Sunday, December 25, 2011

Donut Debacle


BS"D


********What is your favorite type of donut? Tell me and enter for a free giveaway!

See below for details.**********


It's that time of year again, Chanukah, Latkes and Donuts abound. I get a kick out of the December food and women's magazines, wherein there are about 60 pages of x-mas themed recipes and a token page with the same old latke recipe. In recent years I've noticed recipes for sufganiyot, or jelly donuts sneaking in to those pages. While in the United States latkes are the fried food of choice for the holiday, the Israeli favorite sufganiyot have made inroads across the Atlantic.


Last year I had great success with my Gluten-Free Bisquick Donuts for Lillie. However, they contained eggs so they were a no-no for Rosie. So I had two separate pots of oil, two different doughs, and separate jelly-squirters to accommodate Lillie's egg containing gluten-free donuts and Rosie's glutteny vegan donuts. Since I'm not a big fan of deep frying to begin with, and even take the precaution of wearing safety goggles and shooing small children out of the kitchen, having two pots of boiling oil going on the stove at once nearly gave me a nervous breakdown. So this year I wanted a gluten-free and vegan donut all in one. Good luck to me! I bought a great little book entitled, Doughnuts: Simple and Delicious Recipes to Make at Home by Lara Ferroni --it's worth buying just for the luscious pictures. But in addition to the traditional donut recipes, it contains two types of gluten-free and vegan recipes, but not gluten-free and vegan in the same recipe. I considered fooling around with them to make an amalgam. But after a disastrous first attempt at making GF and Vegan yeast donuts (although the kids still ate it...roll anything in confectioners' sugar and they'll eat it), I wanted a sure thing.


Since my favorite all time donut is a chocolate cake donut, I decided to aim for that. Much to my surprise I found that cake donuts are actually fried. Different than yeast raised donuts, they are denser and, as the name suggests, cake like. Through my experiments I found the baking powder batter was preferable than a yeast raised one for gluten-free donuts. I decided to make my life slightly less complicated and just use cake batter in donut shaped baking pans (you can get these at most craft or housewares stores). I used my favorite gluten-free and vegan cake recipe from The Allergen-Free Baker's Handbook by Cybele Pascal. I poured the batter into a big ziploc, snipped about a one inch hole from one corner and easily piped the batter into the non-stick pans. The next day I let the girls frost and decorate them with a variety of sprinkles. They had a ball and my floor looked like the French Quarter after Mardi Gras, but it was a fun day-off-from school activity for them. I used a very simple ganache for the glaze and they looked like donut store donuts! Yes, I had liftoff.


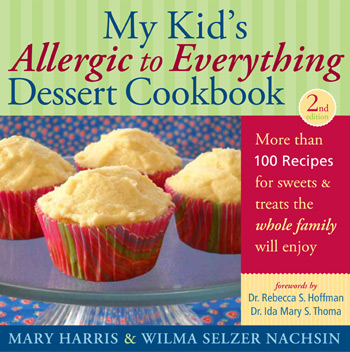
But the gluten-free and vegan fried donut still alluded me. A great cookbook I came across called, My Kid's Allergic to Everything Dessert Cookbook by Mary Harris and Wilma Selzer Nachsin, had an oat flour based doughnut hole recipe. Hmmm. The book contains recipes free from (or has subs. for) wheat, eggs, dairy, soy, corn and nuts. It gives substitutes for some other common allergens, like chocolate. Although it does have some glutenny flours as options, there is a handy-dandy chart at the beginning of the book, which breaks down flours from very sticky to non-sticky, as well as a chart showing which flours work best together for different varieties of baked goods. What I like best about this book is that the recipes were developed by mom's of food allergic children, and they are very easy, doable, and appealing to children. I mean what kid wouldn't want to eat a Booger Cupcake?!


I paired the oat based doughnut hole with a maple glaze from Lara Ferroni's book, and voila I had achieved a great gluten-free and vegan (if agave instead of honey is used) donut that was quick and easy to make to boot! I took the liberty of subbing an all-purpose gluten free flour blend (I used Jule's brand) for half the flour in the recipe and used oat flour for the rest. The combination of the oat flour and maple glaze gave it such a homey, warm flavor---perfect for a cold winter's day.

The publishers, Chicago Review Press, have very generously sent me a copy of this great book to give away to one lucky reader. In the comments section below, tell me your favorite type of donut. Be sure to enter with a google ID, or leave your e-mail or web address so I can be in touch with you if you win. Or, you can tweet me at @glutenfreemaven with your favorite choice. You have until January 15th 2012 to enter. The winner will be chosen at random.


I found that I needed to add a bit more liquid than the recipe called for. This could be due to variations in the type of flour I chose. I added more club soda (ok really I used plain seltzer) slowly until the dough stuck together. You want more of a bread flour consistency than a cake batter. Try dipping in one of the two glazes below. They are really amazing when served warm. Make a lot...they go quickly!


Doughnut Holes
from My Kid's Allergic to Everything Desert Cookbook, 2nd ed., by Mary Harris and Wilma Selzer Nachsin, p. 120


3 cups oil (for frying)
4 cups gluten-free flour (any mostly sticky combinations, such as 3 cups oat and 1 cup millet, or half oat and half all-purpose gluten-free blend)
1 tsp. salt
1 tsp. any one or combination of dried ground nutmeg, cinnamon, allspice, and cloves
1 Tbsp. baking powder
3 Tbsp. club soda
1 Tbsp. honey (or 2/3 Tablespoon agave nectar)
1/3 cup melted allowable shortening or melted margarine or mild tasting oil (I used canola oil)
1 cup soy, rice, or almond milk or water

Note: I have made some changes to the text to simplify the instructions.

In a deep fryer or large pot, heat 3 cups oil to 375F degrees.

In a large bowl, whisk together the flour, salt, and spices. Mix the baking powder with the club soda. Stir into dry ingredients. Add remaining ingredients and mix until the dough is well blended and smooth. Add additional liquid a tablespoon at a time if needed, until batter comes together.

Form the dough into walnut sized balls. Drop balls into hot oil and fry until the doughnut holes are golden brown. Do not crowd them; fry only a few at one time.

Remove the doughnut holes with a slotted spoon and drain on paper towels. May be served warm or cooled.

Yield: Approximately 2 dozen


When doughnuts are cool to the touch, you may wish to dip in either of the two glazes below, or sprinkle with confectioner's sugar or cinnamon-sugar.

Chocolate Glaze
1-10 ounce bag dairy free chocolate chips
1 cup liquid non-dairy whipped topping (i.e. Rich's Whip) or canned coconut milk

Combine both ingredients in a medium sized microwave safe bowl. Microwave on high for 2 minutes. Stir until chocolate is fully melted and mixture is smooth and glossy. Return to microwave for 15 second increments, stirring in between, if chocolate is not melted.

Maple Glaze
from Doughnuts: Simple and Delicious Recipes to Make at Home by Lara Ferroni, p. 48

1 1/2 cups confectioners' sugar, sifted
2 Tbsp. maple syrup
2 Tbsp. milk (any) or water

Place the sugar in a medium bowl and slowly stir in the maple syrup and milk, a little at a time, to make a smooth, pourable glaze.


Saturday, December 10, 2011

A Sweet Cookie to Swap


BS"D

It's that time of year, cookies for cookie swaps, cookies for school parties, cookies for neighborhood and family get togethers. But cookies, cookies everywhere yet for the food sensitive--none to eat! Not so fast. Although I am often disheartened when reading through gluten free cookbooks at seemingly great cookie recipes when I scroll down the list of ingredients and hit "eggs" on the ingredient list. Then flip the page, and another, and more of the same. Even though the recipe fits Lillie's diet, Rosie can't have as much as a crumb. But, I do have a number of recipes in my cookie arsenal that accommodate both girls, and have found shortbread style cookies to be an extremely good choice. Shortbread traditionally is not made with eggs, and many Scottish shortbread recipes even call for rice flour! I use a shortbread recipe for my basic cutout cookies, but it is adaptable for so much more. You can use it as a crust for single-crust pies, and is especially good for a chocolate or custard style pie. It can be used as a crust in a gem style cookie (made in mini-muffin tins), or you can add any flavor extract and roll the dough in coconut, crushed nuts, candy, etc., for almost any flavor profile you desire.

This year I decided to combine a chocolate shortbread crust with my very favorite ganache filling. Using either crushed candy canes or almonds, you have a delightful and eye-catching dessert. People who've tried it without being told it's gluten free even thought it was very good.


So as you flip through endless "holiday" themed magazines this month with great ideas for everyone but you, don't despair, bring this recipe to your next party and enjoy the "oohs" and "aahs" you receive. For another great holiday sweet idea check out my recipe on the Attune Foods (makers of Erewhon cereals) website.

This recipe is vegan provided you use margarine and coconut milk. The coconut milk here is the thick kind that comes in the can, NOT cream of coconut or the kind sold in the dairy case or aseptic boxes. The latter are mixed with water and sweetener and are similar to soy milk.


Crispy Choco-Mint Gems


Cookie:
non-stick cooking spray
2 cups all-purpose gluten-free flour blend with xanthan gum*
1/2 cup unsweetened Dutch-processed cocoa powder
1/4 teaspoon salt
1 cup (2 sticks) non-hydrogenated margarine (such as Earth Balance), or unsalted butter
1 cup granulated sugar
1/2 teaspoon pure vanilla extract
1/2 teaspoon mint extract
2 Tablespoons water

Filling:
1 cup semi-sweet chocolate chips (I prefer Trader Joe's brand)
1/2 cup canned coconut milk or heavy cream
1/2 teaspoon mint extract
1/4 cup finely crushed candy canes or peppermint candies

Garnish (optional):
3 Tablespoons coarsely crushed candy canes or peppermint candies

Pre-heat oven to 350F degrees. Lightly spray a 24 cup mini-muffin pan with non-stick cooking spray, set aside.

In a medium sized mixing bowl, whisk together flour, cocoa powder and salt, set aside.

In a large mixing bowl, or the bowl of an electric mixer, cream together margarine and sugar until fluffy, about 2-3 minutes with mixer on medium speed. Add extracts and beat until combined. Gradually add flour mixture and beat until mixture forms a dough. Add water and beat until smooth.

Form dough into 24 walnut sized balls. Place one dough ball in each muffin cup. Press down on dough with your thumb to form a well; press dough into sides of muffin cup with fingers. Place in freezer for 15 minutes.

Remove muffin pan from freezer and bake in pre-heated oven for 20-25 minutes until cookies feel firm when pressed with a finger, and no longer appear to have moist spots. Remove from oven and place on a wire rack to cool completely, about 30 minutes. If dough has risen during baking, use the bottom of a wooden spoon to press down center of cookies to form a well.

Filling:
In a medium sized microwave safe bowl, combine chocolate chips, coconut milk and mint extract. Microwave on high 1 ½ to 2 minutes. Stir until chocolate is completely melted and the mixture is smooth and silky looking. If chocolate is not fully melted, return to microwave for 15 second intervals, stirring in between. Allow to cool for 10 minutes. Stir in finely crushed candy canes.

Spoon a scant tablespoon of filling into center of each cookie. Sprinkle coarsely crushed candy canes over filling, if desired. Chill until center is firm, about 1 hour. Remove cookies from muffin tin and arrange on a serving platter, or store in an airtight container.

Yield: 2 dozen cookies

* If the flour blend you are using doesn't contain xanthan gum, add ½ teaspoon of xanthan gum


For Almond Cups:

Substitute almond extract for the mint extract called for in both the cookie crust and the filling.


Substitute 1/2 cup sliced, toasted almonds for the crushed peppermint candy called for in the filling and garnish. To toast almonds: Spread almonds out on a cookie sheet and bake in a 350F degree oven for 8-10 minutes, turning several times, until lightly brown. Remove from sheet immediately, as the tend to continue browning if left on hot cookie sheet.

Monday, November 21, 2011

Apple of My Pie

BS"D


In my mind Thanksgiving is THE pie holiday. And I am the family pie baker going back to my teen years. That is why I was thrilled to pieces to see the release of Vegan Pie in the Sky from Da Capo Press just a few weeks ago. Vegan Pie in the Sky is the charming newest addition to the the Isa Chandra Moskowitz and Terry Hope Romero Vegan cookbook empire. They have collaboratively produced such gems as Veganomicon and Vegan Cookies Invade Your Cookie Jar. As always, they are aware of gluten-free needs and provide several options for gluten-free recipes.


The explanation of ingredients and recipe instructions are written like a friend who is guiding you through the pie making process--something many think is daunting. As Moskowitz and Romero break down the steps for such classics as Blackberry Bramble and Maple Pecan Pies, you feel like the process, from crust to filling, is within your grasp. They also include some funky new favorites like Curried Macaroon Pie and Basil Peach Pie. All the recipes are dairy free and egg free. That being the case, you would think something like Blueberry Bliss Cheesecake, would be off limits---not for this pair! Cashews and silken tofu are employed to whip up an ersatz cheesy taste sensation.


The recipes stretch the definition of pie to include cobblers, pandowdy's, tarts and a number of cheesecakes. The crust chapter is extensive, giving recipes for a no-butter, Buttery Double Crust, a flaky Vodka Crust, Olive Oil Double Crust and several gluten free options including a Gluten-Free Almond Crust. The Gingersnap Crust seemed very tempting to me, as I am perhaps the biggest fan of Trader Joe's Gluten Free Gingersnaps. A Buckwheat Double Crust is a refreshing healthy alternative in the pie world. I made the Chocolate Shortbread Tart Shell with Jules All-Purpose Gluten-Free Flour Blend, and found it came out beautifully.


For those of you who have had it with oil based, synthetic tasting non-dairy whipped topping alternatives, Moskowitz and Romero offer several healthier choices employing almond or coconut milk. I look forward to trying more of the recipes, as well as future collaborations between these extremely creative authors.


I use Josef Gluten Free Vanilla Cookies instead of graham crackers for pie crust, you can basically use any sort of plain, firm, gluten free cookie (i.e. not a soft chocolate chip cookie), I use the chocolate flavored cookies when making a chocolate mousse pie and it lends a very decadent flavor!


Graham Cracker Crust
from Vegan Pie in the Sky by Isa Chandra Moskowitz, p. 46


1 3/4 cups finely ground graham crackers (made from 10 ounces of whole graham crackers)(make sure graham crackers are gluten free or sub another cookie as above)
3 tablespoons sugar
4 tablespoons melted non-hydrogenated margarine (like Earth Balance), melted coconut oil or canola oil
1 tablespoon plain soy milk or almond milk

1. Preheat oven to 350 degrees and lightly spray a 9-inch pie plate with nonstick cooking spray.

2. In a mixing bowl, combine the graham crumbs and sugar. Drizzle in the oil or melted margarine. Use a spoon to blend the mixture thoroughly to moisten the crumbs, then drizzle in the soy milk and stir again to form a crumbly dough.

3. Pour the crumbs into the pie plate. Press crumbs into the sides of the plate first, then work your way down to the bottom. Bake for 8 to 10 minutes until firm. Let the crust cool before filling.

Yield: Makes one 9- or 10-inch pie crust.


This is a non-dairy and egg-free "cheesecake"-- enjoy it with your Thanksgiving meal!

Pumpkin Cheesecake Pie
from Vegan Pie in the Sky by Isa Chandra Moskowitz, p. 149


Crust:
1 recipe Graham Cracker Crust (see above)

Filling:
1/2 cup whole unroasted cashews, soaked in water for 2 to 8 hours, or until very soft
1/4 cup mashed banana (about 1 medium banana)
1 (12- to 14-ounce) package silken tofu, drained
1/2 cup sugar
1/3 cup dark brown sugar
3 tablespoons coconut oil, room temperature
6 teaspoons cornstarch
2 tablespoons lemon juice
2 1/2 teaspoons pure vanilla extract
1/4 teaspoon orange extract or 1 teaspoon grated orange zest
1/4 teaspoon sea salt
1 1/4 cups canned pumpkin purée (not pie filling, 100% pure pumpkin puree)
3/4 teaspoon ground cinnamon
1/2 teaspoon ground ginger
1/4 teaspoon ground nutmeg

Topping:
1/3 cup brown sugar
1 tablespoon non-hydrogenated margarine
Pinch of salt
1 cup pecan pieces, roughly chopped

1. Make the topping first. In a mixing bowl, use a fork to mash together brown sugar, margarine and salt until crumbly, then fold in the chopped nuts and stir to coat with the mixture. Set aside until ready to use.

2. Preheat oven to 350 degrees and lightly spray the bottom and sides of a 9-inch springform pan with nonstick cooking spray. Prepare the crust and press it very firmly into the bottom of the pan. Bake for 10 minutes, and move the pan to a cooling rack, leaving the oven on for further baking in a bit.

3. Meanwhile, prepare the filling: Drain the cashews and blend with the banana, tofu, sugar, brown sugar, coconut oil, cornstarch, lemon juice, vanilla and orange extracts, and sea salt. Blend until the mixture is completely smooth and no bits of cashew remain.

4. Set aside 1/3 cup of batter. To the remaining batter, add the pumpkin purée, cinnamon, ginger and nutmeg and blend until smooth, then pour it onto the crust. Randomly spoon dollops of the reserved batter onto the cheesecake. Poke the end of a chopstick into a batter blob and gently swirl to create a marble pattern; repeat with the remaining plain dollops.

5. Bake the cheesecake for 45 to 50 minutes, removing the cheesecake halfway through the baking period to sprinkle on the topping. Return to oven to continue baking. Cheesecake will be done when the top is lightly puffed and the edges of the cake are golden. Remove it from the oven and let cool on a rack for 20 minutes, then transfer to the fridge to complete cooling, at least 3 hours or, even better, overnight. To serve, slice the cake using a thin, sharp knife dipped in cold water.

Yield: One 9 1/2-inch cheesecake.

Thursday, October 6, 2011

Passing on Tradition


BS"D

Lillie saw the big bag of gluten free flour sitting on the counter and asked what I would be making. "Kreplach!" I said enthusiastically. "Gluten Free kreplach", I said more quietly--trying to encourage myself. Knowing the precariousness of gluten free dough, I had my doubts the kreplach, meat filled dumplings, traditioanlly eaten on certian Jewish holidays including Yom Kippur, which is tomorrow night, would hold together. I pictured soggy bits of dough and the meatball like filling floating in boiling water in which they cook. I pictured a huge waste of my time in an otherwise very busy day and night of preparations. I pictured my sadness that my girls can't have a taste of the traditional foods my beloved grandmother lovingly provided us in her lifetime. A tenuous link to a vanished world in Europe. The village, gone, the people, gone, the food, survived.

"Kreplach?" Lillie said. "Kreplach." I said again. I could have said we're having mao po dao fu and she would have had the same look. "You know, like pierogen", I added. "Umm, what's pierogen?", she answered. Me, "like wontons!" Still blank. Then I realized. This is not a dough centric child. While most children at Chinese restaurants can be seen slurping wonton soup with a handful of crunchy complimentary noodles thrown in, Lillie tentatively eats plain rice. These dumplings in any language were not part of her lexicon until now. Finally I showed her a picture on Google Images. She cocked her head to the side, not really understanding the big deal. To me though, they meant so much more. They represented my grandmother's love and tradition and everything good about home cooking.


Every year since I've been married I've said I would make kreplach for Yom Kippur, and every year I've ended up reaching for the box of meat kreplach in the kosher freezer section of my supermarket. The first year, I had been married only a few weeks before the holdiay, the next year, I had a few month old baby (k"a), etc. I was always disappointed with the frozen ones, the dough was too thin and they were remininscent of wontons, the filling too salty, very bad when you won't be able to drink for the next 24 hours. When I was single I had once attempted making my own. The dough was too thick and chewy, the ground meat wasn't the right texture, and overall, they "just weren't Grams". I'm the same way about stuffed cabbage. Nothing is as good as my grandmother's and noone bothered, in her 86 years on this earth, to write down her recipes.

But this year I wanted to give it a go. Why? I don't know. When I started the process I felt a slight fear. "Why?", I kept asking myself. So if it doesn't work, just boil up some gluten free noodles, the kids love those anyway. But I felt like if I succeded, it would be a nail in the coffin of my grandmother. Once I could make kreplach, we didn't need her kreplach. We didn't have them so this was all irrational. Anyway.

I had serendipitiously came across Beard on Pasta on sale for $1 in the lobby of my library a few weeks ago. "That's a classic", the librarian noted as I stood at the circulation desk. Flipping through it I came across a kreplach recipe. How odd, that James Beard would have a kreplach recipe in his pasta book, I thought. But he's thorough. The filling seemed right, a few weeks later I came across Jules Gluten Free Easy Ravioli recipe. No eggs to my delight! Most homemade pasta has eggs making it off limits for Rosie. Hmmm. I think I can make a mashup of the two and we're in business.


I tentatievely rolled and filled the dough. Sensed encouragement from a voice from within. Pictured my Gram looking down from heaven and telling me, go ahead, it's ok, you can do it. Pinched the dough shut. Held my breath and dropped them in the water. They rose to the top as the recipe said. They looked like any other dumpling I've ever had. One bite told me they actually tasted like any other dumpling I've ever had. We have liftoff! I think those dozen pale lumps of dough staring back at me from the counter are my proudest achievement all year.


The dough for this recipe is NOT elastic like wheat pasta dough. It is not forgiving either. If you pull it, it doesn't stretch. It is very easy to make, but you have to handle it with care. If you pull on it, it will tear, the plus side, it is softer than regular pasta dough, so you can just rub the crease together much like pie dough.


Jules' Easy Homemade Pasta from julesglutenfree.com

The recipe is verbatim from Jules' blog, until the part about forming the dough into kreplach, that is mine.

Pasta Ingredients
1 1/2 cups Jules Gluten Free™ All-Purpose Flour
1 – 2 Tbs. extra virgin olive oil
1/2 cup very hot water
salt for water

Pour Jules Gluten Free All Purpose Flour into a large bowl and form a shallow well in the flour. Add the oil and water a little at a time of warm water into the flour well and mix until it all comes together into a smooth ball (I mixed up everything in my electric mixer and it was super easy). Wrap in clear plastic wrap and allow to rest for 30 minutes to 1 hour.


Lay a large sheet of plastic wrap on a flat surface, dust lightly with gluten free flour. Place dough in center of plastic wrap and cover with a second sheet the same size as the first. Using a rolling pin, roll dough out between sheets of plastic wrap to a 1/4-1/8th-inch thickness.

Remove top layer of plastic wrap. Using a sharp paring knife or pizza cutter, trim edges off dough to form a rectangle (reserve for later use). Cut dough into 3-inch squares. Gently pick up each square and put a scant tablespoon of filling (see below) into center. Fold over corners to form a triangle. Pinch or crimp edges closed with a fork. Repeat until all dough is used up. Roll out trimmed off dough and fill as above. Note: You can use a biscuit cutter or glass to make round kreplach, but you have less waste if you cut them in squares.


Bring a large pot of water to boil with salt. Drop into boiling water. Cook for 4-5 minutes, until they bob up to the surface, remove with a slotted spoon and drain. Allow to air dry for a few minutes before storing.

At this point the kreplach may be stored in an airtight container in the refrigerator, and served in chicken soup (put in soup at last minute before serving so you don't end up with mushy pasta). Or, frozen between layers of waxed paper. To re-heat, place frozen kreplach in boiling water or soup for several minutes until warmed through. Or, fry thawed kreplach in oil or margarine in a skillet until crispy and golden brown. Serve with fried onions.

Kreplach Filling:


From Beard on Pasta by James Beard, p. 175

1/2 pound ground chuck
1 Tablespoon chopped fresh sage, or 1/2 teaspoon dried sage
1 small bunch chives, minced
3 Tablespoons chopped parsley
1/2 teaspoon salt
1/4 teaspoon Tabasco

Combine all ingredients in a medium sized mixing bowl. Chill until ready to use.

My Filling:
Although I usually alwasy buy extra-lean ground beef, use the full fat variety for this filling...trust me!

1/2 pound ground beef
1 small onion finely minced
1 Tablespoon dried parsley
salt and ground pepper to taste

Mix all ingredients together. Cover and refrigerate until ready to fill kreplach.


Note: You can also use mashed potatoes to fill dough if you want to make pierogen. There is meat filled pierogen too, but in our house meat filled dumplings were called kreplach and the potatoes ones pierogen.

Saturday, September 24, 2011

Short and Sweet


BS"D

Since I am very busy preparing for the upcoming holiday of Rosh Hashana, the Jewish New Year, this blog post will be short...but sweet. I found some great new recipes I felt I had to share!

For those uninitiated, people are supposed to eat sweet foods, such as apples and honey, sweet raisin challa and sweet kugels on Rosh Hashana to symbolize a "sweet" new year. When Lillie saw all the round (a traditional shape for new year's challa) raisin challa's I had made for the rest of the family on the cooling rack, she declared she wanted raisin challa too. Her favorite brand of oat challa is Katz's, and they do carry a 10-ounce raisin challa. I felt that was a bit too big for Lillie, so I ventured to make my own. Since Lillie has what may be called a "discriminating palate", she had rejected my numerous oat challa attempts in the past in favor of store bought. But I decided to give it one more try. Instead of using 100% oat flour I mixed it with my favorite gluten free all purpose brand, in a 50/50 ratio. Oat flour is the only gluten free flour upon which one can make "Hamotzi", the blessing on bread said before Shabbat and Yom Tov (holiday) meals (and any other time bread is eaten). So I couldn't use solely the all purpose gf flour. I adapted a recipe from Jules Gluten Free blog with surprisingly good results.


If you are frantically preparing for the holiday like me, and have a page long list of things to cook, you may want to buy desserts. No fear if like most people, you don't have a gluten free bakery near you, try some of Katz's new items. They kindly sent me some samples of their delicious new offerings. Included were a traditional Apple Pie. Lillie liked the crust best, I liked the filling, which had a homemade feel and was not too sweet and gooey---the way I like it! The new Coffee Bundt cake had a very good look and texture, and is worth the $10 price, in my opinion. It came with a separate container of icing, which I felt had a very strong coffee flavor. So if you like that then use, if not, serve plain or dust with powdered sugar. The Sugared Snack Poppers evoked a Proustian memory in me when I "popped" them in my mouth---Kichel! Now on their website Katz's writes "Kichel" in parenthesis. These are light little cookies with a sugary dusting. The website is currently offering a special of free shipping on orders over $30.

Katz is generously giving away a box of 5 of their gluten free baked goods. Leave a comment on this post telling me your favorite holiday baked good, and your e-mail address (so I can get in touch with you if you win), and you will be entered in the giveaway. The deadline for entering the giveaway is 11:59 p.m. on Monday, October 3rd, 2011. The winner will be picked at random from entries that contain an e-mail address.


Another Rosh Hashana tradition is to eat simanim, or symbolic foods, which corresponds to different good tidings for the new year. One of them is dates. I generally buy a big container, and they are popular for a few days, then sit hardening in my cabinet until Tu b'shvat. I happened to come upon a great recipe to use up extra dates.

So I wish you a Shana Tova...a sweet, happy and healthy new year!


Sweet Raisin Challa

Adapted from Jules Gluten Free blog

non-stick cooking spray
1/3 cup warm water
1 packet (2 1/4 tsp.) rapid rise gluten free yeast
1 tsp. granulated cane sugar
1/2 cup unsweetened applesauce
1 tsp. apple cider vinegar
4 large eggs, beaten
1/3 cup canola oil
1/4 cup honey, agave nectar or molasses
2 cups all-purpose Gluten Free Flour* (I used Jules brand)
2 cups gluten free oat flour
4 teaspoons xanthan gum
3 Tbs. + 2 tsp. granulated cane sugar
1 1/4 tsp. kosher salt
1/2 tsp. baking soda
2 tsp. gluten-free baking powder
1/2 cup golden raisins
1 large egg beaten with 1 teaspoon water, optional

*If your all-purpose gluten free flour blend contains xanthan gum (like Jules) or guar gum, reduce xanthan gum in recipe to 2 teaspoons.

Preheat your oven to 200º F, then turn it off; if you have a warming drawer, you may set that to low/moist setting instead. Spray baking pan (see below) with non-stick cooking spray.

In a small bowl, mix together the warm water, yeast and 1 teaspoon of sugar to proof the yeast; set aside. In the bowl of your stand mixer, add the remaining wet ingredients and mix until combined. Whisk together the dry ingredients in a separate bowl. After 5 minutes of proofing, stir in the yeast-water mixture into the wet ingredients (note: if your yeast isn’t bubbling at this point, throw it out and start again with fresh yeast). Gradually stir in the dry ingredients until fully integrated, then mix 2 minutes more on medium speed.

Spoon batter into prepared pans.

To achieve the round challa shape for Rosh Hashana here are some options:
*"Texas Size" giant muffin pans (about 6-8)
*Cupcake pan (about 12)
*Mini-Bundt Pan (about 6)
*Place a ramekin or custard cup in center of a round cake pan, spray all well with non-stick cooking spray, pour batter around ramekin (2 medium)
*Pour batter into 2 8-inch round cake pans
*Bundt pan (2 small, 1 large)
*Gently form dough into a rope with (gluten free) floured hands and roll into a coil on a parchment lined baking sheet (2 small, 1 large)

Place in a warming drawer set to low heat, or into the warmed oven for approximately 20 – 30 minutes. (Don’t expect the bread to rise much at this stage). Once risen slightly, brush with egg wash, if desired.

Bake in an oven preheated to 350º F (static) or 325º F (convection) for 20 minutes. Remove to cool on a wire rack.

May be wrapped in foil or frozen in a zip-top plastic bag. Warm before serving.


Chewy Date Bars
from The Top 100 Recipes for a Healthy Lunchbox by Nicola Graimes, p 127


Non-stick cooking spray
1 1/2 cups chopped, pitted, dried dates
1 cup water
1 cup all purpose gluten free flour blend with xanthan gum
1 tsp. baking powder
1/2 cup light brown sugar
1/2 cup rolled oats
4 Tablespoons sunflower seeds
4 1/2 ounces unsalted butter or non-hydrogenated margarine

Spray an 11x7 inch baking pan with non stick cooking spray.

Put the dates and 1 cup water in a small saucepan, bring to a boil. Reduce heat to simmer, partially covered, 20 minutes until dates are soft and water has been absorbed. Puree the dates in a blender and let cool.

Pre-heat the oven to 350F degrees.

Meanwhile, mix together the flour, baking powder, sugar, oats, and seeds in a mixing bowl. Rub in the butter or margarine until the mixture is soft and crumbly. Spoon 3/4 into the prepared pan and press down to make an even layer.

Spoon the date mixture over the oats in an even layer, sprinkling with the remaining oat mixture, and press down lightly. Bake 25 minutes until golden, then leave in the pan to cool. Cut into 16 squares and remove from the pan. Store in an airtight container up to 1 week.

Yield: 16 bars

Monday, September 12, 2011

Real Cool!

BS"D

I always say when asked that classic question about what food you would bring to a desert island, my answer is pizza and ice cream. Not terribly practical if you are stranded on a desert island, but still the two foods I would choose to eat exclusively if I could.

But, as we all know too much of a good thing is actually a bad thing.However, a company named Arctic Zero has created a product that makes it possible to have almost as much ice cream as you like. They make pints which have 150 calories, not per serving, but per pint. And realistically we all know everyone digs into the whole pint when no one is looking. They have a number of unique flavors like pumpkin spice and vanilla maple (just imagine that on warm apple pie), in addition to old favorites like chocolate and strawberry. They also make pops which are just the right size for the kiddies (and mommies too). And the best part is it is made with all natural ingredients. Arctic Zero doesn't have the artificial sweetener aftertaste of many low-cal frozen desserts. Instead they use something called monk fruit concentrate to boost the sweetness from organic cane sugar in the ingredients. Arctic Zero also include whey protein, so it has a nice boost of protein most frozen desserts do not. Although not dairy free, Arctic Zero is lactose free, so no upset tummies for those that are sensitive.

I am kind of on pumpkin overload this time of year, and love all things pumpkin. Try making a shake with Arctic Zero pumpkinspice flavor (or any flavor you like) and coconut milk or whatever your milk of choice.

Pumpkin Milkshake

1/2 pint Arctic Zero Pumpkin Spice flavor
12-ounces chilled milk (dairy, coconut, soy, almond)
2 Tablespoons chocolate syrup
6 ice cubes

Blend everything on high speed in the blender until smooth. Serve immediately.

Yield: 1 large shake

Note: For even more protein you can add a scoop of your favorite protein powder to the shake.

Sunday, September 11, 2011

Alert and Aware


BS"D

Celiac Awareness Day is September 13th this year. It coincides with the beginning of the school year. I found the timing interesting, as I have a pressing need at the beginning of the school year to make Lillie's and Rosie's new teachers "aware" of their food sensitivities and needs.

In general, my approach is three pronged to make my daughters' school experience more comfortable. First, I speak to their teachers before school starts. Just getting their numbers can be challenging, and I always try to respect boundaries. However, I feel catching them for five minutes when I drop off the first day is not enough. If I see that leaving a message for them at school doesn't work, I call at home and preface by saying, "I'd like to arrange a time to speakthat is convenient for you." Some teachers are nervous after I tell them about Rosie's Epipen and her hospitalizations, but it is a necessary conversation. Some people have heard of celiac disease and some have not. Either way, we need to discuss an approach that's comfortable for all parties regarding celebrations at school and various situations when the school provides food for events. Ask the teachers the best way to reach the them during the year (e-mail, phone, etc.). Request that they be in touch before parties, and explain how nice it would be if they can offer foods the entire class could eat, e.g. an ice cream party instead of a pizza party.

I also mention the physical effects if Lillie is "glutenned" and make them aware that she is fatigued at times, and may need to use the bathroom frequently. Although it may be a bit uncomfortable to talk about your child's bathroom needs with a stranger, it's necessary especially since many schools have rules about not going except between classes. And, we know when a celiac kid needs to go...they gotta go!

Secondly, I put together a packet with my Memo about my children's needs, as well as a list of problematic ingredients (available on http://www.celiac.com/), and a "safe" candy and snack list from the Dallas chapter of Raising Our Celiac Kids (R.O.C.K.). More often than not, I find that the teacher calls me regarding ingredients, instead of checking the list. But at least, I feel I made an effort, and at least she is aware that she needs to be careful with ingredients. Lillie happens to be hyper cautious and will bring home treats she recieves at school for me to o.k. before she will consume them. I admire her restraint greatly given her age. About 1/4 of Rosie's class this year is allergic to nuts, so the teacher is hyper-sensitive about ingredients. That statistic floored me, but I was relieved that the teacher had to understand and deal with this issue, as so many children are affected.

Lastly, I send a big bag of acceptable snacks for my kids, as well as a jar of soy butter (peanut's are banned from the school) and rice cakes in case they forget lunch, to keep on top of their cubbies (or wherever else the teacher deems acceptable). Lillie's teacher gave alot of "treats" last year, so she dipped into the bag quite often. This year her teacher told me she doesn't give food as rewards...I was thrilled, as you might imagine! I also received permission to keep a supply of cupcakes in the freezer of one of the teacher's rooms, as birthday parties aren't always announced in advance. I can recommend Katz's decorated cupcakes , as they come in a plastic container and keep well. For Rosie, I provide Epipen's and other allergy medications for both her classroom and the school nurse (check with your school regarding rules pertaining to medication dispention). I found that a fanny pack (dig it up from your '80's clothing box) works well, as it can be attached to an adult and taken on class trips and in some accute cases I have heard, even just out to the playground on a daily basis. Included in the pack are clear instructions regarding allergies, dosages and parent's phone numbers for quick reference. One year the nurse requested a picture of the child on the corresponding medicine as a failsafe of sorts, and for quicker retrieval. I thought this was a good idea.

If you put all the steps in place to make the teachers and staff who interact with your children at school "aware" of their dietary and health needs, you are on the right track for a great year. Remember this is something that has to be dealt with, even if in general you are non-confrontational and a "go with the flow" type. So be assertive and direct in advocating for your child-- be a "grizzly mama"!

I thought about what I want people, in general, to be aware of in terms of celiac disease and food allergies, and I asked Lillie the same question. Her answer was that she wanted the entire world to eat gluten free, so that she could eat whatever she wants!

I would like people to be aware that:

*Celiac disease is not a food allergy; it will not be outgrown someday.
*You cannot take something "like Lactaid" and eat wheat products (not yet anyway).
* Although my daughter may have an appealing treat at a school party, she'd rather have what everyone else is having.
*My daughter stares at bakeries and pizzerias like they were selling diamonds she could never afford.
*My daughter can not have, "just a little, just this once" of any product with gluten, ever, period! *Even though there are many wonderful products in the supermarkets today labelled, "gluten free", my daughter doesn't necessarily like the way they taste.
* Gluten is in more than just wheat.
* Cross contamination is important. While I appreciate it if someone buys Lillie gluten free cookies, they cannot be put on the same try as the "regular" ones.
* It is not easy having celiac disease when you are a child. It is not easy having anything that makes you "different" when you are a child.
*I am grateful that Lillie has a disease that can be controlled by diet.
*I am grateful that there are many wonderful scientists working on solutions for managing celiac that may be tangible by the time Lillie is an adult.
*I am grateful that big companies now make affordable gluten free products which I can buy in my regular supermarket.
*I am grateful for all the wonderful people in our lives who "get it" and help make things a bit easier for my kids.


I tend to dread packing school lunches. Every morning there is that moment of scrutiny when the kids peer into their lunch boxes. The contents are discussed during carpool and compared. I really try to send in a nutritious balance for my kids, even though they would like to eat nothing more than pasta and pudding for each meal and snack. Below is a recipe for gluten free, allergy free blondies that I think are a nice treat once in awhile. Wrap in foil and write a note to your child on them with a permanent marker as an added surprise at snack time.


Blondies
from Sophie-Safe Cooking by Emily Hendrix. p. 94


1 cup brown sugar (I like it with a bit less sugar)
1/4 cup vegetable oil
1/3 rice milk
1 1/2 Gluten Free oat flour
1 tsp. baking powder
1/4 tsp. salt
1 teaspoon vanilla extract*
1 cup chocolate chips*
1/2 cup chopped nuts* (optional)

*My additions


Mix all ingredients together in a medium sized bowl until the batter is smooth. Pour and spread into a greased 9x9" pan.

Bake for 25 minutes at 350. Cut into squares when cool. May be frozen in a zip-top plastic bagged, if desired.

Tuesday, August 23, 2011

Pop on In


BS"D

Keeping cool in the summer is not just about air-conditioning and swimming pools. It is as much about sitting back in the lawn chair with a cherry popsicle dripping down your hand faster than you can eat it, and frosty drinks in tall glasses sipped slowly through straws. For my kids it's about running through the sprinkler with the promise of a freeze-pop afterward. For me it's about getting a tall iced coffee after I drop my kids off at camp.


Besides being a classic summer treat, popsicles are the new "in" dessert, according to some. As the popsicle usurps cupcakes and macarons, an all-popsicle restaurant opened up in Manhattan called Popbar. And (dramatic pause), it is even gluten-free and kosher, according to their website!


There is even a machine called the Zoku Quick Pop Maker, which can freeze popsicles in about 10 minutes. My preferred method is using the plastic molds from the dollar store. I'm ok with planning ahead for my popsicles, and waiting the few hours for them to freeze. As for what flavors to make, today popsicles have been "upgraded" and recipes often include fresh herbs and exotic juice combinations. A book called Paletas by Fany Gerson, gives recipes for pops ranging from the exotic, like mango-chile to the more traditional berry-yogurt. She also includes recipes for aquas frescas, or refreshing drinks in Spanish. Speaking of which, I recently discovered a cold Mexican milk-based beverage called the Horchata. This ain't yo' mama's milkshake. The Horchata is rice-thickened milk seasoned with spices and sugar. I took from my garden's bounty and paired the Horchata with basil for a surprisingly interesting flavor treat.

Whether you like your summer refreshement in solid or liquid form, enjoy the following recipes in the waning days of the season!


Instead of the tradiitonal way of making the horchata with ground rice, I used rice flour, something gluten-free bakers always have on hand!


Basil-Lemon Horchata


1 cup whole milk

2 cups water

1/4 cup loosely packed fresh basil (if you have lemon-basil even better)

zest of 1/2 lemon

1/4 cup granulated sugar

2 Tablespoons sweet rice flour

lemon peel curl for garnish, if desired


Heat the milk in a small saucepan over medium simmer for 10 minutes. Add the water, basil and lemon zest. Continue cooking for an additional 10 minutes.


In a medium sized lidded-contianer, whisk together the sugar and rice flour. Place a small strainer over the container, slowly pour the hot milk mixture through the strainer. Stir to combine. Allow to cool for 10-20 minutes, cover and refrigerate until chilled, 2 hours to overnight.


To serve: Fill a glass with ice. Pour horchata over ice. Garnish with lemon curl, if desired. Serve immediately.


Yield: 2-3 servings


If you don't have pop molds, you can place aluminum foil tightly over a plastic cup filled 3/4 full with popsicle mixture, and pierce center with wooden popsicle sticks, also known as craft sticks. Freeze as directed.


Strawberry-Watermelon Popsicles

from Sweet & Skinny by Marisa Churchill, p. 124


2 cups strawberries, hulled

2 cups cubed watermelon

1/3 cup plus 1 Tablespoon agave nectar


Blend the strawberries, watermelon, and agave nectar in a blender or food processor until the mixture is completely smooth.


Pour the mixture into eight popsicle molds, snap on the tops, and freeze until the popsicles are frozen sold, about 6 hours.


Unmold and serve. If the popsicle will not release from mold, briefly submerge mold in warm water.


Yield: 8 popsicles


Lassis (not Timmy's pet) are cooling yogurt drinks that are popular in India.


Mango Lassi


1-8-ounce container plain or vanilla flavored yogurt

1 ripe mango, cubed

honey to taste

milk or water to thin

ice cubes, as desired


Place all ingredients in blender and process until smooth. Serve chilled.


Yield: 2 servings


Tuesday, August 16, 2011

Artisanally Appealing


BS"D

I had seen the picture of the luscious veggie packed lasagna on the cover of Artisanal Gluten-Free Cooking by Kelli Bronski and Peter Bronski staring back at me on Amazon.com for some time. Whenever I searched gluten free cookbooks, there it was. But I had passed on it for awhile as I am a busy mommy and I assumed artisanal food would be time consuming, and require me to use organic heirloom tomatoes harvested from my own garden, or at the very least from the farmer's market.


But, when their publisher, The Experiment Publishing, very generously sent me their second book to review and GIVEAWAY (see below), Artisanal Gluten-Free Cupcakes, I decided I should take a look at the first book as well. I was extremely pleasantly surprised to see that Kelli and Peter Bronski have got a grip. They understand the busy mommy thing, and although they value greatly the freshest organic ingredients, they know everyone does not have the wherewithal to stock their kitchen with sustainable, free trade ingredients from Whole Foods. Nor, can everyone make their own pasta at 5:30 for dinner at 6:00 with a two year old wrapped around ones leg. There were no requests for kefir lime leaves or date palm sugar. Just things I happened to have in my pantry (o.k. I happen to have coconut milk and a 4 types of paprika in my pantry, but still). And, best of all, I don't feel compelled to make my own chicken broth from free range chickens and vegetables grown within 10 miles from my house, the type that comes in the box is o.k. too.

Although the Bronskis don't seem to actually define the word "artisanal" (pertaining to or noting high-quality, distinctive products made in small quantities according to dictionary.com), their attitude seems to be take care in sourcing and preparing your food to the best of your ability and means. They even go as far to offer tips for shortcuts and pre-made ingredients (such as a bag of coleslaw instead of cabbage and carrots in one recipe I tried). This I appreciate greatly, as I feel they are offering the best of the two worlds I live in and try to bridge-- gourmet food and busy mommydom. I also greatly appreciated their professionalism, which comes through in the book. Peter Bronski is a travel writer with several books to his credit, and Kelli Bronski has a degree from the prestigious hotel and restaurant school at Cornell University. So, not only do the recipes work well, they are well written. I did notice one imperfection though, the Creme Brulee recipe was missing an oven temperature for baking! Yikes! But after making Creme Brulee for the first time ever with the Bronskis very simple instructions (and Joy of Cooking oven temp.--325F), I actually got why this seemingly simple custard it is such a big deal in the dessert world.


Artisanal Gluten-Free Cooking encompasses contemporary flavors such as Thai and Caribbean food, as well as homey old favorites like German Potato Salad and Apple Pie with Streusel Topping. I think this is a very good all around cookbook, which offers sophisticated recipes for entertaining such as Dessert Crepes with a Trio of Sauces, as well as Chicken Noodle Soup, for a cozy family supper. As I mentioned above, the recipes are very clear and well written with introductions that draw you into the Bronski kitchen as if you were family.


I tried two dishes which were instant favorites with my family, Caribbean Rice and Costa Rican Slaw. Both had fresh, bright flavors and were easy to throw together in a short amount of time. Lillie's comment on the rice says it all, "Mmmmm. Good. Very Good."


Look for a review of Artisanal Gluten-Free Cupcakes in an upcoming blog. In the meantime try for an exciting, free giveaway. Just leave a comment about this post with your e-mail address in the comments section below, and you will be entered to win a copy of the Bronskis' newly released and fabulous book, Artisanal Gluten-Free Cupcakes (provided by the publisher who did not influence this review in any way). The winner will be randomly chosen from all eligible blog entries. The contest will remain open until 11:59 p.m. on September 15th, 2011.


Although this recipe calls for adding the mango to the dish while it is cooking, we liked it better served on top of the cooked rice as a garnish.


Caribbean Rice

Artisanal Gluten-Free Cooking, p. 87


1 Tablespoon olive oil

1/2 medium onion, diced

1 garlic clove, minced

1 cup long-grain rice

1 cup Gluten Free chicken broth or vegetable broth

1 cup coconut milk

1 teaspoon dried thyme

1/2 teaspoon ground turmeric

1/2 teaspoon salt

1/4 teaspoon pepper

1/2 cup canned kidney beans, rinsed and drained

1 ripe mango, peeled, pitted, and cut into 1/2-inch cubes


1. Heat the olive oil in a large saucepan over high heat. Add the onion and garlic and saute until translucent.


2. Add the rice, broth, and coconut milk. Stir in the thyme, turmeric, salt, and pepper. Bring to a boil and reduce the heat to low. Cover and simmer for 15 minutes, or until the rice is tender and the liquid is absorbed.


3. Add the beans and mango and cook for an additional 5 minutes, or until heated through.


Yield: 4 servings


I took the quick shortcut the Bronskis suggest for this recipe, using bagged cole slaw mix instead of the cabbages and carrots called for in the ingredient list. I also took it upon myself to sub canned sliced beets, which I julienned, instead of the raw beet. The texture wasn't as crisp as a raw beet, but it was quick!


Costa Rican Slaw

Artisanal Gluten-Free Cooking, p. 100


1/2 head green cabbage, thinly sliced and chopped

1/2 head red cabbage, thinly sliced and chopped

1 medium carrot, peeled and grated

1 raw beet, peeled and grated

3 Tablespoons chopped fresh cilantro

1/4 cup olive oil

2 Tablespoons apple cider vinegar

1 to 2 teaspoons honey

Salt and pepper


1. Combine the green and red cabbage, the carrot, beet, and cilantro in a large bowl.


2. Whisk together the olive oil, vinegar, honey, and salt and pepper in a small bowl. Drizzle the dressing over the salad, toss and serve.


Yield: 10 servings


Monday, July 25, 2011

Biscuits are a snap!


BS"D


I walked into the kitchen this afternoon after putting Posie down for a nap and I noticed Lillie mixing up chocolate milk for Daisie and herself. How nice I thought of her to help her sister. Then I glanced at the quart of milk and the size registered first, wait that's not the gallon we usually use, then my synapses started firing as I grabbed the carton before Lillie poured a glass for herself. "That's buttermilk!" I said. "Oh, I guess that's why Daisie didn't like it." Lillie said. I just laughed to myself at this kitchen mix-up. We've all had them. Anyway, the buttermilk was left over from some amazing biscuits I made last week which I adapted from my new favorite cooking website, Taste and Tell. The blogger tries recipes, almost daily, from different blogs and cookbooks and reports on them. The pictures are as mouth watering as the recipes.


I actually started on a biscuit kick recently when I saw Southern Biscuits by Nathalie Dupree and Cynthia Graubart at my local library. For those of you who don't know her, Nathalie Dupree was doing the Paula Deene thing before Food Network eclipsed PBS's bright stars in the cooking show galaxy. Dupree specializes in low-country Southern Cooking, such as that from Savannah, where Paula Deene lives. So I snapped the book off the shelf and a few shakes of flour later I felt like an expert biscuit maker.


Much to my chagrin, in over 200 pages of biscuit recipes and instructions, the authors did not include one gluten free recipe. However, biscuits inherently lend themselves to gluten free baking for the following reasons:


1) Biscuits are best made with low gluten flour, such as the Southern all-purpose brands which have less gluten than national brands. That is because you don't want to create elasticity as you would with a yeast bread.


2) Gluten free bread recipes yield a "quick bread" type batter, even the yeasted ones, as opposed to an elastic dough for yeast breads. Biscuit doughs are similar in texture to gluten free bread.


3) Biscuits should not be overworked as you want to hinder the gluten production for a flaky crumb (see #1 above). You can never overwork gluten free flour. It will never get tough.

I wanted to see if I could replicate Southern-style biscuits using gluten free flour. In the past some of the gluten free bread recipes I've made have come out like biscuits, so I felt optimistic. One has the option of making a rolled biscuit, which is cut with a biscuit cutter (actually patted into place not really rolled with a rolling pin), or drop biscuit. Being a long term Bisquick fan, I prefer the drop method. Employing a very American attitude, I feel if you can prepare a biscuit in 10 minutes, why wait 20.

Despite not actually having any gluten free recipes in Southern Biscuits, Dupree and Graubart's book did come in handy as far as learning the biscuit making technique-- which I was then able to apply to gluten free biscuits. The book has very helpful pictures that instruct you how to "snap" the fat into the flour. Basically you add pieces of softened butter, shortening or margarine to the flour, dig your hands in and glide your pointer and middle fingers across your thumbs--a snapping motion. By working the fat into the flour this way, you create little pockets of fat which will melt upon baking, creating flaky layers. Then the liquid is added to the center of the flour mixture and you sweep the flour into the liquid with your hands or a spoon. The result is a light, delicious and authentic tasting Southern biscuit. Bon Appetit y'all!


Butter really does make everything better!


Although the distinctive tang of buttermilk gives this recipe an authentic flavor, you can easily make this recipe non-dairy by substituting acidulated soy or rice milk (see below) and margarine instead of butter.


Southern Style Buttermilk Biscuits
Adapted from Daddy’s Rise and Shine Biscuits from Southern Plate via Taste and Tell blog


2 1/4 cups all-purpose gluten free flour blend with xanthan gum (I used Jules brand)
1 Tablespoon baking powder
1 1/4 teaspoons salt
1/2 cup butter or non-hydrogenated margarine (such as Earth Balance Buttery Sticks), softened, cut into cubes
1 1/4 cups buttermilk or acidulated milk*
1 beaten egg white, optional


*To make acidulated milk: For every 1 cup of milk (cow's, soy or rice), stir in 1 tablespoon of white vinegar and allow to sit for 10 minutes.

Pre-heat the oven to 450F. Spray a cookie sheet with non-stick cooking spray.


Sift together the flour, baking powder and salt into a large mixing bowl. Add in the butter or margarine, and using a pastry cutter, or your hands with the "snap" method as described above, cut the fat into the flour mixture. Cover and place in the refrigerator for 10 minutes.


Remove bowl from the refrigerator. Make a well in the center of the flour mixture and add in the buttermilk slowly and stir just until combined.

Spoon the dough by about 1/4 cup scoops onto prepared cookie sheet, 2-inches apart. Brush with egg white, if desired. Bake in 450F degree oven for 15 to 20 minutes, until lightly browned.


Remove from the oven and turn upside down onto a plate to cool (I got this tip from Nathalie's book).


Yield: 8-10 large biscuits


Serving suggestion: Serve warm with butter and blackberry jam. Leftover biscuits can be kept in a plastic bag at room temperature for a day or two and re-heated before serving. Cold biscuits leave a lot to be desired!

Tuesday, July 12, 2011

You say potato I say polenta


BS"D


It was a hot and well, hot day. I wanted something easy for dinner and decided on hamburgers and sauteed onions. I never feel just a hamburger on the menu is enough, and filled out the menu with corn, pickles and tomatoes. But I still felt I needed a starchy side dish. I rifled through my freezer looking for the bag of fries I always keep there. O.k. I guess it's not always. I quickly remembered the tube of polenta I had picked up at Trader Joe's a few weeks ago. I'd been meaning to experiment with polenta fries and so it went.


I have a deep seated fear and general dislike of deep frying, as I feel it makes the whole house smell like a fast food joint, I only do it 2 or 3 times a year. So, I decided to oven fry the polenta "fries". I'm a big oven fryer. It involves putting the food in question, on a very non-stick surface, spritzing with PAM or brushing with oil and baking at a very high temperature, usually 400F degrees or higher. Since polenta is on the bland side, I also coated it with seasoning.

Well it worked great and Lillie even gave a "It's Yummy!" Something that's hard to come by with my pint sized critics. I was pleased with how it turned out and there were even calls for seconds. When you have the summer kitchen "blahs" and don't feel like doing much in the way of cooking, try this option. The polenta fries definitely mixed things up, got me out of the kitchen quickly and are quite a bit healthier than regular fries to boot!


Spices can be adjusted to your taste. Any spice blend can be used. About 1/2 teaspoon per tube of polenta works fine, although with herbs, you should use about 1 1/2 teaspoons. Try Italian, Cajun and Provence herb and spice mixtures.


Spicy Polenta Fries


1-18 ounce tube shelf stable or refrigerated polenta
2 Tablespoons olive oil
1/2 teaspoon Old Bay Seasoning

Pre-heat oven to 425F degrees.

Cut polenta in tube in half or thirds then, then into 3"x1/2" sticks, resembling french fries.

Place cut up polenta in a medium sized mixing bowl, and toss with olive oil and seasoning.

Spread in a single layer on a non-stick cookie sheet (or use Reynold's Non-Stick Aluminum Foil on any baking sheet). Bake for 15 minutes per side, for a total of 30 minutes, until golden brown and crispy. Serve hot.

Yield: 4 servings


Variations:


For spicy fries: add 1/4 teaspoon (or more to taste) cayenne pepper


For Rosemary and Garlic fries: Ass 2 teaspoons dried rosemary, crushed, and 1 clove crushed garlic or 1/2 teaspoon garlic powder