Wednesday, December 20, 2017

We have a winner!


BS"D

 I recall "days long ago" (yes that was a Dreidel, Dreidel, Dreidel reference in case you missed it) when my father stood in the kitchen and grated pounds of potatoes on a box grater.  As the gathered in a large bowl and turned pink, then brown, my mother frantically fried them to a golden crispness and the kids frantically ate them.
I have tried many vegan and gluten free latke recipes over the years, with varying degrees of success. I tried one that called for pureeing half the potatoes and shredding the other half. Using a slurry of potato starch and soy milk in lieu of eggs, and even trying to get a store bought mix to work in a pinch. But Isa Chandra Moskowitz came through with her great Rosti Latke recipe in her recent book, The Superfun Times Vegan Holiday Cookbook,  that covers vegan food for just about every imaginable holiday. From Cinco de Mayo to Chinese New Year...you're covered! Plus lots of bonus content like, "Hosting for the Hopeless". Her irreverent voice (hey she is punk!), permeates the book.  Her easy to follow recipes sound like a friend is walking you through the steps. Best of all, Moskowitz chooses ingredients that are easy to find in any supermarket--not something I can say about all vegan cookbooks.


Like Moskowitz's other cookbooks, her latest one is consistently reliable. I also like that you do not have to jump through hoops to get a good vegan and gluten free dish.  The entire cookbook is not gluten free, but I've found substituting GF all purpose flour for the wheat flour called for in many of the recipes works fine.  I made her Rosti Latkes recipe twice this Chanukah and both times it was quick and easy with just 5 ingredients (plus oil for frying). Besides two types of potato latkes, you might want to try her Samosa Spiced Latkes or Gefilte Chickpeas to round out your Chanukah meal.


Another great recipe, which used up those half price candy canes you can get on December 26th, is her Candy Cane Fudge cookie (I subbed Freedom Delivered All Purpose Gluten Free Flour). The cookies are easy to make and visually appealing.  Overall I highly recommend the book as a great holiday gift for your favorite foodie!


Here are my annual frying tips to ensure you have golden and delicious latkes:
1) Make sure your pan is big enough--a 12 inch pan will comfortably hold 4 to 5 latkes at a time.
2)If your oil is hot enough (about 375F, that's medium high on the stove knob, or slightly left of center), you should have a golden, crispy product that doesn't absorb excess oil.
3) Test a small amount of batter to see if it's hot enough.
4) Put a piece of carrot in the oil to absorb the brown "yuckiness" that results in batch frying.
5) Set a wire rack on a paper grocery bag or a cookie sheet lined with paper towels. This allows the grease to drip down away from the food. If you set the food directly on a paper towel it just sits in the grease.
6) Pre-heat your oven to 275F, and have a non-stick pan handy to load up with the already fried latkes and keep them warm while you're doing the rest.


I found this is great with the usual applesauce topping, but my favorite new twist is with kimchi on top!   

Rosti Latkes
from Superfun Times Vegan Holiday Cookbook by Isa Chandra Moskowitz, p. 372.

2 1/2 pounds russet potatoes, peeled
1 large onion, finely chopped
1/4 cup potato starch
1 teaspoon salt, plus extra for sprinkling
1/2 teaspoon ground black pepper
Lots of canola oil, for frying


Whether you're using a food processor with a grating blade or a box grater, shred the potatoes and transfer them to the middle of the unfolded cheesecloth. Over the sink, twist the excess cloth to wring out the liquid from the potatoes. Get them as dry as possible. It can take a few minutes to really squeeze the liquid out. When done, transfer the shredded potatoes to a a large mixing bowl, along with the onion (note: I found I didn't need to wrap the potatoes in cheesecloth to get out the extra water. But, if there is a lot of liquid after grating, I suggest you follow this step. I also just halved the onion and put it in the processor with the potatoes).

Add the potato starch, salt, and black pepper and toss with your hands to get everything well combined. Even though you squeezed those potatoes so well, there will still be a bit of liquid left to absorb the starch.

Preheat a large cast iron pan (note: I used a non-stick GreenPan) over medium-high heat. Have ready some brown paper bags or a baking sheet lined with paper towels for draining the oil from the latkes. Add about 1/2-inch of ail to the pan. While the oil heats, form some latkes by pressing the potatoes into 3/4 inch thick cakes that are about 2 inches in diameter (note:  press the mixture into a 1/4 cup measuring cup or ice cream scoop, and place it directly into the frying pan). 

The oil is hot enough when you drop in a pinch of batter and bubbles rapidly form around it. If it immediately smokes, then the heat is too high and you should lower it a bit. IF the bubbles are really lazy, just give it a few more minutes or turn up the heat a bit.

Fry the latkes until golden brown, about 4 minutes on each side, checking the underside often so that they don't burn.

Transfer the latkes to the lined pan to drain, Sprinkle with a little salt, flip and sprinkle with salt again, the proceed with the remaining latkes. Serve warm.

Tuesday, October 31, 2017

Zany Brainy

BS"D


Any event or holiday that has food as its focus can be scary and alienating for children with food allergies, Celiac and sensitivities.  A holiday that involves Snickers bars freely being handed around is a nightmare!


As a parent you always strive to create a safe environment for your children--on all levels. As a food allergy/Celiac parent, you need to do that with alternatives to "hazardous" food for your children.  It may involve offering fun alternatives to food, like parties that focus on crafts and activities--not candy. Or a special outing, such as an arcade or an indoor trampoline park or bounce house place.  As well, you can involve your kids in making their own treats. A recent visit to my local dollar store yielded a very cool (and cheap!) brain mold for gelatin or mousse and some cute pumpkin silicone ice molds I thought would be perfect for homemade chocolates.

The technique I use for melting the chocolate for the brain mold can also be used to make chocolates for any sort of mold, or even just put in circles on waxed paper or in paper cupcake tin liners.  You can add any of the following to the chocolate to make your own candy depending on individual's permitted foods:
-crisp rice cereal
-crushed GF Chex cereal
-chopped nuts
-caramel sauce
-mini-marshmallows
-marshmallow crème
-maraschino cherries
-dried fruit


To fill molds with instant kosher gelatin (which is normally fish based a bit looser than brands like Jello) I use  1 1/2 cups of water instead of the 2 cups called for on the box.  That works perfectly.  You can add gummy worms to the gelatin for an interesting and creepy element. First add a cup or two of the liquid gelatin to the mold, chill to set, then add your gummies and the remainder of the gelatin. This should keep the candy from sinking to the bottom of the mold. 


The mold I used is about 5 cups. A Pyrex bowl ay be used as well. For the mousse, you can also wrap individual bowls or custard cups in plastic wrap and dip the bottom the melted chocolate. Sprinkle with sprinkles, chopped candy or chopped nuts, if desired. Chill face down, then release and peel off the plastic wrap for decorative chocolate "bowls" for the mousse, ice cream or fruit.
 
 
Check out my youtube video of the chocolate brain at this link!


Chocolate Mousse Brain (Vegan)
 
2-10 or 12 ounce bag semi-sweet chocolate chips, divided
2 Tablespoon softened coconut oil or vegetable shortening, divided
1-14 ounce can coconut milk (full fat), shaken
1 Tablespoon instant coffee granules (optional) or 1 teaspoon any flavor extract

 
In a medium microwave safe bowl, combine 1 bag of chocolate chips and 1 Tablespoon coconut oil or shortening.  Microwave for 2 minutes on high. Stir until chocolate chips are fully melted.  If they are not melted after first 2 minutes, return to the microwave and heat in 15 second intervals, stirring after each one.  Stir until chocolate mixture is thoroughly combined and smooth. Pour into prepared chocolate mold, turning mold until it is evenly coated. Pour off any excess and reserve for another use.  Chill mold in refrigerator until firm.
 
In a medium microwave safe bowl, combine coconut milk, chocolate chips, 1 Tablespoon coconut oil or vegetable shortening and coffee granules.  Microwave for 2 minutes on high. Stir until chocolate chips are fully melted.  If they are not melted after first 2 minutes, return to the microwave and heat in 15 second intervals, stirring after each one.  Stir until chocolate mixture is thoroughly combined and smooth.  Set aside to cool for 10 minutes. Pour into  chilled mold. Cover with plastic wrap and return to refrigerator until thoroughly cooled and set (several hours). 
 
When ready to serve place a plate over mold and flip over. Gently remove mold. If it doesn't easy loosen, run a paring knife around top edge of chocolate before flipping, and wet a cloth with hot water to place around outside of mold.
 
Serves: 10-12


Monday, October 9, 2017

Corny-copia!

BS"D


When I think of a corned beef dinner, I conjure up images of a bland, boiled chunk of meat floating in a steam table in some institutional setting, or else an obligatory meal that no one really likes for Paddy's Day. But, a sale on corned beef brisket at my local store made me give it another try. I'm glad I did, because the result was delicious and tender, and not at all reminiscent of steam tables and the smell of bleach.

I recently had a rather unfortunate run in with my first attempt at cooking corned beef. The recipe instructed me to bake the meat in a pan of water for 3 hours, put on a sweet and tangy sauce, and then bake for another half hour. When served it was on the tough side and did not impress my guest at the festive meal at which it was served. So I decided I needed to go rogue and turn to either my trusty crock pot slow cooker or electric pressure cooker. Both have reliably delivered tender roasts in the past.  In the interest of time I went with the pressure cooker and some more flavorful cooking liquids than water. I wanted to use beer, but since gluten free beer is expensive and would have required a trip to the store I turned to ginger ale. I felt the spicy yet mild tang of ginger would meld well with the corned beef, and the sugar in the drink would work to soften the tough meat. Instead of water I used a Tetra Pak of beef broth I had on hand, in an effort to further boost the flavor.  A few spices later and I was in business. This recipe proved super easy.


After an hour of twiddling my thumbs wondering if I just ruined another holiday roast, I was relieved to see the pressure cooker had worked it's magic.  As an aside, I highly recommend the new breed of electric pressure cookers. They are "dummy proof" by allowing you to just press buttons for the type of food you are cooking (i.e. soup, beans, or meat), as well as working as slow cookers and rice cookers in some cases.  I purchased mine for about $70 on a good sale (combined with coupons) at Kohl's.  They range in price up to $300, but I find the cheaper one works fine. Recently, Good Housekeeping recommended several reasonably priced brands, included Farberware, which retails for under $100. 


After removing the corned beef from the pressure cooker, I coated it with a sweet sauce and baked another half hour to give it a lovely glaze.  My guests were delighted as they bit into the tender, falling apart meat of the tangy corned beef.  I was delighted that I had "cracked the code" to a tender corned beef!


You may substitute any jarred apricot sauce or use apricot jam in place of the duck sauce. For a "boozy" version, add 2 Tablespoons bourbon to the apricot jam before pouring over meat. When using jam, heat in a microwave safe bowl for about 30 seconds, until it becomes liquidy and easy to pour. 

Tangy and Sweet Pressure Cooker Corned Beef

1 large onion, thinly sliced
2-3 pounds corned beef brisket or kolechal (shoulder meat)
1 - 12 ounce can ginger ale
32 ounces beef broth (low sodium is fine)
1/2 Tablespoon pickling spices
1/4 teaspoon freshly ground black pepper (about 2 grinds on the pepper mill)
1 bay leaf
1/2 cup duck sauce or apricot sauce

Place onions in bottom of cooking pot of electric pressure cooker. Rinse meat well in cold water, and place on top of onions.  Pour the ginger ale and broth over meat. Sprinkle spices over meat. 

Place cover on pressure cooker, and engage all safety valves.  Set for 1 hour on meat setting.  After timer goes off allow the cooker to come to room temperature naturally, about 20-30 minutes (do not release steam valve right away).  By doing so you avoid a "shock" to the meat fibers, which can affect the tenderness of the meat.  Before opening, release steam valve to ensure all the steam has dissipated.

Place meat in a baking pan. Discard the cooking liquid, reserving the cooked onions. Place onions in pan around the meat. Pour duck or apricot sauce over meat. Bake in a 350F oven for 30 minutes.  Rest 10 minutes before slicing.

Serves: 8 to 10

But wait! There's more....
I used another favorite kitchen gadget, my vacuum sealer to store the meat. It comes out moist and fresh tasting, even after freezing. If you are freezing the corned beef, I suggest applying the sauce, but do not cook the additional 30 minutes. Then cook at 350F for 30 minutes once you have thawed the meat.

Wednesday, September 13, 2017

Blueberry Bliss

BS"D


This year marks nearly a decade since my daughter's diagnosis of Celiac Disease. At the time, I still had to comb the aisles of the health food stores and order GF oats online. Now, the chain supermarkets (and even big box stores like Target) have dedicated gluten free sections, as well as a plethora of products in every section bearing the GF symbol.  The many items like prepared cookies and power bars, baguettes and bagels that tastes very much like their "glutteny" version, and cake mixes have made my life much easier. 


There is a wonderful event called the Gluten Free Expo, #GFEFExpo, that occurs in several cities throughout the country this year, including one near me--Secaucus on October 14th and 15th. The tickets are very reasonably priced, and give you a great day out with your family sampling new products and learning more about new foods and lifestyle issues for those who are gluten free or with food allergies (in my family that's both)!  Please click this link to purchase tickets. Today is the last day to receive the early bird 30% discount off tickets (code: EARLYBIRD), and there is a 20% off deal until October 13th (code: ADVANCE). Checkout my twitter feed @glutenfreemaven, to win one of 5 free tickets I'm giving away.The best part of the expo for my kids was meeting others like them, and knowing the daily struggles with Celiac and Food Allergies are very real for so many others.

Summer fruits are my absolute favorite. Whether it's stone fruits, like peaches and plums, or berries of all types, I'm in fruity bliss in the summer. I incorporated some lovely end of season blueberries into a simple cake using a store bought mix.  I figured out a way to make the gluten free cake mix work for my family's allergy needs (no egg and no dairy) using a coconut vegan yogurt and margarine. I use So Delicious brand coconut milk yogurt. You may use any variety that works for you in plain or vanilla flavor.

This cake works well with a variety of fruits such as diced peaches, apples or pitted cherries. The fruit shouldn't be too wet (like a strawberry). Pat the fruit dry before tossing with other ingredients to reduce adding too much moisture to the cake, resulting in a gummy texture. If you use frozen blueberries, do not thaw before baking.  I used Betty Crocker brand Gluten Free Yellow Cake Mix to prepare this cake.

Vegan Blueberry Bliss Bundt

1 stick non-dairy margarine (I like Earth Balance Buttery Sticks)
1 box (15 ounces) yellow Gluten Free cake mix
2/3 cup soy or rice milk (use amount of liquid called for on package)
1 container (5.3 ounces) non-dairy yogurt, vanilla or plain flavor (I use So Delicious Coconut Yogurt)
2 teaspoons vanilla extract
1/2 teaspoon ground cinnamon
1 cup blueberries, washed and dried
1 Tablespoon corn starch (or potato starch or arrowroot)
Confectioner's sugar, optional

Pre-heat oven to 350F degrees.  Spray a non-stick Bundt cake pan with non-stick cooking spray, set aside.

In a large mixing bowl with an electric mixer on medium speed, beat the margarine until fluffy.  Add cake mix and stir.  Add rice milk, yogurt, vanilla and cinnamon. Beat on medium speed for about two minutes until smooth and well combined. 

In a small bowl, toss together blueberries and corn starch.  Remove berries and shake off extra starch. Stir berries into cake mixture.

Pour mixture into prepared baking pan, and bake in pre-heated oven for 45-55 minutes. A toothpick inserted into the cake should come out clean.  Set pan on a wire rack to cool.

To Serve: When completely cool, turn cake out onto serving platter. Sprinkle with confectioner's sugar and garnish with additionally berries, if desired.

Serves: 10-12


Monday, July 3, 2017

"Nacho"ly Good!

BS"D


Any holiday can be challenging if you're on a special diet, whether it be sensitivities or actual food allergies. No one wants to spend the evening sick after a great day out. With food allergies, there is no playing around...you must always be vigilant! But there are many great options for both gluten free and allergy free snacks that will allow you to seamlessly enjoy your holiday barbecue or party without feeling deprived.

R.W. Garcia sent me some new gluten free snacks to sample. You must check each one, because some contain sesame seeds or were produced in plants with other allergens.  But the R.W. Garcia Red & Yellow and Yellow & Blue Mixt Bag Tortilla Chips were not only a hit taste wise with my family (Daisie especially loved them), they were extremely festive for a Fourth of July Nacho Buffet.  Some other new choices by R.W. Garcia which manufactuers tortilla chips and certified gluten free non-GMO crackers are the bright Sweet Beet and Kale 3 Seed Crackers.  They are a great choice for dipping with hummus or salsa.


To make a nacho bar, set out warm tortilla chips, cheese sauce or nutritional yeast cheese sauce (see below), chopped jalapenos, black beans and shredded cheese (for non-dairy cheese I recommend Daiya Shreds).  A small crockpot or warming tray is helpful to keep the cheese sauce warm.


Rosie has been using Bob's Red Mill Large Flake Nutritional Yeast and a recipe from their site to make the most amazing cheese sauce that I want to eat on everything. It's great for vegan mac n' cheese, nachos and over steamed vegetables.  Rosie is a bit of a connosieur of non-dairy cheeses and has found this cheese sauce recipe is the one to beat.  She's made a few changes from the original recipe on the bobsredmill.com website.


This recipe is adapted from the one by Dorothy Bates which can be found in its original form at this link. Feel free to spice it up as you like with the addition of hot pepper flakes, chopped jalapenos, or even diced pineapple for a personal twist at your nacho bar.


Yummy Cheezy Sauce

1/2 cup Bob's Red Mill Large Flake Nutritional Yeast
1/2 cup Bob's Red Mill Gluten Free 1-to 1-Baking Flour
1 teaspoon fine sea salt
2 cups cold water
1/4 cup Earth Balance Buttery Spread (or any margarine)
1/4 teaspoon onion powder
1/2 teaspoon dried mustard powder (optional)
1/4 teaspoon ground black pepper (optional)

Whisk together nutritional yeast flakes, GF flour, and salt in a medium sized sauce pan. Place pan over medium-high heat and whisk in cold water.

Continue whisking as sauce thickens, bring to a rolling boil, reduce heat, cook about 3 minutes, or until thickened. Remove from heat.

Whisk in Earth Balance Buttery Spread and spices.

This may be stored in a tightly covered container for 1 week. It will thicken but may be reheated on low to return it to a saucy consistency.

Yield: About 3 cups of sauce

Thursday, June 15, 2017

Great Green Things

BS"D

Need an easy side dish to bring to your Father's Day Celebration? Need a dish that won't make you feel like your house has been propelled Wizard of Oz style down to the equator? Then try this delicious roasted Haricot Verts (that's the skinny, French version of green beans) recipe. 

I purchase a big bag of them already trimmed at Costco, but I find they are also available in smaller cellophane bags at most supermarkets. If you want to make use of the summer's fresh bounty and are lucky enough to find regular green beans at your local farm stand, by all means use those instead. The plumper American beans are a bit tougher than the slender French ones though (yes, there's a metaphor there).

I prefer to prepare these the night before and serve them chilled. I don't like reheating vegetables that are meant to have a bit of crispness to them, and prefer to eat them cold rather than risk a limp, tasteless version of the veg. They may be prepped several hours in advance and kept in a plastic container or Ziploc bag. They're great for tossing on the grill (see recipe below), alongside your grilled chicken and burgers for a bit of an upscale BBQ side dish.

What I love best about this recipe is there isn't even a bowl to wash as it's all mixed on the baking pan in which it's cooked!

Garlic Grilled Haricot Verts (Green Beans)

1 pound haricot verts (these are available in a cellophane bag in the supermarket already trimmed)*
2 Tablespoons extra virgin olive oil
2 garlic cloves crushed or minced or 1 rounded tablespoon jarred, minced garlic
fresh sea salt, to taste
fresh ground black pepper, to taste

Oven Directions:
Pre-heat oven to 420F degrees. 

Spread haricot verts in a thin layer on a large non-stick rimmed cookie sheet (I line baking pan with Reynold's Non-stick Foil for easier cleanup).

Drizzle beans with oil, garlic, salt and pepper.  Toss to coat evenly.

Bake in pre-heated oven for 20 minutes. Toss and bake an additional 10 minutes.

May be served hot or cold.

Barbecue Directions:
Prepare beans as directed above, except place in a 9x13 disposable aluminum pan. 

Heat grill to medium-high heat.  Place beans on grill and close lid.  Cook for approximately 15 minutes, tossing occasionally. Remove from heat when beans are fork tender


*Note: You may substitute regular, fresh green beans; just rinse and trim ends.

Bonus Recipe:
If you have any leftovers make a delicious main course salad by tossing the roasted haricot verts with romaine lettuce, crumbled goat cheese, or seasoned tofu, and a sprinkling of sunflower seeds for crunch.


Sunday, June 11, 2017

Dads and Grads

BS"D


A small kitchen appliance or gadget is great gift for the Dad who dabbles in cooking, or the new graduate that will be moving into their own apartment.  But choose wisely, an ice cream maker or pasta maker may be infrequently used, and take up precious cabinet or counter space.

I love kitchen gadgets of every stripe, but I have  a very small kitchen without a lot of storage space. As  a result, I have to be judicious when choosing which gadgets I let into the coveted space. You will not find a specific container to store half an avocado, or a special gadget to slice watermelon---I have one, it's called a knife!  I always ask myself if this gadget will a) be frequently used and b) will it make my life qualitatively better?


My two new electronic gadgets answer both these questions.  One is the Capresso milk frother, which I purchased for just under $40 at Costco.  I've seen it online for as high as the $70.  I made a few passes by the aisle, came back another day, and finally decided to treat myself. And, it was a great buy. I use it almost every day, sometimes more than once a day. Besides making amazing frothy milk...hot or cold, that seriously will put the foam at Starbucks to shame, I found it makes a mean hot cocoa. There is no silt at the bottom, and I don't have the messy bubble over like I do when I make hot cocoa from scratch in the microwave. If making the variety from a packet with water, I can mix and heat the water to a nice temperature at the same time...all in about 3 minutes.   An added nutritional bonus is that my kids are not big milk drinkers.  But, if I give them foamy milk (which looks like whipped cream to them, but is 100% sugar free) they'll drink it with breakfast.

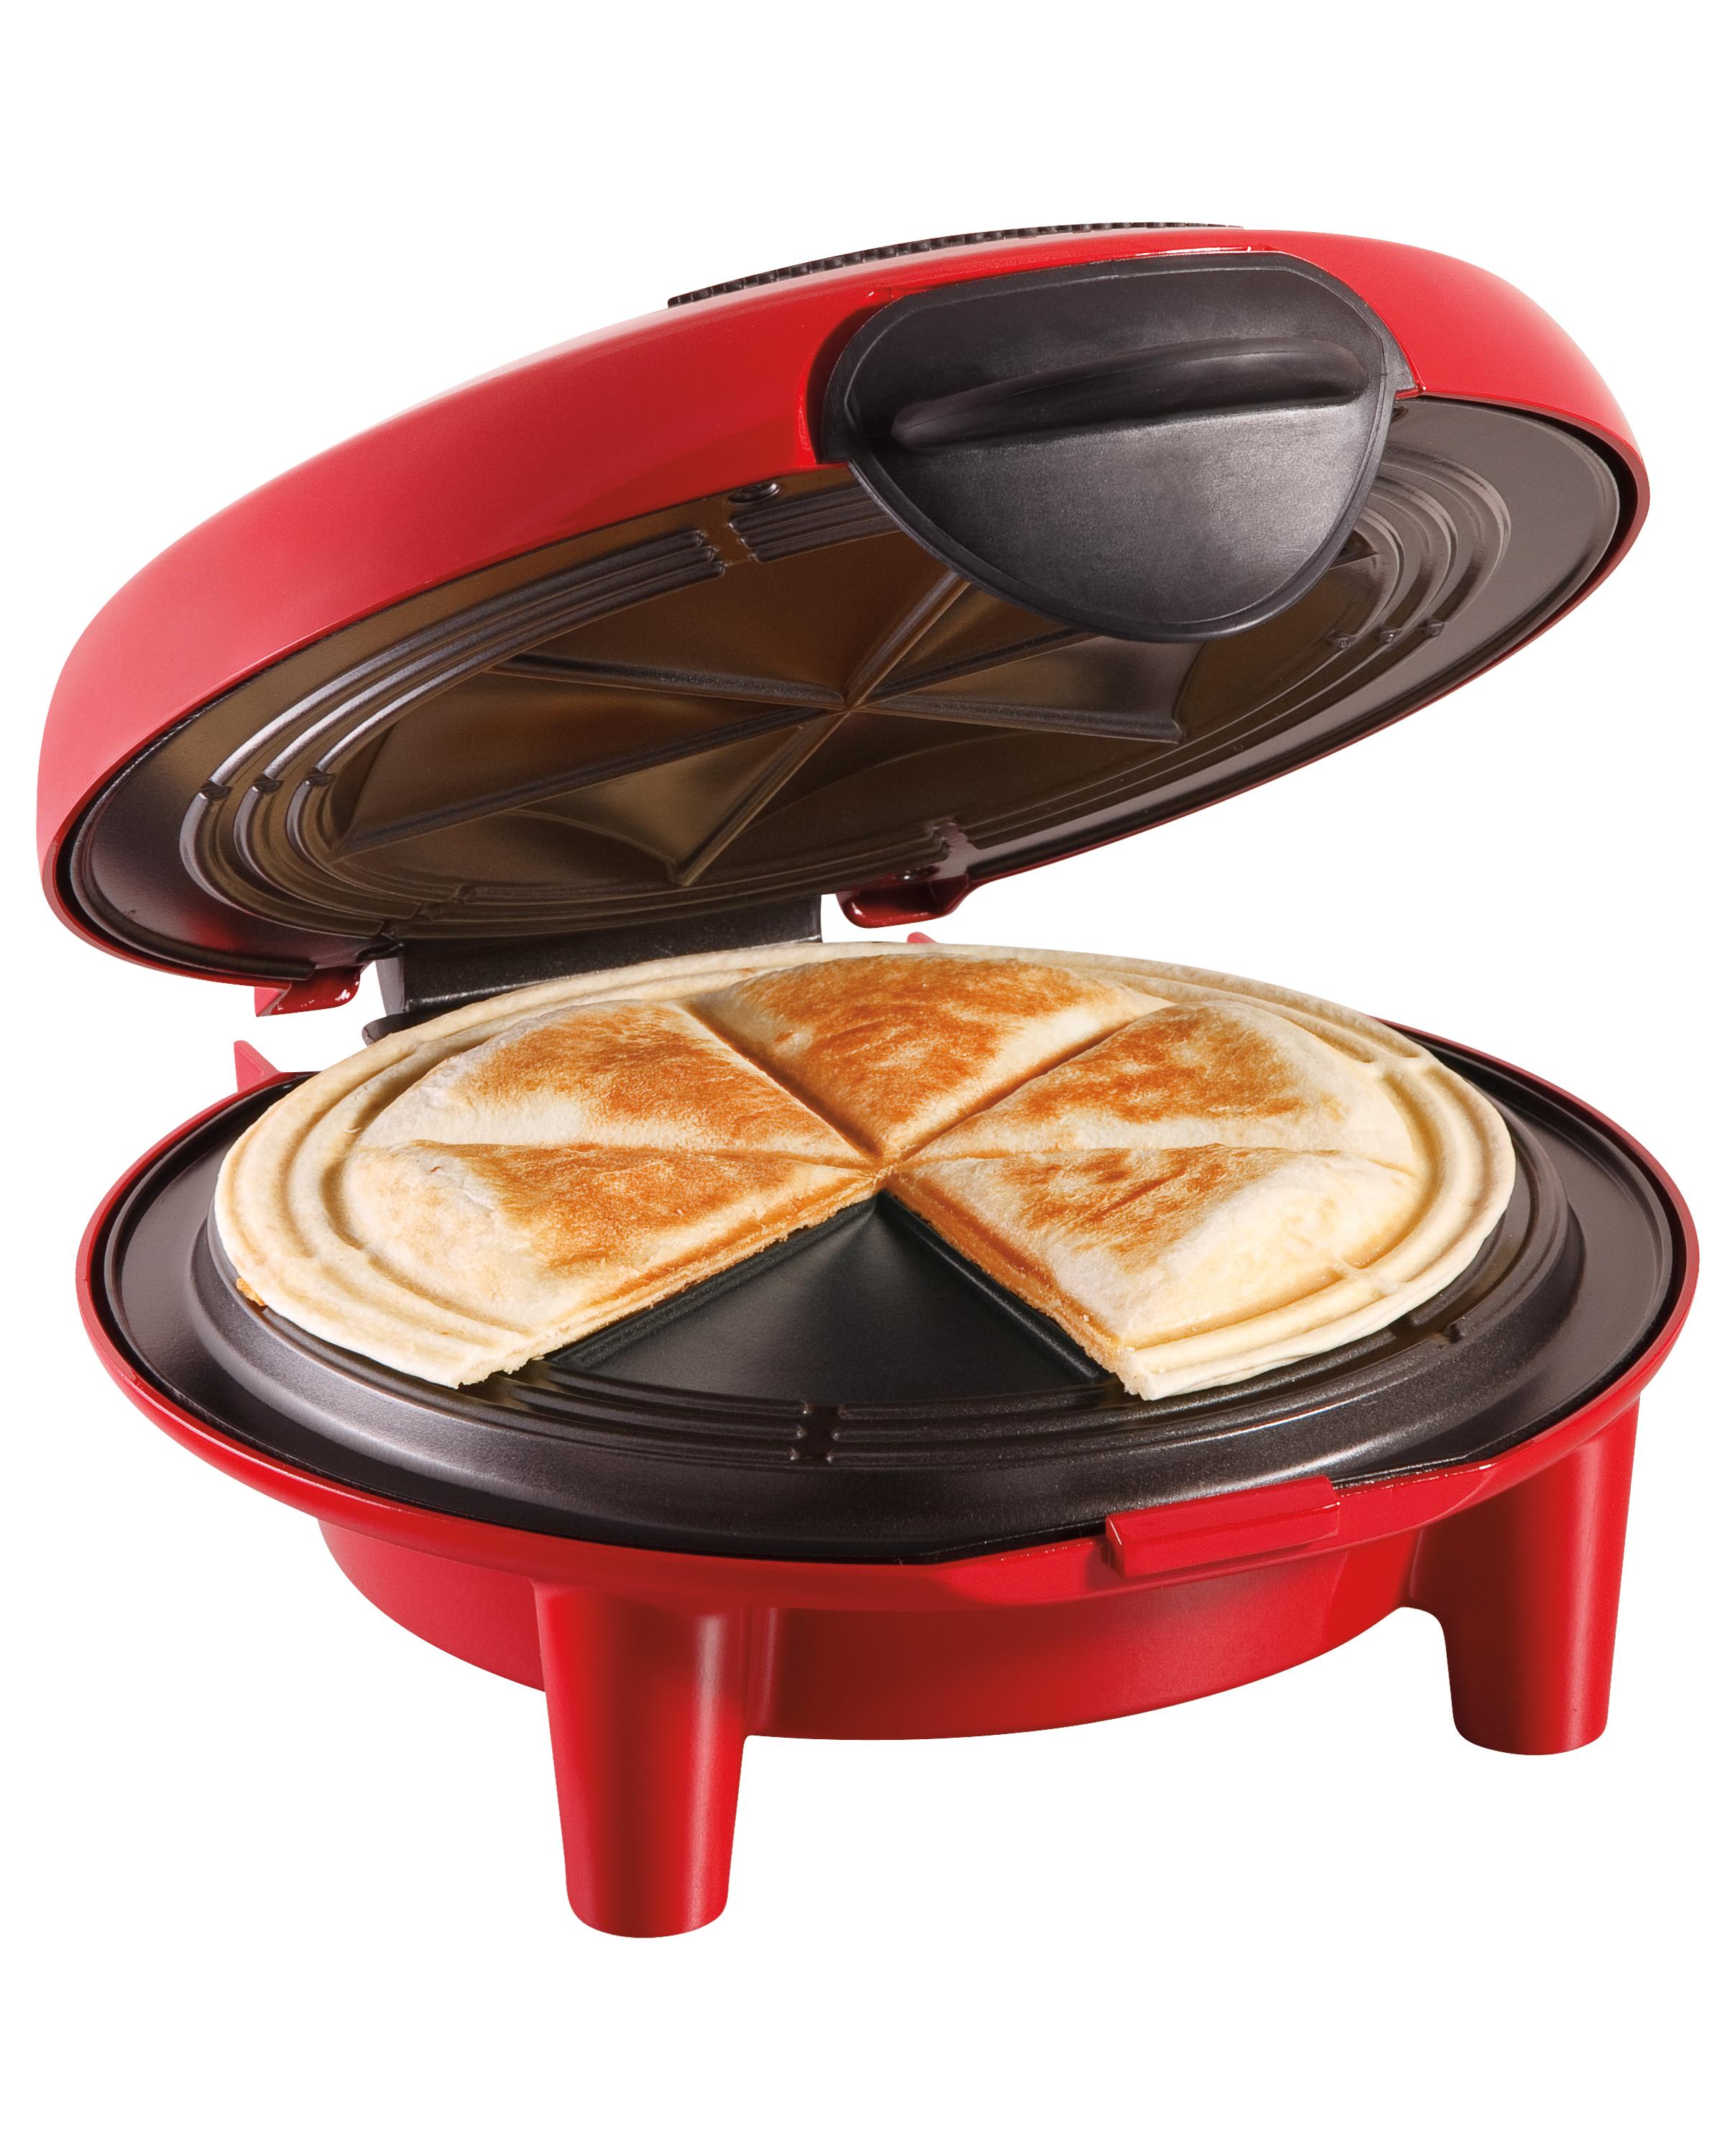
My second purchase was the result of Rosie's recent avid interest in quesadilla's. We normally use a small fying pan, thus avoiding gadget clog up in the kitchen. But when I saw the Hamilton Beach Quesadilla Maker at Kohl's on sale (and having had a great coupon and Kohl's cash) it was only about $14. Less than the cost of lunch for two at a Mexican restaurant (although Margaritas are not included).  When Rosie makes quesadillas I have to carefully monitor her time at the stove, save burning tortillas in the nick of time, and pull it off the stove just in time for optimal cheese meltage. The electric quesadilla maker indicates 2-3 minutes of cooking time is perfect for the perfect quesadilla...and it is. If you use the recommended 7-8 inch tortilla (such as Trader Joe's Rice Flour Wraps or Udi's brand Large Plain Tortillas), the edges will seal nicely giving you 6 perfectly sealed little triangles bursting with filling. If you use the 6" corn tortillas the edges don't seal, so you have to check to make sure the melted cheese doesn't sploosh out.

This machine worked really well with the Daiya shredded cheese for a great dairy free quesadilla. It melted perfectly!

Either of these are great gift ideas for Father's Day next week or an upcoming graduation!

Check out my You Tube videos demonstrating these great products:


Saturday, February 4, 2017

Super-Yum Day

BS"D

So Superbowl Sunday is once more upon us, and you may be asking yourselves how you can enjoy a Superbowl party on your gluten free diet. Well, easy, first make sure there are options if you're going to someone else's home, and of course if your at your own home-- you're in the clear! When my gluten free child is attending a party at a friend's house, or we're going to a meal outside our home, I first call in advance and say, "I'm happy to bring my own food for Lillie, but I wanted to check if you're serving anything she can eat first." That takes the pressure off them, stating from the beginning that basically they don't have to provide anything specifically gluten free.


If you're putting out a spread at home, you can certainly make it all gluten free. I find that a crock pot full of chili or soup is a nice centerpiece. Add some GF breadsticks or Jalapeno-Corn Muffins (see recipe below), gluten free franks in blankets and a deli spread are great.  Udi's French Baguettes are most  awesome for heros, hoagies, subs...or whatever you want to call them!  

If you wish to offer GF and "glutenfull" options, take a disposable green tablecloth and use white duct tape to recreate the lines and number of a football field. You can have the GF end zone and the gluten end zone, with the 50 yard line being the dividing point.  Make "Go Team GF" banners to pin to the gluten free end to avoid confusion.  

Whatever you choose to do, don't let food get in your way of fun. I always advise people on special diets, to focus on the fun, not the food when they go out to a party or meal. Plan ahead so you have something to eat, and will feel sated, but remember the point of a gathering is good friends and good fun! 


This recipe calls for cheddar cheese. If you would like it to be dairy-free, I suggest using Daiya Cheddar Style shreds (and soy milk). This can be made in a 24-cup mini muffin pan. Reduce baking time to 12-15 minutes. You'll have mini jalapeno-corn poppers!
Jalapeno-Corn Muffins 

1 large egg, beaten
1 1/4
cup buttermilk (or soy milk or cow's milk mixed with 1 Tablespoon vinegar)

1/2
cup canola oil

1 1/2 cups Gluten-Free Bisquick

1/2 cup gluten free corn meal (such as Bob's Red Mill)
1/2 cup shredded cheddar cheese
1-2
tablespoon(s) jarred chopped jalapenos, drained (amount used depends on how spicy you want them)


Pre-heat oven to 400F degrees. Line 12 standard muffin cups with paper liners. Spray lightly with non-stick cooking spray. 


In a large mixing bowl, whisk together egg and buttermilk. Whisk in oil, until well combined. Add Bisquick and cornmeal,  and whisk until combined. Fold in cheddar cheese and jalapenos until blended.
 
Fill muffin cups 2/3 full with batter.  

Bake in pre-heated oven for 20 minutes, or until golden brown. Cool in pan 5 minutes, then remove to rack to cool an additional 10-15 minutes. These can be served warm or cold...but are best warm!