Wednesday, November 20, 2019

Turkey Time

Image result for cornucopia"


BS"D

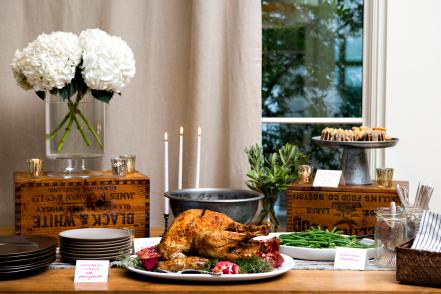
So this year both grandmas quit Thanksgiving. They declared "it's too much" and handed off responsibility to the next generation.  Of course, while offering to prepare their most beloved dishes!  However, I see the next generation isn't much into "patchkeing". That is "fussing around" for the non-Yiddish speakers. And in all fairness, today's generation of women normally have a full load balancing work and family life. If they have a day off they are not getting up at 6 am to baste a big bird, they are sleeping in for a change.  So prepared items are increasing in popularity. Some opt for a full meal from the supermarket deli, while some will buy the bird and prepare the sides or vice versa. Pot lucks are a viable option too.


Image result for take out containers"

However, when you are dealing with food allergies and Celiac disease purchased meals and potlucks are a minefield. The host generally will not be able to answer questions regarding ingredients and cross contamination. The dozen or more people contributing dishes to the potluck will not necessarily adhere to your level of caution when cooking the meals. And, one of the biggest hazards this time of year is the buffet table. It is a veritable nightmare for the food allergic. Spoons designated for items that are "safe" for you are plunged into something "unsafe" by unaware guests.  So the safest way to go in my experience is bring your own "safe" food items. If you are bringing enough to share, explain to your host you need to take your portion first due to cross-contamination issues. I find the best way to do this is serve yourself in the kitchen before the dishes even come to the table.


Image result for buffet table full of fodd"

Another caveat is that big bird. Although everyone thinks it's so plain, there are certainly hidden allergens in it's preparation--especially store bought.  I like using the Reynold's Kitchen bags for preparing the perfect turkey, but it calls for a couple of tablespoons of flour put into the bag (I use gluten free). Unfortunately, many hosts don't realize this is problematic. Nor do they think the ingredients they rub on the skin are a big deal. Cries of "I just used a little flour." or "Just peel off the skin." abound.  Obviously, it is very problematic and enough to ruin a food sensitive person's holiday, even cause them to need medical attention.  So given it's unlikely you are going to make your own turkey, parts are a viable option.  As soon as November hits my supermarket has legs, wings, half breasts and more on sale.  It's also a good option if you want to make the more manageable turkey breast, yet still have some dark meat.  My family loves the crispy on the outside and juicy on the inside turkey leg recipe below. This year I made them when I first saw the legs in the store, and vacuum sealed and froze them for the big day.


You can use a variety of spice profiles for this recipe. If you prefer substituting a coffee rub or Italian seasoning blend for the spices, the end product will be just as great!

Easy Roasted Turkey Legs

Non-stick cooking spray
4 turkey legs
1/4 cup olive oil
2 Tablespoons brown sugar
2 teaspoons onion powder
1 teaspoon garlic powder
1 teaspoon smoked paprika
sea salt and pepper to taste

Pre-heat oven to 400F degrees. Spray a large baking pan with non-stick cooking spray.


Place turkey legs end to end in baking pan. In a small bowl, mix together remaining ingredients.

Rub turkey legs with olive oil and spice mixture (this may be done up to 8 hours in advance).

Stick a meat thermometer in fattest part of one turkey leg---not touching the bone (unless using an infrared thermometer).

Bake at 400F degrees for 30 minutes. Reduce heat to 350F degrees and bake for an additional 1 to 1 1/2 hours, or until temperature of meat is 180 degrees.

Allow to rest 15 minutes before serving.

Yield: 4 turkey legs


Thursday, September 26, 2019

Round and Round We Go...Oat Challa I Love You So!


BS"D
Image result for oats flour
So it's that time of year, or new year, I should say. We welcome the Jewish Year  5780 I"H in just a few days. There are certain traditional items used in the Rosh Hashana meals, such as apples dipped in honey and round challas--which symbolize the cycle of the year.  Although there are usually a few round gluten free round challas in my local supermarket freezer, they tend to be expensive even for the small ones. Lillie has expressed she wants one bigger than her usual standard muffin sized gluten free challa she uses every Shabbat, but understands she doesn't need a full sized one for her personal use.  Enter the wonder that are Texas-sized muffin tins. They also go by the name extra large muffin tins. They have come in handy in a number of applications, I decided to use them to make larger, round personal sized challas for the holiday.
Image result for golden raisins
Since I'm busy making a wide variety of foods for the four meals we'll eat over Rosh Hashana, I wanted something that wasn't too time consuming to make. I don't find that yeast in oat challa has an especially profound affect. There are no strands of gluten being built up, and no puffing of the challa due to the yeast in the manner you find in wheat challa.  So, I felt that a more quick bread approach, using baking powder or soda would be fine. I was inspired by an Oat-Pecan muffin in Mollie Katzen's The Enchanted Broccoli Forest cookbook, and used some of her ratios as a starting point.  I traded the pecans for golden raisins, another Rosh Hashana tradition, and made a mixture of both oat and all-purpose gluten free flour with xanthan gum.


The result were light and fluffy individual round challas in nearly no time at all. No waiting for the dough to rise, and a recipe that could be mixed by hand if needed.  They froze well and we look forward to trying them out. Have a sweet and happy new year!

Image result for oats flour


I made my oat flour by grinding 2 cups of old-fashioned oats in my food processor until finely ground. You may use this method or buy gluten free oat flour. 


Gluten Free Individual Round Oat and Raisin Challas

Non-stick cooking spray
1 1/2 cup gluten free oat flour (or 2 cups old fashioned oats)
1 1/2 cups gluten free all-purpose flour with xanthan gum (I used Bob's Red Mill 1 to 1 GF Baking Flour)
½ teaspoon baking soda
1 ½ teaspoon baking powder
¼ teaspoon salt
1 cup non-dairy milk, e.g., soy, almond or flax (with 1 Tablespoon vinegar mixed in)
1 egg
¼ cup vegetable or olive oil
1/3 cup honey
½ cup golden raisins

Pre-heat oven to 350F degrees. Spray 12 regular muffin cups or 6 Extra-large (Texas) muffin cups with non-stick cooking spray. 

In a large mixing bowl, whisk together oat and all-purpose flours, baking soda, baking powder, and salt. Add milk, eggs, vegetable oil and honey until well combined. You may use an electric mixer on medium or large spoon for mixing.

Stir in raisins. 

Spoon batter into muffin pans. Bake for 20 to 25 minutes, until a toothpick inserted comes out dry.

Cool on a wire rack. Best served warm.

May be frozen well wrapped.

Yield: 6 large or 12 regular muffin sized rolls


Thursday, September 19, 2019

It's that time of year!


Image result for pumpkin pie spice
BS"D

So if you have even glanced at the Internet recently, you will see people are losing it over everything pumpkin pie spice. I enjoy it too, but in well placed proportions. Drinking, eating and inhaling it all the time until the first snow appears is a bit much for me (and then it's all things peppermint).  But I do love it in a muffin or cookie. 

Lillie has been dashing out the door in the morning as a busy high schooler, now needing to catch a bus.  Her school instituted a short period at the start of the day for breakfast. I thought that was such a good idea. Not only do they recognize that a lot of teens miss out on this important meal due to the early start time of high school, but that it boosts their cognitive ability and overall alertness. As well, it's a nice time to regroup and chill with other students before you sit down to a long day in classes.


Since Lillie can't buy most of the offerings the school sells for breakfast, and time is of the essence in the a.m., she started making oatmeal cups. As she got busier with the school year, I have taken on the task, and of course tweaked the recipe to make it my own.  There are many variations, anything from adding dried cherries and chocolate chips, to nuts and dried apples, and even throwing in an extra protein punch with a scoop of protein powder.

However you start the day, aim for wholesome and convenient. These two things will allow you to get the most out of your morning meal, and most importantly, actually get it!


Image result for nourished festival
To check out a load of great products and ideas to make your gluten/allergen free life run smoother and more deliciously, check out the Nourished Festivel for Gluten Free, Allergy and Special Diets coming to the NYC area next month. This year Paleo and Keto diets have been added to the exciting lineup of presenters and products. Here are the details and get 30% off now with this link and code EARLYBIRD: 


Date: October 5-6, 2019
Location: Meadowlands Exposition Center
Times: Saturday 10am-3pm, Sunday 10am-3pm
@nourished fest  #nourishedfestival


Harvest Goodness Muffin Cups

3 cups old fashioned rolled oats
2 teaspoons baking powder
1 1/2 teaspoons pumpkin pie spice
1/2 teaspoon sea salt
1 cup unsweetened applesauce
1/3 cup agave nectar (or 1/2 cup honey)
2 large eggs
1 cup soy, almond, oat or flax milk
1/2 cup dried cranberries
Optional mix-ins  : 1/4 to 1/2 cups of chopped nuts, dried, diced apple, dried, diced apricot, chocolate chips, butterscotch chips

Line a 12 cup muffin tin with paper liners, or spray with non-stick cooking spray, set aside.  Pre-heat oven to 350F degrees.

In a large mixing bowl, whisk together the first 4 ingredients.  Add the next 4 ingredients and stir until will combined. Stir in cranberries and any additional mix-ins.

Cover bowl and allow mixture to sit for 15 minutes (this will soften oats and absorb the liquids).

Spoon batter to nearly the top of each muffin cup. 

Bake in pre-heated oven for 25 to 30 minutes, until muffins are dry in middle when a toothpick is inserted.

Allow to cool 10 minutes before serving.

These freeze very well in a zip top bag or plastic container.

Yield: 16 muffins

Wednesday, September 11, 2019

Saving Summer

BS"D

One of my kids remarked that Labor Day is the last day of summer. "Actually, it's September 23rd, I replied". But back to school, russet colored decorations filling the stores, and an undeniable chill in the evening air certainly signal a big shift.  But, canning and freezing the lovely fruit and vegetables of summer that are rapidly being usurped by their fall counterparts is one way to save summer--at least in your kitchen.

I found a darling little vegetable that looked like a mini cucumber in my local Indian grocery. In my mind I reasoned it must taste like a cucumber because it looks like a cucumber and therefore be used in the way I use cukes.  But in actuality, the tindora, as it is called, is used more in cooked, hot dishes in Indian cuisine. Sauteed in spicy red sauces with other vegetables, it is far from the humble cukes I know and love.

Nevertheless, I decided the tindoras would make the most delectable bite sized pickles.  I went ahead and tried them in an easy dill pickle recipe. It requires no actual canning (although you can if you want), just storage in plastic or glass containers in my refrigerator.  The process is easy, requiring not much more than slicing and boiling. The result...a crisp bite or two that is redolent with the memory of summer.

Slender Persian cucumbers or sliced Kirbies work equally well for this recipe.  If you prefer to can and preserve your pickles check out the Ball Canning website  for instructions.

Bombay via Brooklyn Pickles

1 pound Tindora or Persian cucumbers, washed and halved lenghtwise
1 cup dill weed
1 medium onion, thinly sliced
3 garlic cloves, peeled
1 Tablespoon pickling spices
1/2 Tablespoon peppercorns
3 cups white vinegar
3 cups water
1/2 cup granulated sugar
1/3 cup kosher salt

Place ingredients in a large Dutch oven or stock pot in order listed. Stir.

Bring to a boil. Let boil for 5 to 8 minutes, stirring every few minutes, until salt and sugar are dissolved. 

Remove lid and allow to cool completely. 

Divide among clean quart jars or plastic containers. 

Refrigerate 2 to 3 days before using.  Keeps in refrigerator for 2 weeks.

Yield: 1 pound pickles


Thursday, March 14, 2019

Nutty Cheese


BS"D

I've been on a mission, of sorts, to eat less hard cheese. If you are allergic to dairy, like Rosie, it's not a question of limiting a food as much as eliminating it completely. She has known nothing other than her beloved soy cheeses like Tofutti and Daiya since she began eating hard foods. I decided now that she can have certain nuts, it might be fun to stretch our vegan cheese wings and see what's out there.
Julie Platt's wonderfully photographed and very clearly written, This Cheese is Nuts!: Delicious Vegan Cheese at Home, has helped me on my quest.The book has some wonderful options for everything from cheddar to mozzarella and beyond. The ingredients are accessible (in my opinion) and the instructions are clear and achievable for most people. 


 I decided to start with an easy one, an ersatz pimiento cheese. Or, if you're from the South, "pimenta".  You might recall it as that orangy cheese spread in a crock that was ubiquitous at your parents cocktail parties in the '70's.  But it's actually a nice spread when made with real ingredients and not processed cheese like stuff.  The almond based spread in Platt's book combined a cheesiness from nutritional yeast flakes and the robust pimento flavor from a generous addition of the jarred peppers. I made a few adjustments, as I had to use jarred roasted peppers instead of pimentos. I added some smoked paprika to make up the flavor, and it did so in spades. It can be eaten immediately or refrigerated for about a week. After a few days I felt it took on the flavor (and it had the texture) of smoked salmon spread. Another treat I love, but could do with a health upgrade.  My neighbor tried some on nachos and thought it was a great option if you're cutting back on cholesterol.


I was thinking a crock of cheese spread with GF crackers would make a wonderful and tasty Mishloach Manot--the gifts of food for friends and family on the Jewish holiday of Purim, as described in the biblical Book of Esther. On Purim, we rejoice over G-d's hidden miracles and remember that even in a moment of crisis or danger, G-d's mercy is near at hand. What better way to share our holiday cheer than with fun costumes for the children (or fun loving adults) and creative gift packages of food. Have a happy Purim!

You can find canned pimentos or jarred peppers in the same section of your supermarket as olives and pickles. The amounts make a lot, so consider halving the recipe. I didn't have smoked sea salt, so I used 1/4 teaspoon smoked paprika and regular sea salt, and it worked great! 

Smoked Almond Cheddar Spread


This Cheese is Nuts!: Delicious Vegan Cheese at Home by Julie Platt, p. 33

2 cups raw almonds, rinsed and placed in covered bowl with water to cover overnight
1/2 to 3/4 cup pimientos from a jar, with 1/2 to 3/4 cup packing liquid
1/4 cup nutritional yeast
1 3/4 teaspoon smoked sea salt (I preferred less salt)
1 teaspoon garlic powder

Drain the almonds. In the bowl of a food processor, place the first five ingredients with 1/4 cup of the pimiento liquid. Process until the ingredients are well incorporated.

Remove the lid and test the mixture for texture and salt content. If you want a smoother spread, add pimiento liquid in small increments and process again. Add more salt if needed.

Store in a tightly covered container in the refrigerator for up to a week.

Makes approximately 3 cups of spread.


Thursday, February 14, 2019

Sweethearts

BS"D
I love finding new products, and I was excited to see this one practically jump off shelf at me. Legumes in a bag. Not something to stir most peoples hearts, but I was excited because I had a choice of lentils or chick peas. Gefen makes them in a 16 ounce vacuum sealed (I guess) pouch. And they're great for taking a scoop for a salad or a stew and putting the rest back in the fridge for another time. Until now, lentils are were definitely a plan ahead item for me. They'd have to be soaked, then cooked, then incorporated into whatever dish I planned to use them with (like my favorite m'jedra), but now you can take a scoop, toss and go. They're great to mix with microwavable rice or toss into a salad.

I used another convenience item Gefen vacuum packed beets to make a great winter salad. Gefen is just knocking it out of the park this year!  It served double duty as a side dish then as a lunch the next day with an egg sliced on top (you can also use cubed tofu or leftover chicken). I made the dressing and stirred up the salad in one storage container--so no muss no fuss!

Serve this delicious and hearty winter salad to your sweetheart and enjoy the good heart healthy benefits


If you want to make this even easier, substitute a bottled citrus vinaigrette for the dressing.  It keeps well in the refrigerator for up to a week.


Sweet Heart Beet and Lentil Salad

Dressing:
1/3 cup orange juice
1/4 cup extra virgin olive oil
2 Tablespoons honey
1 Tablespoon lemon juice
1 teaspoon lemon zest
2 Tablespoons fresh dill ) or 1 1/2 teaspoons dried)
sea salt and fresh ground black pepper to taste

Salad:
2 cups cooked brown lentils
3 medium cooked beets, cubed
1/4 cup diced Bermuda onion
11 ounce can mandarin oranges, drained and rinsed (or 2 fresh, peeled and pithed)

In a medium sized mixing bowl, whisk together dressing ingredients. Add salad ingredients and gently fold together.

Chill 2 hours before serving.

Servings: 8