Monday, January 11, 2010

Sugar Cookie Baking with Lillie

BS"D


Snow day season is upon us, and it seems like the day is longer when you have the little ones to to entertain unexpectantly. One of my and their favorite things to do when we are stuck in the house is to bake. When the baking involves icing and sprinkles...even better. Sugar cookies are the perfect canvas for your little ones artistic efforts. Just because you've gone gluten free, doesn't mean you have to give up this treasured parent-child activity.

I feel sugar cookie making is a good option when you have hours to occupy, because it is a multi-part activity. First you have to make the batter, then cut out the cookies, bake and finally decorate. You can even push your children's creative talents further by wrapping the cookies up in a creative manner, attaching cards (homemade...yet another activity to occupy the kiddies) and distributing to friends.

A few years ago I starting using a shortbread recipe when I needed an eggless sugar cookie recipe for Rosie. It was superior to any of the allergy free sugar cookie doughs I tried, as it kept it's shape better-- which is a good quality for a cut-out style cookie. Many traditional Scottish shortbread recipes are made with rice flour, so you're ahead of the game in terms of gluten freeness.

Most sugar cookie recipes require chilling for several hours. If your kids don't have the patience for the chilling time required of sugar cookie dough, you can prepare the dough the day before and chill overnight. I like to make a double batch of dough and form logs out of the extra dough. I wrap them well in plastic wrap and pop in a ziploc on which I write the baking instructions. Then I freeze the logs, and have when needed, I have my own prepared dough logs-- just like the type made by that famous doughboy. The dough is very versatile and can be sliced, dipped in sprinkles, coconut or ground nuts and baked, rolled out for cut-out cookies, and even used as a pie crust.

Below I provide a recipe for gluten free sugar cookies (but you may use any of the abundance of recipes available), as well as step-by-step instructions with visuals courtesy of Lillie.

The cookie recipe I use is adapted from a recipe for Shortbread Hearts (p. 261) in The Silver Palate Cookbook by Julee Rosso and Sheila Lukins (may she rest in peace). I used Jules Gluten Free All Purpose Flour, but you can try your favorite gluten free flour blend, although you should make sure if it does not contain xanthan gum, add 1/4-1/2 teaspoon to the batter.

Gluten Free Sugar Cookies

3 sticks unsalted butter or non-dairy margarine such as Earth Balance Vegan Buttery Sticks, softened
1 cup confectioner's sugar
31/2 cups all-purpose gluten free flour blend (with xanthan or guar gum), such as Jules Gluten Free All Purpose Flour or Better Batter
1/2 teaspoon salt
1 teaspoon vanilla extract (or 1/2 teaspoon vanilla and 1/2 teaspoon almond or orange extract)


1. In a large bowl using an electric mixer on medium speed, cream together butter or margarine and confectioner's sugar until light and fluffy.

2. Sift flour and salt together and add to creamed mixture. Add vanilla and blend throughly.

3. Form dough into a ball and wrap in plastic wrap. Chill 4 to 6 hours.

4. Pre-heat oven to 325F degrees. Line 2 large cookie sheets with parchment paper, or spray with non-stick cooking spray.

5. Roll out chilled dough to approximately 1/4- inch thickness. Using cookie cutters, cut dough into desired shapes. Carefully transfer to cookie sheets with a spatula. Decorate with sprinkles if desired.

6. Bake for 15-18 minutes, until they just start to turn light brown.

7. Cool on baking sheet for 5 minutes, then transfer to a rack with a spatual to cool completely. Ice and decorate as desired.

Yield: Approximately 2 dozen cookies

Hints and Tips for Perfect Sugar Cookies

Lightly spray cookie sheets with water before laying down parchment paper. This will help keep the paper in place, and secure the cookies on the baking sheet. You can buy empty plastic bottles at the dollar store or any hardware store. Never use a bottle that held chemicals.


To easily roll out your dough, place between two sheets of plastic wrap before rolling out. If you have a metal rolling pin, chill before using. If your dough gets too "mushy", chill a metal cookie sheet and place on top of dough for a few seconds to harden.


Dip your cookie cutters in gluten free flour or cornstarch before cutting to keep them from sticking to the dough, and help to keep the desired shape of your cookies.


Use a spatula to transfer shapes to cookie sheet and don't overcrowd. If you fill up your sheets, refrigerate dough until you are ready to make the next batch. You can find inexpensive cookie cutters at dollar and craft stores on sale.


Have on hand a variety of sprinkles, chocolate chips and dragees to decorate your cookies. Betty Crocker and Wilton both make cake decorating items that are gluten free. Remember this endeavor is messy, but it can all be cleaned up with the vacuum at the end of the day.

Store finished cookies in airtight containers, or freeze in ziploc bags up to 3 months.


Thursday, December 24, 2009

Party Planning


BS"D

This morning the girls were setting up a pretend birthday party in their playroom. They laid out plastic play cups and plates, Lillie donned a birthday crown, and as far as I could tell Daisie was the only guest. I overheard Rosie tell Lillie that the cupcakes were gluten and allergic for her. Lillie responded that at this party noone is allergic to anything. I thought it was bittersweet. Cute in how even in play Rosie warned Lillie to be careful of the cupcakes, yet a bit sad that my girls could only eat whatever they want in pretend play.

In reality, one who has special dietary needs must be prepared for parties and celebrations. Our holiday season just ended, and for many around the world theirs is just beginning. I have a few strategies to help manage parties with your celiac or allergic child (or even yourself). But, above all your mantra needs to be "Be Prepared!"

1. Talk to your Host: Although it may be awkward to grill your host on what they are serving, it is necessary. I don't expect the host to prepare anything special for my children, but I do try and find out if there is anything they can eat. Recently, a very nice mother sat on the phone with me and read ingredient lists from items she planned to serve at her child's birthday party. I told her it wasn't necessary, but she very much wanted to provide food for Lillie.

2. Cross Contamination Conundrum: After ascertaining from your host whether or not your children will have something to eat at their home, you now have to explain that just because the food is gluten/allergy free doesn't mean they can put it in their mouth. You must explain the dangers of cross contamination, especially at a party when the food is often buffet style, and people may stick a serving spoon from permissible food into non-permissible food and back. Ask if they can take off your child's portion before the food even leaves the kitchen. I was very proud of Lillie when the mother of the birthday girl told me that Lillie said she didn't feel comfortable eating a certain snack even though she knew it was gluten free, because the children were sticking their hands in non-permissible food at the same time. The best thing you can do is prepare your children to advocate for themselves...you can't be there with them 24/7!

3. Pack a Lunch: There may not be food your children can eat at someone else's house, therefore you should pack them an appropriate meal and snack. I find it's always good to try and have your child's meal "fit in" with what the host is serving. This seems to foster a sense of inclusion. For a party last week, I spoke to the mother and found out what she was serving, then prepared a "corresponding" meal for Lillie. The other kids were having pasta, flavored potato chips and cake. So Lillie had gluten free pasta, plain potato chips and a gluten free cupcake. Her friends are used to her toting along food, and it's now basically non-issue. She came home talking excitedly about the games she played and a magic show, and not once mentioned the food.

4. Share a Dish: Ask the hostess if you can bring a main dish or dessert to the party that everyone can enjoy. This way your children will definitely have something to eat, and they won't feel "different". Gluten free lasagna is a good choice, as it is almost indiscernible from the wheat variety (I use Tinkyada brand noodles). Bring something that travels well, such as a casserole or salad. Pyrex makes a line of baking dishes that come with insulated carriers and hot/cold packs. They work beautifully and your dish can hit the table even without being heated up. The less it is "handled" the less risk you have for cross contamination. A plate of cookies or brownies is a good choice, as you avoid the need to use serving utensils. You don't have to worry about someone cutting into a glutenful cake and then using the same cake server for a gluten free cake.

Overall, you want to make the situation run as smoothly as possible for your child so they (and you) can enjoy the celebration! This means a bit of legwork on your part, but it is worthwhile in the end.


This versatile meatless recipe is from one of my favorite cookbooks, Vegetarian Pleasures by Jeanne Lemlin. It can be used either as a main course served with rice on the side or warm corn tortillas. Or, it makes a nice hot dip served with tortilla chips. The original recipe calls for dried beans and whole tomatoes, but why make your life hard, I substitute canned beans and diced tomatoes. The prep time is under 30 minutes with this simple sub.

Baked Mexican-style Beans with Sour Cream and Chilies
adapted from Vegetarian Pleasures by Jeanne Lemlin, p. 50


2 - 15 ounce cans kidney or pinto beans, rinsed and drained
2 Tablespoons olive oil
2 medium sized onions, diced
2 cloves garlic, minced
28- ounce can diced tomatoes
1 Tablespoon tomato paste
4 -ounce can mild green chilies, drained and diced (optional)
1/4 teaspoon dried oregano
1/2 teaspoon salt
Freshly ground black pepper to taste
1 cup sour cream or non-dairy sour cream substitute
2 cups grated (8 ounces) Monterey jack or cheddar cheese or non-dairy soy cheese

1. In a large pot, heat oil over medium heat. Add the onions and garlic and saute for 5 minutes. Add the tomatoes, tomato paste, chilies, oregano, salt and pepper, and raise the heat to high. Cook for five minutes. Add beans, lower heat and simmer for 15 minutes (at this point you can use the beans as a vegetarian chili if you wish).

2. Pre-heat oven 375 degrees. Put half of the bean mixture in a large casserole sprayed with non-stick cooking spray, cover with half of the sour cream and half of the cheese, add the remaining bean mixture, and top with sour cream and cheese.

3. Bake for 20-30 minutes, or until hot and bubbly.

Serves 4 as a main course

Wednesday, December 16, 2009

Generally Speaking


BS"D

I just received a great link to General Mills Live Gluten Freely site. It lists all the General Mills products (and there are many) that are gluten free. Although I realize the main motivation is sales, I still thank General Mills for providing this invaluable information. I wish more companies would jump on the bandwagon and provide clear nutritional information at the click of a mouse.

The list includes such products as Betty Crocker Gluten Free Baking Mixes, Fruit by the Foot and Chex cereals! The list is convenient and worth forwarding to friends and family who may be in a position to feed your gluten free child.

The site also includes some good recipes using General Mills products---of course.

Below is a recipe from the General Mills Live Gluten Freely website utilizing the fabulous Betty Crocker Gluten Free brownie mix

Turtle Brownies

------------------------------------
Prep Time: 20 Minutes
Total Time: 2 Hours
Makes: 16 Servings
------------------------------------

1 box Betty Crocker® Gluten Free brownie mix

Butter and eggs called for on brownie mix box
25 caramels, unwrapped
2 tablespoons whipping cream
1 teaspoon gluten-free vanilla
1 cup semisweet chocolate chips
1/2 cup coarsely chopped pecans
1. Heat oven to 350°F (325°F for dark or nonstick pan). Grease bottom of (8- or 9-inch) square pan. In medium bowl, stir together brownie mix, butter and eggs until blended. Spread 2/3 of batter in pan. Bake 10 minutes.
2. Meanwhile, in medium microwavable bowl, microwave caramels and whipping cream uncovered on High 1 to 2 minutes, stirring every 30 seconds, until smooth. Drizzle caramel evenly over partially baked brownie. Sprinkle with half the chocolate chips and half the pecans. Drop remaining brownie batter by small spoonfuls onto caramel layer. Sprinkle with remaining chocolate chips and pecans.Meanwhile, in medium microwavable bowl, microwave caramels and whipping cream uncovered on High 1 to 2 minutes, stirring every 30 seconds, until smooth. Drizzle caramel evenly over partially baked brownie. Sprinkle with half the chocolate chips and half the pecans. Drop remaining brownie batter by small spoonfuls onto caramel layer. Sprinkle with remaining chocolate chips and pecans.
3. Bake 20 to 25 minutes longer or until top of brownie looks dry. Cool completely before cutting. Cut into squares, 4 rows by 4 rows.

Thursday, December 10, 2009

Pancake Panache

BS"D

Last week Rosie's teacher told me she had refused to participate in a baking project that involved eggs. When the clever teacher realized what may be the problem, she asked Rosie if tomorrow they made a cake without eggs would she help? She said yes. Then on Shabbos she started pointing out to Lillie what she could not have because it contained gluten, such as the challah the rest of the family ate. This continued through the weekend with Rosie pointing out that Lillie could not have "her" pasta, even though Lillie had her own. I recognized what was happening. Rosie was only gaining self-awareness of her own allergies. However, Lillie did not recognize the same, and got angry and even physically lashed out at her, as she interpreted Rosie's remarks as teasing and taunting. I took Lillie aside and tried to explain what "going through a stage" meant, and that Rosie wasn't trying to be mean. But even for a bright 5 year old, there is just so much they understand.

I decided for dinner Sunday night we needed something everyone could eat. I also wanted to do something easy as I had been sick the previous week and felt sapped. I had a bag of Trader Joe's Gluten Free Pancake and Waffle Mix, a newer item in their store brand gluten free line, which I was anxious to try. All their gluten free products are delineated by a "g" symbol on the packaging. This definitely makes shopping easier. Having been in the store earlier in the day, I queried the manager whether he had a vegan pancake mix, but he only directed me towards the gluten free one!? Most pancake mixes call for milk, but the Trader Joe's Gluten Free mix specifically calls for rice milk or water. It also boasts it is wheat, peanut, tree nut, milk and dairy, soy and corn free. It does require 2 eggs though, which I substituted Ener-G Egg Replacer for Rosie's sake. The results were fine, although a bit flat. I attributed this to the lack of eggs which give pancakes a fluffy lift. I think a couple of pinches of baking powder would remedy the situation in the future. I felt good about serving this pancake mix to the whole family, as the ingredients are much healthier than your average glutenful pancake mix. Trader Joe's Gluten Free Pancake Mix definitely gets a thumbs up from my family. Lillie even ate seconds, something she usually never does!

Give the kids a few chocolate chips (Trader Joe's are the best!) to make faces or free form designs on the pancakes. Rosie's masterpiece...


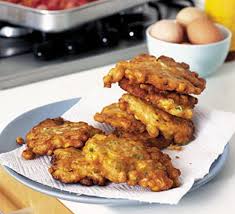
With Chanukah arriving tomorrow night, pancakes of the potato variety are on most people's minds. They are a boon to gluten free eaters, as they are basically naturally gluten free. Just substitute potato starch, rice flour, or any gluten free flour blend for the small amount of flour or matzo meal in most recipes. Since there are a gazillion potato latke recipes out there, I will spare you. Instead, I am providing a recipe for Thai Corn Pancakes. This is a popular street food in Thailand, and a colorful, flavorful packed addition to Chanukah celebrations.


Thai Corn Pancakes with Cilantro Mayonnaise
from Recipe Encyclopedia, Pub. Crescent Books, p. 307

2 cloves garlic
1 small red chili pepper
3/4 inch piece fresh ginger or 1/8 teaspoon ground, dried ginger
2 eggs or equivalent egg substitute
1/4 cup cornstarch
2 Tablespoons fresh cilantro leaves
fresh ground black pepper
1 Tablespoon sweet chili sauce
14 ounce can sweet corn kernels, drained
1 Tablespoon peanut or vegetable oil (more as needed for frying)

Cilantro Mayonnaise
2/3 cup mayonnaise or Nayonaise (a vegan mayonnaise substitute)
1/4 cup lime juice
1/3 cup cilantro leaves, chopped
8 scallions, finely chopped
freshly ground black pepper to taste

1. Coarsely chop the garlic; chop the chili pepper and ginger. Place the eggs, cornstarch, cilantro leaves, garlic, chili, ginger, pepper, chili sauce and half the corn in a food processor. Process in short bursts for 30 seconds or until smooth. Transfer to a bowl and fold in remaining corn.

2. Heat the oil in a large frying pan. Spoon 2 Tablespoons of the corn mixture into a frying pan (repeat leaving 1 inch between pancakes) and cook over medium heat for 2-3 minutes or until golden. Turn over and cook the second side for 1-2 minutes or until the pancakes are cooked through. Repeat the process until all the mixture is used. Drain pancakes on a paper towel.

3. To make the Cilantro Mayonnaise: Combine the mayonnaise, lime juice, cilantro and scallions in a bowl. Mix well. Add pepper to taste. Serve the pancakes hot or cool with a dollop of Cilantro Mayonnaise.

Serves: 6

Sunday, November 29, 2009

Thanksgiving Dinner in 30 minutes...or less!


BS"D

After 82 years of travelling the same route down Broadway, the Macy's Thanksgiving Day Parade changed it's path. This was a well coordinated change on their part, choosing the most optimal route for maximal enjoyment by spectators. We don't all have the benefit of well planned changes, sometimes they are sudden and not so pleasurable. So it was this past week when Rosie fell ill with swine flu, the next day Lillie was diagnosed with strep throat, and the next Hubby and Daisie came down with bad colds. I knew attending my family's annual Thanksgiving extravaganza was completely out of the question.


I felt somewhat bereft at the thought of missing our annual family get together. It was the only day in the entire year my whole family manages to get together, if only for a few hours. My mother fusses over her menu with me on the phone, making sure there are choices for Lillie and Rosie's special dietary needs. "No, " I tell my mother, "you don't have to make gluten free stuffing...I'm sure Lillie won't eat it anyway." No matter how hard I try to convince my mother not to make the Sweet Potato Pineapple Puffs they always seem to end up on the table. The week of Thanksgiving my mother times her cooking schedule down to the minute. The golden crusted franks-in- blankets and mini-knishes are pulled from the oven as the first grandchild crosses the threshold. That is what I missed this year.

As for me, I was rushed off my feet this week, bleary eyed as if I had a newborn infant in the house. My sleep was not restful as a feverish children (or husband) woke me up at midnight or 3 a.m. for more Tylenol. My house ran like a hospital ward for several days, and I was the head nurse. I graphed temperatures and medicine dosages on a legal pad. One hand constantly flying to people's foreheads to see if the cursed fever had broken, the other to the tissue box. Needless to say, a turkey dinner with all the trimmings was not in my scope this year. But as the day neared I felt we should carry on that great American tradition of eating turkey on the last Thursday in November, simply because we are Americans. Even though, when asked most people will sheepishly admit they don't really like turkey. The week prior I stood talking to me neighbor as she unloaded our kids from carpool debating whether or not to get my "free" turkey which the supermarket gave out to customers who had spent a certain amount the prior month. "Yeah, " she said, "I don't really want mine either, we don't really like turkey. But it's free." And there's the rub, it's free! I would be a fool to turn down 20 lbs. of free meat. And that is why I always have a turkey hibernating in my freezer over the winter months, until I decided to finally cook it or throw it out in the midst of Passover cleaning. Several years ago I switched over to getting just a turkey breast after a particularly disastrous episode involving a too small roasting pan and a large Turkey prepared too close to the start of Shabbos.

After getting over my turkey trauma and getting just the breast one year (which is infinitely more manageable to cook) I found it came out delicious in the crock pot. The meat becomes incredibly moist, and most of the traditional accompaniments (carrots, potatoes and turnips) can be prepared in the crock pot as well. This year I decided I would go the crock pot route as my day was hectic. I could pop the bird into the pot in the morning and forget about it until dinner time. This was my kind of Thanksgiving prep. So in the end we did sit down to a Thanksgiving meal. Infinitely simpler than the one eaten by my extended family, but it retained the spirit of the day--even without the sweet potato pineapple puffs!

This recipe can easily be prepared either in the crock pot or in an oven cooking bag. Either way, you don't need to baste or tend to the turkey as it cooks. Toss a few whole sweet potatoes (pierced with a fork) in a 400 degree oven for 1 hour, and you have a meal!

Crock pot Turkey
(or Thanksgiving in a pot)

2 cups baby carrots
6 new potatoes, scrubbed and halved

1 cup chicken broth or stock

1 medium sized frozen turkey breast roast (bone in)
, thawed
2 medium onions, peeled

black pepper to taste

1/4 cup orange juice

3 Tablespoons maple syrup

1 Tablespoon fresh ground ginger root or 1 teaspoon dried ground ginger


Place potatoes and carrots in bottom of crock pot, pour chicken broth over all. Remove turkey breast from wrappers and cut off excess fat. Rinse inside and out with cold water. Place onions in cavity of turkey and place breast side down in crock pot (depending on size of crock pot, you may have to position your turkey breast vertically). Sprinkle with black pepper.

In a small bowl, stir together remaining ingredients and pour over turkey. Cook on Low setting for 6 hours, or until turkey reaches 180 degrees with a meat thermometer.

To prepare in an oven bag: Using a large oven bag, such as Reynold's brand, shake 1 Tablespoon of corn or potato starch inside the bag. Prepare turkey as above, inserting ingredients in bag placed in a large baking pan, instead of crock pot. Tie end and make 6-inch sized slits in bags. Cook in 350 degree oven for 2 1/2 hours, or until meat thermometer reaches 180 degrees. Allow to "rest" 15-20 minutes before slicing.


Easy Turkey Gravy

Pan drippings
1 Tablespoon corn starch

fresh ground black pepper to taste

Ladle pan drippings into a small saucepan*. Set over a low flame and whisk in corn starch. Continue whisking several minutes until gravy has thickened. Stir in pepper and allow to simmer 3-5 minutes.

*Note: If you prepare your turkey in an oven bag, my little secret is to hold bag over the saucepan, snip one corner and allow the liquid to pour into the pan while holding back the solid material.


If you want an easy, gluten free alternative to stuffing, try this buckwheat recipe from one of my favorite cookbooks, Vegetarian Pleasures by Jeanne Lemlin (p. 88).


Kasha Pilaf

1 Tablespoon Margarine (or Olive Oil)
8 ounces mushrooms, quartered (3 cups)
1 medium-size onion, minced

1 1/4 cups kasha (medium granulation buckwheat groats)

1 egg or equivalent egg substitute (such as Ener-G Egg Replacer)

2 1/4 cups hot vegetable or chicken stock

1/4 teaspoon salt


1. Melt Margarine in a small skillet over medium heat. Add the mushrooms and onion, and cook until the mushrooms are brown and tender, about 10 minutes.


2. Mix the kasha and egg together in a medium-size saucepan, and stir briskly over low heat until all of the kasha is coated with the egg. Turn the heat to medium and "toast" the kasha by stirring constantly until the grains are dry and separate, about 3 minutes.


3. Add the mushrooms and onion and toss. Add the vegetable stock and salt, and cover the pan. Simmer for 10 minutes, or until all of the liquid is absorbed. Fluff with a fork before serving.


Serves 4


As for the Sweet Potato Pineapple Puffs, the recipe can be found on page 286 of the Spice and Spirit Cookbook.


Sunday, November 22, 2009

Catch Up with Ketchup


BS"D

I am a member of a great e-mail list that services the area in which I live. It provides updates on stores and restaurants that have gluten free products, as well as general helpful information. This week the e-mail came through with a complete list of Heinz products that are gluten free. One of the member's of the e-mail list made an inquiry to the Heinz corporation, and passed the information on in the weekly e-mail. So, I am passing it on to you, my good reader, to save you an annoying phone call with yet another customer service rep. who asks you tons of personal information short of your cat's name.


HEINZ PRODUCTS NOT CONTAINING GLUTEN:
Heinz BBQ Sauces (Original, Chicken & Rib, Garlic, Honey Garlic Only)
Heinz Chili Sauce
Heinz Cocktail Sauce
Heinz Horseradish Sauce
Heinz Ketchup
Heinz Organic Ketchup
Heinz Reduced Sugar Ketchup
Heinz No-Sodium Added Ketchup
Heinz Hot & Spicy Ketchup
Heinz Mustard (All Varieties)
Heinz Pickles (All Varieties)
Heinz Peppers (All Varieties)
Heinz Relish (All Varieties)
Heinz Sloppy Joe Sauce
Heinz Tartar Sauce
Heinz Traditional Steak Sauce
Heinz Worcestershire Sauce
Heinz Vegetarian Beans
Heinz Distilled White Vinegar
Heinz Red Wine Vinegar
Heinz Apple Cider Vinegar
Heinz Apple Cider Flavored Vinegar
Heinz Red Wine Vinegar
Heinz Garlic Wine Vinegar
Jack Daniel's BBQ Sauces (Original #7, Honey Smokehouse, Hickory Brown
Sugar, Spicy BBQ Only)
Jack Daniel's EZ Marinader -- Teriyaki Variety
Jack Daniel's EZ Marinader -- Garlic & Herb Variety
Jack Daniel's Steak Sauce (Both Varieties)
Lea & Perrins Worcestershire Sauce
Lea & Perrins Traditional Steak Sauce
TGI Fridays Salsa (All Varieties)

Current as of October 2009
Heinzconsumeraffairs@us.hjheinz.com


The corporation also provided an easy Barbecue sauce recipe using some of the ingredients above. You can prepare it in large batches and can or freeze it for later use and added convenience.

Heinz Ketchup Basic Barbecue Sauce

1/2 cup Heinz Tomato Ketchup
1/4 cup water
2 tablespoons brown sugar
2 tablespoons Heinz Apple Cider Vinegar
2 tablespoons Worcestershire Sauce*
1 teaspoon chili powder
1/2 teaspoon celery seed
1/2 teaspoon salt
1/4 teaspoon hot pepper sauce

In saucepan, combine all ingredients.
Simmer, uncovered, 10 minutes.
Brush ribs or chicken with sauce during last 10 minutes of grilling or
broiling.

Makes about ¾ cup of sauce.

*For use with meat, make sure Worcestershire sauce does not contain any fish products.


Wednesday, November 18, 2009

Is Better Batter Better?


BS"D

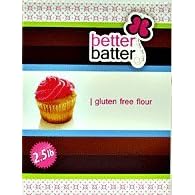
The challah trials (and tribulations) continue at our house. For several months, I have been using Bob's Red Mill GF Homemade Wonderful Bread Mix with chocolate chips on top, for added appeal, for Lillie's challah. It was passable. She tended to eat the chips off the top, and about half a muffin. As far as affordability, one packet of mix (about $5) yielded enough muffin size challah rolls to last me a month (I use 3 per Shabbos). But, there was always an unappealing sliminess (sorry Bob that's the only way I can describe it) in the mouthfeel of these rolls. Then a product crossed my radar called Better Batter. The product is a blend of rice flour, brown rice flour, tapioca starch, potato starch, potato flour, pectin and xanthan gum. It differed from my standing favorite flour blend, Jules Gluten Free All Purpose Flour, in that it contained brown rice, as well as white rice flour (Jules also uses corn flour). In certain applications, I felt the Jules flour did not have enough structure and was too delicate for certain applications (those Souther Belles!). So I set out to see if Better Batter is better.


The flour is sold both online and in health food stores. Their website offers numerous recipes, including many vegan options. The fact that the flour could be used in eggless, dairyless recipes has particular appeal to me, as I can make one baked good for the entire family instead of gluten free items that contained eggs and egg less items that contained wheat flour. Better Batter wasn't available in any store near my home, so I ordered a 5 lb. box online (I was optimistic). It is also available in 2.5 lb. and 25 lb. boxes and cases. The company also sells pancake and brownie mixes. The shipping and handling charge was a bit off putting when I calculated the value of the product versus those available in the supermarket, or Jules' flour--which often has free shipping deals. But if Better Batter is ordered by the case (which is only 4 boxes), it actually works out cheaper than Jules'. I inquired at my local health food store if they can give me a case discount, and they said they would and looked into ordering the product. It pays to ask!
When the very chic pink and brown box arrived, I decided to put it to the test according to the instructions on the back. For yeast breads (loaf), it instructs you to double the liquid in the regular recipe, and for shaped yeast breads, halve the liquid. Since I wouldn't be shaping my challah, I went with the doubling method. I decided to use my standard, white flour, egg challah recipe from The Taste of Shabbos. When I opened the Better Batter I noticed it was closer in texture to wheat flour than Jules Gluten Free All Purpose Flour, which resembles more a fine powder (not surprising since the first 3 ingredients are tapioca, potato and corn starch). It also looked more like real flour; I attribute this to the brown rice flour, which adds some appealing tannish flecks to the blend. In addition, the smell was similar to wheat flour. I was cautiously optimistic. I loaded the ingredients into my special-reserved-only-for-gluten-free-flour bread machine and set it on the dough cycle. I looked in the window after a few minutes and noticed it seemed a bit too dry. I pondered whether it was the flour blend or me. Hmmm. Then I realized when the box said "double the liquid", they didn't just mean the water in the recipe. The challah recipe also contains oil and eggs---both liquids. I added a bit more water and oil and set the bread machine in motion once again. The result was a nice fluffy batter which I spooned into oiled muffin cups. One batch yielded18 muffin sized rolls. Enough for 6 weeks. In terms of economy, Better Batter was shaping up to be as good, if not better than Bob's bread mix. But, the proof is in the pudding. If the baked good tastes awful, economy goes out the window (or in the trash can).

The challah came out nice and fluffy, with a light golden crust. I popped a barely cooled roll out of the muffin tin and tasted it with some jam (Trader Joe's makes the best). It was delicious! Whoopie! The texture straight out of the oven was just like a baking soda biscuit. The roll of course lacked the chewiness of wheat bread, but that is the case with all gluten free bread. It is the strands of gluten which are created in the kneading process that lend chewiness to wheat bread. This challah was more like a not too sweet muffin. When I gave it the ultimate test (Lillie), it passed with flying colors. Even without chocolate chips, Lillie munched through the entire roll and uttered an "Hmmm, good!" So, I knew I had a new challah recipe (an unslimy one to boot)!


The next, and ultimate in my opinion, litmus test was Rosie's favorite chocolate chip cook recipe. If Better Batter could hold up in an eggless recipe, I knew it was a keeper. It passed with flying colors. In comparison to Jules Gluten Free All Purpose Flour, Better Batter held together, well, better. Without eggs as a binder, and without gluten to similarly bind the batter, gluten free baking can be tricky. But I found the Better Batter yielded a soft, chewy cookie that didn't fall apart.


Lately, I seem to breathe a sigh of relief when I find a gluten free product I can "settle on". That is, the end of the road, so to speak, in my search for the perfect pasta, challah, cake mix, etc. With so many balls in the air in my daily life, it's one less thing I have to worry about. So finding "go to" products is a big relief.

I definitely intend to use Better Batter in more of my baking; I will probably order a case next time. As for Jules, I am not tossing her aside entirely. Jules Gluten Free All Purpose Flour will be like my cake flour. The more delicate texture is perfect for cakes and shortbread cookies. The wonderful thing about gluten free baking is there is room for so many different flours. Like a family, they each have their own unique qualities and talents!


This challah recipe tastes best when warmed before eating. I wrap the individual rolls in foil, and store them in a Ziploc bag in my freezer. I thaw and heat as needed. The Better Batter website also offers a braided challah recipe.

Always Successful Challah
from The Taste of Shabbos, p. 3

4 1/2 cups of Better Batter Gluten Free Flour
1/2 cup sugar
1/2 Tablespoon salt
1 packet dry yeast
2 cups warm water (more as needed)
1/3 cup oil
3 large eggs (plus 1 for egg wash, if desired)

Add ingredients to breadmaker according to manufacturer's instructions.

Set breadmaker to dough cycle. If dough appears too dry after first mixing, stop machine and add additional water.

Pre-heat oven to 350F degrees. Spray two muffin pans or 2 medium sized loaf pans with non-stick cooking spray.

When cycle is complete, scoop batter into prepared baking pans. Beat egg with 2 teaspoons of water. Brush top of batter with egg wash. Bake in pre-heated oven for 20-30 minutes for muffin pans and 30-40 minutes for loaf pans. Remove from oven when top of bread is a light golden brown. Cool on racks.

Store tightly covered in the freezer if not using immediately. Heat in a 225F degree oven for 10 minutes prior to serving.