Monday, December 3, 2012

What to give? What to give?

BS"D

 This time of year, people sit down with a pad and pencil and then tap their pencil on the side of their head racking their brains for what to buy loved ones for holiday gifts. Scanning the myriad glossy ads for Black Friday I noticed the same old things ("mittens again, how nice" yawn), coupled with novelty items that seem cool but really end up taking up space, and are an unneeded expense (how often will you use a home cotton candy maker? Really?!). New books are fresh and interesting. New cookbooks are useful. In addition, they are often glossy and appealing. I find people on specialty diets, like gluten and allergy-free are always looking for new and exciting recipes. In the coming weeks, I hope to review some great new cookbooks that make wonderful holiday gifts. If you want to push your gift over the top, prepare one of the dishes in the book and present it on a nice new platter or baking pan for the recipient to keep. I guarantee you it will be appreciated.

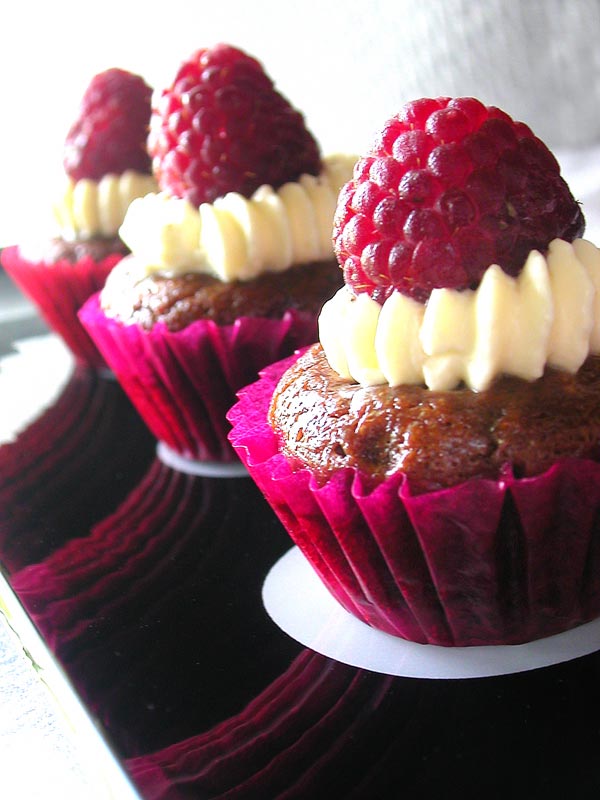
I revisit the Twinkie controversy to review my first book, Real Snacks by Lara Ferroni. As Americans sit biting their nails over whether they will be able to buy classic snack cakes ever again, you can prepare them at home, and make them gluten free and vegan! Once again the ever considerate Lara Ferroni, author of another favorite of mine, Doughnuts, has included gluten-free and vegan (no eggs, no dairy) substitutions for her recipes. How great is that! Ferroni's book covers popular American snacks savory to sweet that are normally purchased. The subheading on her book states, "make your childhood treats without all the junk", sounds good to me. From the goldfish crackers to the Hostess style cupcakes on the cover, she does quite a comprehensive job of covering all the biggies. Being a food photographer, Ferroni's photos in Real Snacks, are top notch, style wise, and mouth watering, stomach wise. You can purchase a Twinkie mold baking pan , or you can create your own molds out of aluminum foil and a spice jar as in Todd Wilbur's video.


 Vanilla Snack Cakes
from Real Snacks by Lara Ferroni, p.p. 5-6, 140
Ingredients:


    3/4 cup (90 grams) gluten-free all-purpose baking mix.
    1/4 cup (30 grams) ground millet
    1 teaspoon baking powder
    1/2 teaspoon salt
    4 egg whites
    1/3 cup (66 grams) cane sugar
    2 tablespoons honey
    1/4 cup (2 ounces) water
    2 tablespoons safflower oil
    4 egg yolks
    1 teaspoon vanilla extract
    1 batch (about 1 cup) Snack Cake Crème
Preparation:

Preheat the oven to 350°F and lightly grease a canoe-style snack cake pan. If you don't have a snack cake pan, you can use 4-ounce loaf pans. Alternatively, create your own molds out of foil by shaping double thicknesses of aluminum foil around a spice bottle and setting the individual foil pieces next to each other in a cake pan.

Sift the all purpose baking mix, ground millet flour, baking powder, and salt together and set aside.

In a dry mixer bowl with dry beaters, beat the egg whites until stiff, about 2 minutes. Transfer the beaten egg whites to a clean bowl and set aside.

In the same mixer bowl, add the sugar, honey, water, oil, egg yolks, and vanilla and beat for 1 minute. Add the flour mixture and beat until smooth, about 2 minutes. Fold in half of the beaten egg whites; once the first half is fully incorporated, fold in the second half.

Pour the batter into the prepared molds, filling them 2/3 of the way full. Bake until golden, 15 to 20 minutes, rotating the pans halfway through baking. Cool the cakes in the pan for at least 20 minutes, then remove to a wire rack and cool completely before filling with the Snack Cake Crème.

To fill the cakes, use a skewer or chopstick to poke 2 holes partially through the snack cake from the bottom, and wiggle around to hollow out some space. Use a piping bag fitted with a Bismarck (#230) tip or a very small star-shaped tip to fill the cake with the Snack Cake Crème.

To make raspberry snack cakes, make the snack cakes as directed. Coat each filled snack cake with raspberry jam and dust with shredded coconut. They will be sticky and delicious.

Or for Chocolate-Coated Snack Cakes, try dipping your snack cakes in melted chocolate (Chocodiles anyone?!).

Filling:

2 tablespoons ground millet flour
1/2 cup milk
1/2 cup (100 grams) cane sugar
1/2 teaspoon vanilla extract
4 tablespoons (1/2 stick) unsalted butter, cut into pieces
4 tablespoons coconut oil
Dash of salt (optional)

Combine the flour and milk in a saucepan over medium heat to form a thin, pale paste, about 4 to 5 minutes, stirring constantly. Be careful not to brown the roux. Stir in the sugar and continue to cook until smooth, about 2 to 3 minutes. Remove from the heat and stir in the vanilla. Cover and refrigerate to cool completely.

In the bowl of a stand mixer fitted with the whisk attachment, whisk the butter and coconut oil until light, about 1 minute. Add the cooled flour paste and beat until creamy, about 5 minutes. Store in an airtight container at room temperature for up to 2 days.

For vegan Snack Cake Crème, replace the milk with an equal amount of rice milk and the butter with an equal amount of coconut oil.

Yield: 8 large


I have made the appropriate substitutions for gluten free. Ingredients 3/4 cup (90 grams) white spelt or all-purpose flour 1/4 cup (30 grams) ground millet or cake flour 1 teaspoon baking powder 1/2 teaspoon salt 4 egg whites 1/3 cup (66 grams) cane sugar 2 tablespoons honey 1/4 cup (2 ounces) water 2 tablespoons safflower oil 4 egg yolks 1 teaspoon vanilla extract 1 batch (about 1 cup) Snack Cake Crème print a shopping list for this recipe Preparation Preheat the oven to 350°F and lightly grease a canoe-style snack cake pan. If you don't have a snack cake pan, you can use 4-ounce loaf pans. Alternatively, create your own molds out of foil by shaping double thicknesses of aluminum foil around a spice bottle and setting the individual foil pieces next to each other in a cake pan. Sift the spelt flour, ground millet flour, baking powder, and salt together and set aside. In a dry mixer bowl with dry beaters, beat the egg whites until stiff, about 2 minutes. Transfer the beaten egg whites to a clean bowl and set aside. In the same mixer bowl, add the sugar, honey, water, oil, egg yolks, and vanilla and beat for 1 minute. Add the flour mixture and beat until smooth, about 2 minutes. Fold in half of the beaten egg whites; once the first half is fully incorporated, fold in the second half. Pour the batter into the prepared molds, filling them 2/3 of the way full. Bake until golden, 15 to 20 minutes, rotating the pans halfway through baking. Cool the cakes in the pan for at least 20 minutes, then remove to a wire rack and cool completely before filling with the Snack Cake Crème. To fill the cakes, use a skewer or chopstick to poke 2 holes partially through the snack cake from the bottom, and wiggle around to hollow out some space. Use a piping bag fitted with a Bismarck (#230) tip or a very small star-shaped tip to fill the cake with the Snack Cake Crème. To make raspberry snack cakes, make the snack cakes as directed. Coat each filled snack cake with raspberry jam and dust with shredded coconut. They will be sticky and delicious. Or for Chocolate-Coated Snack Cakes, try dipping your snack cakes in melted chocolate. For gluten-free Vanilla Snack Cakes, replace the white spelt flour with an equal amount of gluten-free all-purpose baking mix. Filling: 2 tablespoons white spelt or ground millet flour 1/2 cup milk 1/2 cup (100 grams) cane sugar 1/2 teaspoon vanilla extract 4 tablespoons (1/2 stick) unsalted butter, cut into pieces 4 tablespoons coconut oil Dash of salt (optional) Combine the flour and milk in a saucepan over medium heat to form a thin, pale paste, about 4 to 5 minutes, stirring constantly. Be careful not to brown the roux. Stir in the sugar and continue to cook until smooth, about 2 to 3 minutes. Remove from the heat and stir in the vanilla. Cover and refrigerate to cool completely. In the bowl of a stand mixer fitted with the whisk attachment, whisk the butter and coconut oil until light, about 1 minute. Add the cooled flour paste and beat until creamy, about 5 minutes. Store in an airtight container at room temperature for up to 2 days. For gluten-free Snack Cake Crème, use the ground millet flour instead of the white spelt. For vegan Snack Cake Crème, replace the milk with an equal amount of rice milk and the butter with an equal amount of coconut oil. Yield: 8 large

Monday, November 19, 2012

R.I.P. Twinkie

BS"D

Big News!!! Hostess to cease producing Twinkies (and other beloved snack cakes). For those who eat gluten free, we said goodbye to Mr. (or is it Ms.?) Twinkie long ago.  But this week at the Kosherfest trade show in Secaucus, NJ, I received the good news that Shabtai Gourmet, a gluten and peanut free company,  is going to begin producing gluten free Twinkie-like snack cakes. Adding to their amazing repertoire of Ring Ding and Yodel-like cakes.  You can soon enjoy this iconic American treat even if you are gluten free (and they are also kosher for Passover).

Other great products tasted at the show include a truly outstanding gluten free (and kosher for Passover) baguette by Eytan gourmet. A number of years ago I became smitten with their outstanding gluten free brownies, and hope to buy their breads soon.

Another interesting baked good company at the show was My Dad's Cookies, which offered a selection of bakery style gluten free cookies, including black and whites, linzer tarts, and a Milano-style cookie. They really looked like the "real" thing.

Manischewitz has expanded their gluten free offerings and has come out with red velvet macaroons to add to their myriad of flavors. They have a macaroon mix wherein you can make your own macaroons at home. I saw the potential in this product to be used for a crust for pies or cheesecakes.  Experiment, I'm sure you will find many new uses for this new product.


My all time favorite of the show this year were Naturale-Boon, high end chocolates from Australia, available online in the U.S. They are available in pareve (non-dairy) and dairy varieties, and are as beautiful as they are delicious. Their homemade caramels are buttery and out of this world! In addition, Boon puts out a soy chocolate milk that reminded me of Yoohoo in glass bottles.
BOON Chocolates
For a quick fix on the go, there are The Simply Bars. Low calorie, vegan, gluten free and kosher. Need I say more.

I love the brown rice that's precooked and in individual bowls by Minsley. I buy them at Costco. Now I discovered they also make quinoa in the same sort of packaging. What a great idea for lunches at school or the office. You can have it with a salad, or bring a leftover piece of chicken, fish and veggies to mix in with the ready to serve quinoa.
This year for Thanksgiving, I decided to make a stuffing themed quinoa salad. It can be served warm in lieu of stuffing, but I prefer quinoa cold. If you want a great bread stuffing, I suggest using cubed gluten free hot dog buns, as they have the most crust surface area and hold up better in a stuffing than sliced gluten free bread.

Festival Fall Quinoa Salad or "Squiffing"

2 cups prepared quinoa (1 cup raw), cooled
1/2-3/4 cup dried cranberries
1/2 cup chopped dried apricots or apples
1/2 cup chopped pecans, toasted*
2 stalks scallions, finely chopped

Dressing:
1/3 cup olive oil
3 Tbsp. apple cider vinegar
1 teaspoon dijon mustard, optional
2 Tbsp. honey
salt and pepper to taste

In a large bowl, gently mix together salad ingredients.

In a small bowl, whisk together dressing ingredients. Pour over salad. Toss well to coat. 

Cover and chill until ready to use. May be prepared up to 2 days in advance.

Serves: 6-8


*To toast nuts: Spread out in  a single layer on a baking sheet. Bake at 350F degrees for 6-8 minutes, turning several times. Allow to cool.

Wednesday, September 12, 2012

Sugar, sugar....honey, honey

BS"D

Sometimes experiences in life are sweet like honey, and sometimes they are salty.  At Rosh Hashana, we eat honey and other sweet dishes as "good luck" for a sweet new year. Apples in honey, honey cake, honey cookies and tzimmes with a drizzle of the sweet stuff are common.

I came across a recipe for honey candy which mimics a European honey (miele) candy I tasted years ago-- hard on the outside, a gooey burst of honey inside. Pure flavor, not artificial. I thought it would be a neat project with the kids before rosh hashanah. They MUST be kept away from the boilng honey/sugar-- that is non-negotiable. I wouldn't want this sweet situation to turn into a salty one! But, they can stretch and roll the cooled candy, and little hands are good for wrapping the candy to give to friends and family for a sweet and happy new year.

May you all enjoy a shana tovah u'metukah, a sweet and happy new year!


Honey Candy
from Make the Bread, Buy the Butter, p. 160-161

Butter or margarine, for the pan and your hands
1 cup honey
1 cup sugar

1. Generously butter a 9x13-inch metal baking pan.

2. Pour the sugar and honey into a heavy-bottomed saucepan. Over high heat, bring to a boil. No need to stir. Let the mixture boil until it registers 300 degrees F on a candy thermometer, at which time it will appear to be nothing but a mass of frothy golden bubbles. Immediately pour the hot mixture into the greased pan.

3. Let it cool just enough that you can handle--about 10 minutes. It should be quite warm and malleable. Butter your hands well, and keep a little butter ready to re-grease as necessary.  Scoop the mass of warm honey into your hands and begin to stretch and fold it. Stretch and fold the candy and and watch as it turns pale and begin to glisten.  It should be a light golden color. Keep stretching and pulling until the candy is cool and starts to stiffen.

4. You must work quickly on this step. Working on a non-stick cutting board, silipat or clean counter, roll the honey mixture into skinny rope, 4 to 5 feet long (or divide into 5 pieces and create 1 foot long ropes). With a scissors or a sharp knife, snip rope into 3/4-inch long pieces.  Let cool completely.

5. Store in a cookie tin or plastic storage container--make sure unwrapped pieces don't touch each other (unless you want a really BIG piece of candy). Or wrap in small squares of waked paper.  The candy gets sticky after a few days.

Yield: About 80 pieces of candy


Tuesday, August 7, 2012

If you can't take the heat, get out of the kitchen!

BS"D


In the good ol' summertime I find people don't want to spend a lot of time in the kitchen. But for those of us who have to get food on the table for a family and "convenience" foods aren't so convenient due to food allergies/sensitivities, we need ideas for fuss free meals. I find grilling a great option.  So we've been grilling a few times a week this summer. But how do you beat the boredom of burgers and hot dogs all the time without a big fuss? For me it was learning the proper technique for making barbecued chicken. I grew up knowing that barbecued chicken meant a piece of meat charred black on the outside and near raw in the middle. But thanks to Cook's Country magazine I have learned the technique of cooking grilled chicken in indirect heat. What that means is having one burner on higher heat, usually the middle burner, and the side burners on low, then cooking the chicken on low. I've done it with whole chickens, "beer can" style, chicken pieces, and now a butterflied chicken. I've also learned that barbecued chicken doesn't have to mean a drippy, sweet sauce. After discovering the flavorful, crispy skinned wonders of the dry rub I was hooked.


Last night I made an herb rubbed chicken (with oil, so technically not a dry rub), that I prepped in the morning and let sit all day to marinate. When I ran in with the kids close to dinnertime,  I just fired up the grill and popped on the chicken, no muss, no fuss. With this technique there's not much to tending the chicken either, just pop, on close lid and turn after an hour. The result was the moistest barbecue chicken with the crispiest skin I ever had. My husband told me that it was on par with the chicken served at our favorite steakhouse. I was swooning!


I "eyeball" the amounts for the rub on this recipe, so you can add a bit more or less of the spices you like. Try other flavor combinations like Cajun, Indian, hot n' spicy or herbs d'provence. Fresh herbs may be used instead of dry.

Grilled Olive Oil and Herb Chicken


1 whole chicken, medium size 
1/4 cup olive oil
Juice of 1 lemon
2 Tablespoons honey
2 garlic cloves, pressed
2 Tablespoon dried rosemary
1 1/2 teaspoons dried thyme
1/2 teaspoon dried basil 
1/2 teaspoon onion powdersalt and black pepper to taste
 
Rinse and pat dry chicken. With kitchen shears or a sharp knife, cut chicken along back bone. Lay chicken flat and press down on breast bones to flatten more.

Mix together remaining ingredients in a small bowl. Rub spice mixture all over chicken, inside and out. Place chicken in a 1-gallon zip top plastic bag. Refrigerate for 4-8 hours.
Heat all burners on gas grill on high for 15 minutes. For one chicken, turn 1 burner on the end to low, the one next to it to medium and all other burners off. If you are grilling two chickens on a 3 burner grill, leave middle burner on medium, and side burners on low. You must maintain a grill heat of 350-375F degrees with lid closed, so you may have to reduce medium burner as well.
Place chicken skin side down over the low burner side of grill with legs closer to the medium burner. Close lid. Grill for about 1 hour, or until the thigh meat is 160F degrees. Flip chicken over and put over medium burner for 10-15 minutes. When done, thigh meat should register 175F degrees, and breast meat should be 160F degrees. Transfer to a tray and tent with aluminum foil. Allow to rest 15 minutes. Cut into pieces and serve warm.

Yield: 4-6 servings


For an easy and elegant "no bake" dessert, try this chocolate pie which comes together in about 15 minutes. You can use ready made whipped topping, or serve with a scoop of vanilla ice cream to cut the richness of the pie.

Vegan Mocha Truffle Pie

For crust:
2 dozen (approximately) gluten free cookies such as shortbread, grahams or sandwich cookies (I used 1 box of Jo-Sef brand Sandwich O's)
1/4 cup non-hydrogenated margarine (such as Earth Balance)

For filling:
1-14 ounce can coconut milk (not low fat)
10-12 ounce bag semi-sweet or bittersweet chocolate chips
1 1/2 Tablespoons granulated instant coffee powder
2 Tablespoons non-hydrogenated margarine (such as Earth Balance)
2-8 ounce containers non-dairy whipped topping (such as Rich's Whip or Mimic Creme)
1/2 teaspoon pure vanilla extract
Spray a 9-10-inch pie plate with non-stick cooking spray. Set aside.

In a food processor fitted with a knife blade, process cookies until fine crumbs form. In a medium sized microwave safe bowl, heat 1/4 cup margarine on high for 1-2 minutes, until melted. Pour cookie crumbs over margarine; stir together until crumbs are totally coated with margarine (you may use your impeccably clean hands for this). Place in refrigerator while preparing filling.

In a medium sized microwave safe bowl, combine coconut milk, chocolate, coffee powder and 2 Tablespoon margarine. Heat on high for 2-3 minutes. Stir until chocolate is completely melted. If chocolate retains its shape, return to microwave for 15 second intervals, stirring in between until melted. Stir until mixture appears silky and is completely combined with no streaks of white on surface of mixture. Allow to cool for 20 minutes.

Pour cooled chocolate mixture into pie crust. Cover with plastic wrap and refrigerate for 2 hours, or until firm. This may be done up to 3 days in advance.

In an electric mixture, beat together whipped topping and vanilla. With a rubber spatula, spread whipped topping over chilled pie, forming a mound in the middle. You may use half the amount of whipped topping for a flatter looking pie. Cover and keep refrigerated until ready to serve.

Optional garnish: Berries, chocolate curls or shavings, chocolate espresso beans,or dusting of cocoa powder.

Yield: 10 servings 

Monday, July 16, 2012

You scream, I scream, we all scream for.....

BS"D


You guessed it--ice cream!  As we are experiencing sub-tropical weather here in the northeast, we have been eating a lot of ice cream. When you look at the ingredient list, you may wrinkle your nose and say, "huh?" at the supposedly wholesome, all-American treat.  Do you really need mono and di-glycerides along with your double cone?   There is also the bigger issue of cross-contamination for those with food allergies/sensitivities,  as most companies offer cookie dough and nut flavored ice creams. Their equipment therefore is often not cleaned to the extent between runs of plain ice cream for those very sensitive. For Rosie, we have maybe one non-dairy, non-nut choice in the supermarket.  I do have to say that Turkey Hill and Klein's ice cream do an excellent job in providing allergen information on their web site or by phone.

 
I received an ice cream maker as a wedding present. I had grandiose ideas when I registered for it, however it's mainly taken up space in my cabinet. But I decided to put it to use last week and make a homemade, non-dairy ice cream.  I think it will be seeing a lot more daylight from now on.  If you don't have an ice cream maker, don't despair though. Click on this amazing recipe for ice cream that's so deep and rich without a machine. It's also very easy for kids to make  .


You can add different mix-ins and extracts as per your individual tastes. Try crushed gluten-free sandwich cookies or a half teaspoon peppermint extract instead of vanilla.

Chocolate-Chocolate Chip Vegan Ice Cream
8 ounces bittersweet or semi-sweet chocolate morsels
1 Tablespoon non-hydrogenated margarine
1 can (8-ounces) coconut milk (canned, not light variety), refrigerated 8 hours to overnight
¼ cup blue agave nectar
1 teaspoon vanilla extract
pinch of salt
1 pint (2 cups) soy cream (I used Trader Joe's brand) or Mimic cream or Rich's Whip, chilled
¼ cup chopped chocolate bar or mini-chocolate chips (I used an Enjoy Life boom-Choco-boom Bar)

In a medium sized microwave safe bowl combine chocolate and margarine. Microwave on high for 2 minutes. Stir until chocolate chips are completely melted. If not melted, microwave in 15 second increments stirring in between, until melted. Allow to cool 15-20 minutes.

Open the can of coconut milk and spoon out the solid white part of the coconut milk into a large bowl. The separation of the coconut milk into a solid and liquid will result when chilled as directed above. Use the remaining liquid for another purpose.* In a large mixing bowl, with electric mixer on medium-high speed, beat together coconut milk solid, agave nectar, vanilla and salt until fluffy. Add soy creamer and beat until combined.

Whisk one third coconut into cooled chocolate mixture. Fold chocolate mixture into remaining coconut mixture. Pour into bowl of ice cream maker and process as directed by manufacturer. Store in a plastic container in the freezer.

Note: If you don't have an ice cream cream maker you can pour mixture into a large plastic container and freeze one to two hours until crystals form on the top. Beat again with electric mixer on high. Freeze until firm. The ice cream will not be as creamy as in an ice cream maker.

Tip: Place a sheet of plastic wrap on top of ice cream in container to prevent crystals from forming in freezer.

Yield: 1 quart

*The remaining liquid in the chilled coconut milk works well in rice-- substitute for an equal part water when boiling the rice, in baked goods or in smoothies. Store refrigerated up to several days until ready to use.

Monday, July 9, 2012

It's so campy!

BS"D


Whether you are sending your child off to sleep away  or day camp, certain things remain the same for children with food allergies or sensitivities. Above all else they, and those responsible for them at camp, must do everything they can to keep them safe. I must borrow from the Scout's motto, "Be prepared", to express the best way to achieve your child's optimal safety while away from home.

First of all, prepare a memo to be given to the camp director, nurse, and counselors who will be dealing directly with your child. I use this one for Lillie, and include a list of problematic ingredients found on www.celiac.org, as well as a snack list, such as this one from www.dallasrock.org.

For Rosie, I have an allergy information sheet with her allergies and Epipen instructions in bold. I also include mine and my husband's cell phone numbers, so time isn't wasted going through the files to look this information up. I send a fanny pack for the counselor with her Epipen, asthma inhaler, Benadryl and a copy of the sheet.

I make sure to make an appointment too meet with the relevant people, before camp begins. The first day is usually chaos, and that is not the time to teach a 16 year old counselor how to use an Epipen for the first time.Take your kids, or a picture of them, when you meet with director/counselor, so they are familiar with your child.

This year I purchased very cute medic-alert necklaces. I include their allergies, sensitivities, name and home phone.  Lauren's Hope has a great variety of products sure to please any child or adult. The classic medic- alert bracelets and necklaces are kind of boring for a child, and in turn, they may be reluctant to wear them...add a princess or some funky beads, and now they've got bling!  The plastic bracelets are also an appealing solution for many children. My highly food allergic babysitter recently told me how she saved a 3 year old from popping a peanut chew at a party recently when she recognized the child's plastic "Peanut Allergy" wrist band.

Lauren's Hope is giving reader's of this blog 10% off your order with the code GLUTENFREE on the check out page.  I really feel more at peace of mind when my children wear these necklaces.

Pack appropriate snacks.  My daughters' camp provides two snacks a day. I spoke to the counselors about giving my kids the snacks they can have, but on any given day there may not be appropriate choices. Rosie likes to play it safe and stick with what I pack either way.


Luna bars has recently come out with Luna Protein Bars that are gluten free. They do have allergens such as peanuts and tree nuts, so check if it suits your child's needs. But for those that are only dealing with a gluten free diet, they are a great choice.  The new flavors include cookie dough, chocolate cherry almond and chocolate peanut butter. These are great to send along a bunch for sleep away kids or in a lunch for a day camper. It can be a real pick-me-up during a hike or just a long day.  Be considerate and check with your child's camp regarding restrictions in terms of nuts. 

Don't forget to send those special homemade treats. Today there are a number of camps just for celiac kids, and others that are training their cooks regarding food allergies and special diets.Whether you are sending your child to one of these camps or not, I strongly suggest you speak to other parents whose children have similar concerns to your's and get their recommendations on specific camps.  A R.O.C.K. support group is a good place to start. Although many camp directors think they can accommodate your special needs, you need to know it is not just theoretical, and ensure that there is follow through.


Sending pre-made meals and baked goods is a good way to ensure your child won't go hungry if there is a mix-up. I am a huge fan of vacuum sealers for meals. They can be re-heated as a boil in bag or in the microwave. They keep food fresher longer and avoid cross contamination on re-heating. Food does need to be frozen or refrigerated if it normally would be stored that way. A vacuum sealer doesn't make perishable foods shelf stable.


I discovered an amazing brand of flour that's "new to me" called Domata.  As readers of this blog know, my past favorites were Jules and Better Batter. They have been dethroned.  I found that for some applications like cakes Jules was better and for some like bread, Better Batter was the one to use. With Domata, I only need one now to achieve a perfect texture in my baked goods. I tried it in cream biscuits, cookies and cake and the texture was really perfect without any funny smell, (as is common in gluten free flour), or gritty (ditto)! When I bit into my chocolate chip cookies I had a flashback to "regular" Toll house cookies for a moment. Domata is available online at Amazon.com, as well as in some stores. Check their website for details. If you purchase through Amazon on a regular basis, you can take advantage of the subscribe and save program.  Domata is also cheaper on Amazon, at least, than the other all purpose flours which I order online. The flour contains xanthan gum and is a "cup for cup" substitution for all-purpose flour in recipes. I also use it as a substitution for gluten free recipes that call for a number of different flours and xanthan gum. Simply add up all the measures of various flours in the recipe and omit additional xanthan gum.


With some legwork and a good attitude, your child with special dietary needs can have a great camping experience along with their peers...enjoy the summer!
 
This recipe is great for a lunch, or to send individually wrapped and frozen for your sleep away child to store in the camp kitchen. These muffins are gluten free, vegan and nut free.

Chocolate Chip Banana Muffins

2 cups all-purpose gluten free flour blend with xanthan gum (such as Domata)
2 tsp. baking powder
2 tsp. baking soda
1 tsp. salt
1 1/2 teaspoons cinnamon
1/2 cup canola oil
2/3 cup blue agave nectar
3/4 cup soy or rice milk
1 tsp. vanilla extract
3 medium very ripe bananas, mashed well
1 cup chocolate chips

Pre-heat oven to 325F degrees. Place paper cupcake liners in 2 standard sized muffin pans (this recipe yields 18-24 muffins depending on size). Spray lightly with non-stick cooking spray.

In a large mixing bowl, whisk together first 5 ingredients. Make a well in the center of the dry ingredients and add next 4 ingredients. Stir until well combined. Add bananas and stir until well combined.  Stir in chocolate chips.

Fill muffin cups 1/2 to 3/4 full. Bake for 30-35 minutes. The centers should no longer appear "wet" and should bounce back when touched when done. Completely cool on wire racks.

Freeze in zip top plastic bags, if desired.

Yield: 1 1/2 to 2 dozen muffins

Note: Use the brownest, yuckiest bananas you can find...the ones no one wants to eat anymore!


Monday, May 21, 2012

Little things Mean a Lot


BS"D


In the past decade, small desserts have made a big impact on our culinary consciousness.  Cupcakes, cake pops, donuts, and whoopie pies have all been front and center in this movement.  Artistic displays at weddings and parties include beautifully crafted individual desserts, trifles in shot glasses and even slices of ice cream that look like sushi.

What's great about these little treats, in my opinion, is that you get variety, big flavor impact and best of all less calories than their full sized counterparts. If you have one cupcake for example, when it's done, it's done; no shaving off slices of a big cake to "even things out". You can also sample a few different desserts for the same caloric impact of one regular sized dessert.  Plus they are just cute!


I recently made key lime pie without the actual pie part. I am totally in love with my ramekins, and think just about anything you make in them is attractive.  So I decided to just bake the best part of the pie--the filling-- in the ramekin. The result was something that tasted like a cross between a mousse and a souffle. The taste...divine!  It had the full flavor impact of key lime pie, yet spared me of a couple of hundred calories from the crust.


So mix it up this Shavuot and try baking your cheesecake in ramekins, serve with fresh fruit and whipped topping for a lighter dessert.  You can also make cheesecake parfaits by baking the cheesecake filling in a 9x13 inch pan for about half the time specified in the recipe, then layer it with fruit filling in tall shot glasses or mini parfait cups.


For something new, check out my Tropical Breeze Mango-Coconut Cheesecake on Eaglebrand.com!


Enjoy and Chag Sameach!


This recipe calls for seemingly long beating times for the eggs and sweetened condensed milk, but it is worth it! The result is the absolutely fluffiest key lime pie filling ever.

 Key Lime Dessert Cups

This is adapted from a recipe for Key Lime Pie from The Beachwalk Cafe featured in Relish magazine.

4 large egg yolks
1/2 Tbsp. of grated lime rind
1 (14 ounce) can sweetened condensed milk (light version is fine)
1/2 cup fresh or bottled lime juice (not concentrated; I use bottled key lime juice)
1 cup chilled whipping or heavy cream (optional)
2 Tbsp. powdered sugar (optional)
1 lime sliced thinly, for garnish

Pre-heat oven to 350F degrees.  Spray 6-8 4-or 6-ounce ramekins with non-stick cooking spray and set on a cookie sheet.  Set aside.

In a large mixing bowl, beat egg yolks and lime rind on high speed for 8 minutes; the eggs will appear light yellow and fluffy. Slowly add sweetened condensed milk and beat an additional 7 minutes.  Add lime juice and beat 2 minutes more.

Pour batter into ramekins within 1/4-inch of top of each ramekin.  Bake for 10-12 minutes, until set.  Allow to cool, then chill 8 hours. 

Beat chilled whipping cream with powdered sugar on high with electric mixer until stiff peaks form. Chill until ready to use.

Top chilled key lime cups with sweetened whipped cream and lime slices.

If you desire a "full sized" dessert, you may pour key lime filling into a coconut crust, and bake as above for 12-15 minutes.