Thursday, June 17, 2010

Hot days...Cool Katz

BS"D

As camp season is upon us I face the unsavory task of going through my children's special dietary needs and medical treatments to a new crop of adults. That task in itself is pretty daunting. I find it best to leave as little wiggle room as possible. This basically translates to providing most food myself. My daughters' camp offers lunch and snacks every day. Lillie cannot partake of any of it unless they serve potato chips (and even then they must be plain) or ices. It is a great convenience...not having to make lunches all summer...IF you can take advantage of the program. Since I have to prepare lunches for them nearly every weekday, one thing that I look for on these hot summer days is convenience.


Basically Lillie has three acceptable lunches: pasta with sauce and melted cheese in a thermos, yogurt or a sandwich with margarine (not butter!) on both sides of the bread and square cheese. One day I gave Lillie a brand of gluten-free sandwich bread other than Katz's brand gluten-free Sliced White Bread. Upon returning home she asked me indignantly, "Why didn't you give me the bread that tastes good?" Recently, I was pleased to see that they have come out with a Wholesome Bread variety that contains, fava and garbanzo beans, teff flour and flax seeds. Loving whole grain bread to start with, I was pleased to see that there is a now a tasty gluten-free variety. As I find the goal of most gluten-free companies is first and foremost to make their products taste like "the real (glutenful) thing". As a result, it seems they tend to use a lot of "white" flours like potato, rice and tapioca, which are low in fiber. Upon sampling Katz's new higher fiber bread, I found the texture similar to the regular brand of high fiber bread I buy for myself. As I've mentioned before on this blog, Katz's is the only gluten free brand I've come across that tastes good without heating or toasting. Although, it arrives frozen, so I usually do store it in the freezer and reheat before making Lillie's lunch.


Given my aversion for using the oven in 100 degree heat as we've had the last week, I also love Katz's line of cookies, everything from Sprinkle Cookies to Jam Thumbrints to Chocolate Rugelach---my all time favorite. Katz's really has done a great job of making them look and taste like "the real thing. Recently, I went to a reception at our synagogue, and grabbed a box of the Chocolate Rugelach for Lillie on the way out the door---she ate half the box by the end of the event. And, they looked similar to the glutenful variety on the dessert table!


If you can't get Katz's in your local store, they have a program wherein you can refer new store and they will send you a $50 coupon for their products! I think that is very cool of Katz's.


In this very hot weather I also hate making hot soups, but my family still clamors for their soup Friday night. One day I made a strawberry soup, and Lillie and Rosie decided we should have a different colored soup each week. To date I've also made blueberry soup and cantaloupe soup (my personal favorite).

It may seem strange to cook the cantaloupe melon, but somehow the dish works. With all of the fruit soups, do not even think about eating them until they are fully chilled--8 hours to overnight. This is a good way to use up a melon that's seen better days, and maybe isn't so aesthetically pleasing on its own.


Cantaloupe Soup with Blueberries
from Cooking the Whole Foods Way, by Christina Pirello, p. 113


1 ripe peach, peeled, pitted and diced
1 cantaloupe, peeled, seeded and diced
1 cup apple juice
Pinch of sea salt
Juice of 1 lemon
1 teaspoon pure vanilla extract
Fresh mint leaves, for garnish
Fresh blueberries, for garnish


Place peach and cantaloupe in a soup pot with apple juice and salt. Cook over medium heat, covered about 10 (to 20) minutes. Remove from heat. Transfer to a food processor and puree until smooth (Note: you may also place in a large storage container and puree with a hand blender). Stir in lemon juice and vanilla, pour into a bowl and cover. Chill thoroughly before serving. Serve garnished with fresh blueberries and mint leaves.

Makes 4 servings

Wednesday, May 26, 2010

Macaroon Mania


BS"D

It started the day after Passover. The phone began to ring with friends and relatives calling me from the supermarket. The conversation went something like this, "They have cans of macaroons on sale for just 99 cents, do you want me to get you a few?" At first I answered with an enthusiastic "Yes!", as few gluten free goodies are that low in price. Those little flourless coconut gems that are the mainstay of snacking during Passover are like week old rotting fish as soon as the holiday is over. Who wants them when you can have a Chips Ahoy? Except of course those who eat gluten-free all year.

Then, I began getting a can or two left on my doorsteps in plastic grocery bags. I had to put a stop to this. I had also purchased a cart load of various Passover cookies and cakes myself. I wasn't sure anymore of the utility of the macaroon throughout the year. What could I do with them I wracked my brain. Other than using the cans as door stops, I decided the crumbly macaroons might make a quick and easy pie crust. I took it a step further with the next Jewish holiday on my mind, and decided to use them as a crust for a Shavuos cheesecake in lieu of the traditional graham cracker crumb crust. Being cheaper than a box of gluten-free cookies, I decided this was not only a tasty choice, but an economical one as well.


It is customary to make a bevy of dairy dishes for the spring holiday of Shavuos. Since Rosie doesn't eat dairy, and most of the dishes are also made with eggs (think blintzes and quiches), I limit myself to a few dairy desserts (and provide non-dairy options for Rosie). Cheesecake is a must have though. And, being a New Yorker, I like a dense yet creamy version of this delicacy. Too much air and fluff and the cake no longer holds my interest. Farmer cheese, cottage cheese and any other cheese than brick style cream cheese (like Philadelphia brand) have no place in my cake. I decided to complement the tropical nuttiness of the coconut in the macaroon crust with the citrusy and exotic flavors of lemon and ginger for this cheesecake. The result hit just the right note. Lillie liked the crust best. I enjoyed the creamy filling.


You can leave this cheesecake bare, or top with a can of cherry or blueberry pie filling for a traditional look. If fresh berries are in season, they make a beautiful garnish. Comstock pie fillings are gluten free according to the company. It may seem "fussy" to add one egg at a time to the mixture as directed below, but it is essential for achieving the proper texture of this cheesecake.
Ginger-Lemon Cheesecake with Macaroon Crust
1-11-ounce can coconut macaroons, any flavor
3 Tablespoons unsalted butter, melted
20-ounces brick style cream cheese
1/2 cup granulated sugar
4 eggs
1/2 cup sour cream
1 1/2 teaspoons vanilla extract
Juice of 1 lemon
1/4 teaspoon ground ginger
Pre-heat oven to 375F degrees. Spray an 8 or 9-inch spring form pan with non-stick cooking spray. Set aside.
Place the macaroons In a medium sized mixing bowl. Using your fingers, crumble the macaroons until they reach a crumb-like consistency. Add the melted butter and stir to combine. With your fingers, press macaroon mixture into bottoms and partially up sides of spring form pan, set aside.
In a large mixing bowl, cream together cream cheese and sugar until smooth using a handheld or stand mixer on medium speed. Add eggs, one at a time, beating until combined. Add remaining ingredients, stirring on low to combine.
Pour cream cheese mixture into crust. Bake for 25-30 minutes, or until cake appears set. Do not let top brown too much. Cool for 30 minutes on a metal rack. Cover and refrigerate for 8 hours to overnight before serving.
To serve: Unmold from spring form pan and place on serving platter. Serve plain or topped with cherry or blueberry pie filling or whipped cream and fresh berries.
Serves: 10-12

Tuesday, May 4, 2010

Adorable Avocados


BS"D

I love the produce section at my local warehouse store. They have restaurant quality fruits and vegetables, and generally better prices than my local supermarket.

I love the variety and colors available. The mini tri-colored Holland peppers are my favorite--like little pepper offspring. Next to them today I spied a 6 pack of avocados for only $4.99. Giving them a squeeze I found my thumb sunk into the flesh just enough to indicate they were just perfect for immediate use. My mind skipped to dinner and I thought of slicing them up with tacos. But that wouldn't use up the entire bag of ripe and ready green goddesses. As I pushed my heavily laden cart into the walk in refrigerator (which was blissful in today's 80 degree heat), I thought about Mother's Day coming up this weekend and an elegant salad came to mind. Two of my favorite things are gazpacho soup and guacamole. I don't know if it is the combination of the cool fresh vegetables and piquant Latin flavors or the overall feeling of lightness when indulging in these fresh and healthy starters. I decided to combine them for a lovely layered salad that is a visual feast for a celebratory table.


You can use little footed dessert bowls, but clear "low ball" style glasses work well too. You may even layer the ingredients into a glass trifle bowl for a great addition to a potluck buffet.

I try to make this dish a bit healthier by garnishing with baked plantain chips, but you may also serve with the ever popular and naturally gluten free corn tortilla chips.
Say Ole and enjoy your day with mom.

Avocado and Cucumber Gazpacho Salad with Plantain Chips and Jalapeno Cream

3 English Cucumbers, peeled, seeded and diced
1 orange Holland pepper, seeded and diced
1 yellow Holland pepper, seeded and diced
2 medium vine ripe tomatoes, finely chopped
2 medium ripe, firm avocados, peeled, pitted and diced
juice of 1 lemon
juice of 1 lime
1/2 cup olive oil
2 Tablespoons white balsamic vinegar
2 Tablespoons chopped, fresh chives
1/2 cup chopped scallions
¼ cup chopped, fresh cilantro
1 clove garlic, crushed
½ teaspoon ground cumin
kosher salt, to taste
fresh ground black pepper, to taste
1 teaspoon sugar

For Jalapeno Cream:
1 cup Greek yogurt
1 small jalapeno pepper, seeded
1 clove garlic
¼ cup cilantro, packed
1 teaspoon lime juice

For Plantain Chips:
1 large ripe plantain
½ Tablespoon olive oil
½ teaspoon kosher salt

In a large mixing bowl, place cucumbers, peppers, tomatoes and avocados. Pour lemon and lime juice over avocado mixture and toss gently to coat. In a small bowl or shaker bottle, whisk together remaining ingredients. Pour over salad and toss gently. Cover and chill for 1 hour. Keep refrigerated until ready to serve.

To serve, spoon into individual glass bowls. Top with a dollop of Jalapeno cream and garnish with 2 or 3 plantain chips. Pass additional jalapeno cream and plantain chips on the side.

For Jalapeno Cream:
In a blender or food processor, process all ingredients until well blended. Place in a covered bowl and refrigerate until ready to use.

For plantain chips:
Line a cookie sheet with non-stick foil or spray with non-stick cooking spray.

Slice plantains 1/8-inch thick and place in single layer on cookie sheets. Brush both sides with olive oil. Sprinkle tops of plantains with salt. Broil on high on top oven rack for 5-6 minutes or until they begin to brown. Turn oven to 375 degrees. Bake for 13-15 minutes. Cool on rack for 10 minutes, remove with a spatula.

Serves 6-8

Monday, April 26, 2010

Share the Shirataki


BS"D

The other night I came home late and needed to make a quick dinner for myself. I scanned the fridge and my eyes lit on a new gluten free item I had purchased called House Foods brand Tofu Shirataki Spaghetti Shaped Noodle Substitute (8 oz./$ 1.99). The word "Tofu" on the package may send others running towards the packaged cereal aisle, but since I visit the tofu case weekly, I was eager to try this product. What did worry me was the phrase "noodle substitute". The item looked like a noodle. I hoped it would taste like a noodle. Why couldn't it be called a legitimate "noodle"?

I grabbed the package and set to making my now famous spicy peanut noodles. Before Rosie was diagnosed with a peanut allergy I would make this dish almost weekly. Since then, never for the family, rarely just for me.


The "noodle" preparation instructions are fairly easy. You must first rinse the product well to get rid of its "authentic" aroma. I read that this is really a fishy aroma. I rinsed the ersatz noodles very well in a colander to avoid any unpleasantness. Then one can either microwave the product for 1 minute or parboil for 2. I chose the microwave (I was really hungry). As it cooked, I whisked together the dressing, and then dumped in the noodles when they finished cooking.


The noodles do have the appearance of Ramen-style noodles, and I thought they would work well in an Asian style dish like a noodle bowl or Pad Thai. Upon my first bite, I was struck by the texture. It was quite what I imagine rubber bands would taste like if eaten. However, I got past that and concentrated on the flavor. Like tofu, the flavor of the noodles are neutral---I did not taste any fishiness once cooked. They were the perfect foil for the peanut sauce.


Although I feel the price is high for the portion size, I do think the convenience and nutrition outweighs the price. As well, the Shirataki noodles are no more expensive than your average gluten free package of noodles. As far as nutrition goes, there are only 40 calories for the whole package, 1 gram fat, 4 grams fiber and 6 grams carbohydrates. That's pretty good in my book! I would like to see larger packages that are more appropriate for family sized dishes.


Overall, I thoroughly enjoyed my noodle dish made with the Shirataki noodles, and especially enjoyed the ease and quickness of prep. I decided that Shirataki noodles could be the Ramen of the gluten free world!


This recipe won me a finalist position in a Crisco sponsored cooking contest. I didn't win, but the recipe is a "winner" according to family and friends. You may also substitute 1-12 or 16- ounce package gluten free brown rice spaghetti for the Shirataki noodles.


Spicy Peanut Noodles


2 - 8 ounce packages Shirataki noodles
1/3 cup peanut oil
1/4 cup creamy peanut butter
1/3 cup gluten free soy sauce
1/4 cup apple cider vinegar
1/4 cup sugar
1/4 teaspoon ground black pepper
1 teaspoon red pepper flakes
2 Tablespoons sesame seeds
2 scallions, chopped

Cook noodles according to package directions. Drain, place in a large bowl and set aside.

In a medium sized mixing bowl, whisk together next 7 ingredients. Pour sauce over noodles and toss well to coat. Sprinkle with sesame seeds and scallions.

May be served warm, or cold. Toss before serving.

Yield: 4 servings

Monday, April 19, 2010

Taxing Situation


BS”D

I just finished typing what seemed like hundreds of numbers into Excel. The result was a sum of $417.72. This represented the amount spent on gluten free specialty foods in the past tax year (see http://www.celiac.com/ for details on deductions). Lillie was diagnosed last March, so it doesn’t represent an entire tax year. In some cases, I had diligently circled the items on my receipt before throwing it into a flowered blue shoe box labeled “Gluten Free Groceries 2009”. In some cases I went through a couple of feet of grocery tape trying to decipher register shorthand like, “TNKY BR RICE LASAG”, and I remembered the quite good vegetarian lasagna I made with Tinkyada Brown Rice Lasagna Noodles. I was also struck by how many times “B & J DUB MDSLDE IC” (Ben and Jerry’s Dublin Mudslide Ice Cream) appeared on the receipts. This “stress” food was for me. Reviewing the receipts reminded me of the effort I put in yearly, weekly and daily to accommodate my the gluten and allergy free diets of my children.
After reviewing the receipts, I decided I needed to pray harder. I always pray for cures to my children's ailments. But I realized perhaps I should be more focused. The most realistic thing in the short term to make my life easier would be for Rosie to outgrow at least one of her allergies. Lillie is in it for life with her disease. I’ve been told “they” are working on a pill to manage celiac, and “cheer up”, it should be available around the time my daughter starts college (she’s 5). My hope was boosted though when I was talking to an adult celiac recently who spoke with Dr. Alessio Fasano , who is actively working on this project. He told me Dr. Fasano said the pill that would allow celiacs to safely consume gluten is in stage 3 of testing. Ignorantly I asked how many stages there are in the approval process. He answered 4. That was the most hope I had had in a long time. Although I know that final FDA approval once a drug is deemed “finished” by its developers can take 10 years. I discussed with this gentleman ,who has lived with the disease for about a decade, whether or not he would take the pill, since he manages the disease quite well with a diet. My concern is that there have been quite a number of prescribed drugs in recent years that have been taken off the market due to very serious side effects (even after all that extensive testing). He said he’s a patient man and would wait and see about 10 years if any side effects or detrimental outcomes result from long term use of the drug. His wife added that she would like him to take the drug, as it would make her life easier, referring to meal prep, of course. It’s a slippery slope, but this conversation did bloom my optimism.

After looking at our years worth of processed gluten free food items, I marvelled at all that’s available,, and reflected on those items that are naturally gluten free. I can’t declare a golden ear of sweet corn, locally grown, or a crisp green bean still standing at attention when cooked just right as a tax deduction. But, I can take pleasure in these items as they nourish the body, and reflect on how simplicity can be nourishing for the soul as well. G-d put many naturally gluten free items on this earth for us to enjoy. Not all things gluten free must be complicated.

I like my vegetables just fork tender, vibrant in color and not drowned in heavy sauces. A few sprinkles of sea salt, a drizzle of golden olive oil, perhaps, are all most vegetables need in my opinion. Enjoy the bounty that spring and summer brings, and enjoy what’s simple.


I love to use Ziploc brand Zip n' Steam bags to prepare vegetables. You can cook, marinate and store vegetables in these little gems of steamer bags. The package suggests putting an entire meal in the bag (i.e. protein and vegetable) and transporting the bag to work to cook in the microwave come lunch time. This is an excellent idea for the gluten free eater. No worry about cross contamination, as each bag is fresh, and contained to avoid any nasty drips or spills you may find in your office microwave. This can work well when going to someones house for a meal as well. No hassle cooking!

I’ve made vegetables as well as salmon in the bags and both worked well. I have an aversion to cooking chicken in the microwave as I find it always comes out rubbery-- but it could work with these bags. The recipe pamphlet included in the package claims you could make an omelet in the bag. I just had to try that. My goat cheese and mushroom omelet was indeed edible, if not terribly attractive. It reminded me of something I once received in an airplane meal. But cleanup was easy, as promised.


The following recipe works well for green beans as well.

Asparagus Au Vinaigrette

1 bunch fresh asparagus, checked for bugs, rinsed and patted dry
1 1/2 Tablespoons extra virgin olive oil
juice of 1/2 lemon
1/2 teaspoon Dijon mustard
1 clove fresh garlic, crushed
sea salt, to taste
fresh ground black pepper, to taste

Using a steamer bag, stove top, or electric vegetable steamer, steam asparagus according to manufacturers directions.

Open bag, or remove asparagus from steamer container and allow to cool. Note: For extra crisp and green vegetables, plunge just cooked vegetables in a large bowl filled with cold water and ice.

In a small bowl, whisk together remaining ingredients. Pour over asparagus (this may be done in steamer bag). Cover and shake container until asparagus is coated. Refrigerate until ready to serve.

Serves: 4

Wednesday, March 24, 2010

Egg-ceptional Mousse


BS"D

Rosie threw up yesterday. 3 times. And in true child fashion didn't make it to the bathroom in time. A well meaning person mistakenly gave her egg matzoh and a Passover cookie containing eggs. I wasn't with her at the time, and the individual had been instructed on her allergies. Mistakes happen. It's frustrating when our children experience pain as a result though. The same day Lillie came home and told me she had been given matzoh for a model seder at school. Her teacher immediately realized the mistake and removed it from her plate. I asked if she got a new plate? Cross contamination anyone? She did. I think no matter how much we express to others the dangers of allergic/intolerant foods for our children, unless they see a reaction, they don't get it. They aren't washing a half a dozen vomit soaked towels, or rocking a celiac child at 3 am who woke up with a crushing stomach ache. I realized there is just so much we can do. I am frustrated, but no one is going to watch out for your child like you will. It's a parental instinct. That being said, we cannot give up on educating and setting clear guidelines for our children's food needs when they are in the care of others.

The night before I had been so proud of myself for whipping up (literally) a decadent gluten-free chocolate mousse without any dairy products or eggs. Those pesky eggs. So prevalent in Passover cooking. Yet last night I I of course was excited to have a dessert both Lillie and Rosie could both eat without worry. The fact that I had a couple of servings before sticking it in the freezer didn't hurt either! It is a tricky time of year with every store bought Passover cake containing eggs and every recipe for fluffy potato starch sponge cakes requiring at least a half dozen eggs. I hope the recipe below will help someone who is in the same predicament as I. So lick your spoon and sit back contentedly with the knowledge that you are keeping your food allergic/intolerant children safe...at home at least.

Happy Holiday!


Egg-less Rich Chocolate Mocha Mousse
2-8 ounce containers non-dairy liquid whipped topping (such as Rich's Whip)
1 - 10 ounce bag semi-sweet chocolate chips or 10 ounces bittersweet chocolate chopped
2 teaspoons instant coffee granules (or 2 Tablespoons favorite liqueur, such as orange or raspberry)

1/2 teaspoon vanilla extract

In a medium sized microwave safe bowl, place 1 container whipped topping, chocolate chips and coffee granules. Microwave on high for 2 minutes*. Stir until smooth and well combined. Allow to cool for 20 minutes.

In a large bowl with an electric mixer on high, whip remaining container of whipped topping and vanilla extra until stiff peaks form. Fold in half of cooled chocolate mixture until well incorporated. Fold in remaining chocolate mixture.

Pour into a plastic container with a tight fitting lid. Refrigerate or freeze until ready to serve.


Serves: 8-10


*Note: You may do this in a double-boiler on the stove over low heat. Stir chocolate mixture occasionally until melted and smooth.

Serving Tips: This versatile mousse can be garnished with berries, whipped topping, chocolate curls or crumbled macaroons.


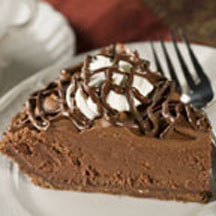
You may use the mousse as a filling for a frozen pie. Fill prepared "cookie crumb style*" pie crust with mousse. Cover tightly with plastic wrap and freeze until firm. Decorate with whipped topping and chocolate syrup if desired.


For Cookie crumb pie crust: Mix together 1 1/4 cup finely ground gluten free cookie crumbs and 1/4 cup melted margarine or butter to form a crumbly mixture. Firmly press into bottom and up sides of pie plate.

Sunday, March 21, 2010

Passover: Before and After


Passover time marks a kind of anniversary for us. Lillie was diagnosed with celiac disease 3 days before the holiday last year. Instead of finishing my preparations until 1 am, as most observant woman do in those few days before the holidays, my husband and I were on the computer learning about this disease, and what we would need to get through the next week or so. Aside from running out and buying a $13 box of gluten free oat matzo specially imported from England, most of the food had already been cooked. Some gluten free, made with potato starch, some laden with matzo meal. I quickly learned what I would have to separate out for her and what she could happily enjoy.

Passover is a dream for celiacs, stores are full of prepared foods made without wheat. Those items are generally prepared with potato starch and marked "non-gebrokts". There are items prepared with matzo meal, so like year round, one must read labels to be safe. Thankfully, companies have caught on to the revenue potential, and started marking foods "gluten-free". Now is the time to stock up. Well, maybe in another week and half to get the best prices. I remember my first post-Passover shopping adventure into the land of gluten-free. I was nervous. Passover had been one thing, we didn't allow bread, pasta or cereal in the house anyway. I felt, after that week long reprieve, that I had to now face the rest of my life-or rather Lillie's-in a world of gluten landmines. Like any good mother, I was prepared to do battle for my little girl.

My beret cocked at a determined angle, I felt like a tank commander leading her troops into battle, only the tank was a mini-van and the majority of my troops still pooped in their pants. I decided that surely every celiac in town would buy out the 50% off Passover items by the end of the day. So I left my house the day after Passover before the matzo crumbs were even swept off my floors. When I arrived at my local supermarket I found there was plenty left, and I went a bit crazy almost buying out the Passover display, now compacted from 2 aisles to a small display in the center of the floor. I starting tossing gluten-free salad dressing, chicken "shake n' bake" type mixes, potato starch noodles, cookies and cake mixes into my cart. Soon the boxes reached the top of the basket and started to spill onto the roof of the plastic car attached to the front of the cart. This great invention holds two small children, who can "steer" the car with fake steering wheels, while their parent blissfully shops in peace. The reality is for the parent steering this monstrosity, is equivalent to turning around an 18 wheeler in a cul-de-sac. The weight of the cart with 3 children and enough cake mix to last me an entire year was tricky. The items begin to slip and slide off the roof of the car and I kept stopping and re balancing like a house of cards, carefully trying to make it to check out.

Once home I cleared off a couple of shelves which I decided would be gluten-free only and neatly stacked my prized purchases. As you can see from my previous post, my supply served me well, and has lasted until this Passover. It was worth it to stock up at that time. The Passover cake mixes, on sale, are about 1/2 the price of those gluten-free mixes available year round. The boxes of cookies also went a long way. The salad dressing went rancid in November. Make sure to check expiry dates, and don't buy more than you realistically think you will use.


Baker's Chocolate Mousse

Many people have been hitting my site looking for Passover dessert recipes. Two majorly yummy and easy ones are below. I happened upon a bevy of easy dessert recipes on the Bakers Chocolate site that called for either little or no flour. The chocolate mousse looked especially tempting and easy to make. If the amount of flour is 1/2 cup or less, you can easily substitute potato starch. If you want to make the desserts non-dairy use pareve whipped topping.


Chocolate Chewies
from Gottlieb's Bakery in Savannah, GA
from Cook's Country Magazine, April/May 2010, p. 32

The original recipe called for flour instead of potato starch. You can substitute coconut for the nuts if there are allergy issues. Unfortunately, there is no sub for the eggs in this recipe, but they are dairy free!

2 1/4 cups confectioners' sugar
6 Tablespoons cocoa powder
2 Tablespoons potato starch
1/4 teaspoon salt
3 large egg whites
3/4 teaspoon vanilla extract
2 cups pecans, toasted and chopped fine
1 ounce bittersweet chocolate, grated

1. Adjust oven rack to middle position and heat oven to 325F degrees. Line 2 baking sheets with parchment paper. Mix confectioners' sugar, cocoa, potato starch and salt together in bowl of electric mixer. With electric mixer on medium speed, add egg whites to sugar mixture, 1 at a time. Add vanilla and beat for 3 minutes on high speed, scraping down sides as needed. Stir in pecans and chocolate.

2. Drop batter, 1 tablespoon at a time, onto prepared baking sheets, spacing 1 inch apart. Bake 1 sheet at a time, until cookies are dry at edges but soft in centers, rotating sheet halfway through baking, 15 to 18 minutes. Repeat with remaining cookie batter. Slide parchment onto wire rack and let cookies cool completely before peeling from parchment. Serve.

Yield: 2 dozen cookies


This is my hands down favorite Passover brownie recipe. I found it on the back of a box of Haddar brand potato starch one year. When Lillie had to start eating gluten-free, I made a copy of it and posted it inside my cabinet. It's a great "go to" recipe for all year.

If you don't have the chocolate called for in the recipe, you can substitute 3 Tablespoons cocoa powder, plus 1 Tablespoon oil for each ounce of chocolate. The 1 cup of chocolate chips in the recipe can be substituted with 1/2 cup cocoa and 3 Tablespoons oil.

Zev's Pesachdik Brownies

4 large eggs
1 1/2 cups granulated sugar
3/4 cup vegetable oil
3/4 cup potato starch
1 cup chocolate chips, melted
1 Tablespoon lemon juice
3/4 cup ground or finely chopped walnuts (optional)

Preheat oven to 350 F degrees. Spray a 9x13 baking pan with non-stick cooking spray or line with parchment paper.

In a large mixing bowl combine all ingredients. Mix well on high speed with an electric mixer, or by hand until thoroughly blended. Pour into prepared baking pan.

Bake for 45 minutes. Cut while warm. Cool on a wire rack. Store tightly covered.

Yield: Depends on how large you like your brownies!