Thursday, January 31, 2013

Paleo Parenting

BS"D


I find it amusing that in December all the magazine and newspaper articles extol excess, in the form of food and gifts. As soon as January 1st rolls around all you see are magazine covers imploring you to diet and exercise.  So, since it is still January, I'm going to review a book about a family who has taken their diet, really more a lifestyle, and exercise seriously. In doing so they have changed their lives.

I was very inspired by Eat Like a Dinosaur by the The Paleo Parents (Matt and Stacy), of the eponymous blog. The book is a cookbook with a children's story book at the beginning.  It tells of a family riddled with health issues among adults and children, and ADHD like behavioral issues with the children (which, Stacy mentions runs in her family). After taking on the Paleo lifestyle, which is mainly animal protein, vegetables and fruits, no grains, dairy, legumes or refined sugars, their lives did a total 180. Stacy lost the most weight, with Matt following behind. The children went from having behavioral issues in school to being cited for good behavior by their teachers.  The family went from being couch potatoes to living the active lifestyle they only dreamed of in the past.


My children enjoyed this book not only because of the illustrated story about eating like a dinosaur in the beginning, but also because it has a lot of pictures of the children, large photos of the recipes, as well as kid-friendly instructions. The easily readable recipes allowed my children to pick out the recipes they wished to prepare. There are charts at the end of the book indicating by icons whether recipes contain the common allergens of fish, shellfish, tree nuts or eggs . The recipes themselves are all fairly simple and easy for children to participate in the preparation of family meals, and do not contain laundry lists of ingredients.

I especially liked the section which gave ideas about lunches, as well as actual photos of the Matt and Stacy's children's lunch boxes. One can see that it is "doable" to make healthier lunches. The Paleo Parents do a lot of dehydrating both with meats, to make their own jerkies as well as fruits. Reading this book made me want to run out and buy a dehydrator. But, being an average American family trying to make ends meet, the Paleo parents do not require you buy any special equipment--this I especially liked. They give alternate instructions of how to make dehydrated food in a regular oven. As well, they give tips on how to approach a healthier lifestyle in an economical manner, i.e. shopping at farmer's markets for fruits and vegetables.

The downsides of the book for me were only two. one, The Paleo Parents use a lot of bacon in various recipes, even in mayonnaise, which I imagine imparts a nice flavor, but we don't use bacon at all in our home, so some recipes I had to skip over.  Also, as far as adopting the Paleo lifestyle, I've decided it's not for us. I do feel from my research, that  whole grains, gluten free included, are important in ones diet if they can be tolerated. However, I feel this family has proved the Paleo diet can be healthy for the entire family, and I respect that. As for me, I will take their yummy recipes and integrate them into my family's gluten-free, allergen-free diet.
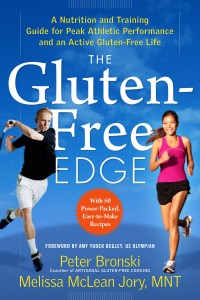


Going along with the theme of health benefits of a gluten-free diet, I am doing a giveaway of The Gluten Free Edge (The Experiment Publishing), by Peter Bronski. It is a nutrition and training guide for peak athletic performance utilizing the gluten-free lifestyle. The book includes 50 gluten-free recipes to enhance your training program.  Just leave a comment on this blog-post about a healthy step you have taken for you or your family by February 14th, and the winner will be picked by random.


Due to Rosie's egg allergy, I had used a slurry of corn or potato starch and soy milk instead of egg when making chicken nuggets or schnitzel.  But, Eat Like a Dinosaur has a method for making chicken nuggets with olive oil that has proved more popular in our household. It is now a "go to" dish. Recently, Rosie had integrated almonds back into her diet (B"H), using almond flour has added great variety, not to mention  nutrition and flavor to our dishes.

Fool's Gold (Chicken Nuggets)
Eat Like a Dinosaur by The Paleo Parents, p. 81

Ingredients:
3 chicken breasts, deboned and skinned
2 cups almond flour
2 Tbsp. arrowroot powder
2 tsp. salt
1 tsp. paprika
1 tsp. onion powder
1/2 tsp. dry mustard
1/8 tsp. black pepper
3/4 cup olive oil

Directions:

1. Cut chicken into 1-inch by 1-inch chunks.

2. Mix flour, arrowroot powder, and spices together in bowl with a fork or whisk.

3. Pour olive oil into a separate bowl.

4. Dip each chicken piece in the oil and then roll in the flour mixture.

5. Place nuggets on baking sheet and bake for 15-20 minutes at 400 degrees, flipping halfway through.

6. When done, the crust will be golden brown and juices will run clear.


I think this fruit and nut bar is really neat, and such a healthy alternative for the lunchbox.

Papi's Bars
Eat Like a Dinosaur by The Paleo Parents, pp. 261-3

Ingredients:

1/2 cup dates

1/2 cup dried apricots
1 cup almonds

Directions:

1. Chop fruit and nuts in the food processor until finely ground

2. Form a dough by rolling it into a ball and then simply place the dough between two sheets of wax paper or plastic wrap, and roll flat.

3. Cut it into bars and store in airtight containers. They last at room temperature for several days, and up to several months in the refrigerator.  They are a great on the go snack!

Tuesday, December 25, 2012

Gifts...on a shoestring.

BS"D

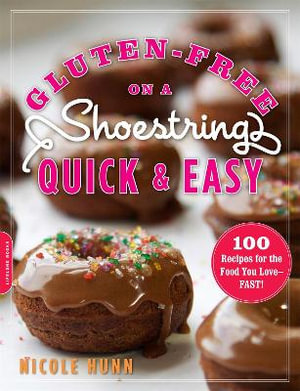
Can't wait to use that Amazon gift card you received this holiday? Why not try Nicole Hunn's new book, Gluten-Free on a Shoestring, Quick and Easy,  a follow up to Gluten-Free on a Shoestring: 125 Recipes for Eating Well on the Cheap.

The sparkly donut on the cover is festive in it's own right.  The book incorporates Hunn's frugal approach to gluten-free food prep with a short on time flair.  Although she uses shortcuts like cake mix for desserts, such as, Twinkie cupcakes (yes the Twinkie rears it's head in this blog once again).  She also provides a whole chapter with homemade mixes-- a cost conscious approach, and appreciated.

She gives tips for using ones limited time in the kitchen wisely, such as freezing portions of rice to have on hand for a spontaneous fried rice.   Her section on yeast-free breads including English Muffins, Pita Bread and Hamburger buns certainly makes the lengthy process of bread baking quick and easy.

One aspect of the book I didn't like was the lack of pictures. There is a cluster of pictures in the middle of the book, and they are all baked goods. Although the whimsical picture of Goldfish-style crackers is adorable, the one of Texas Toast is uninspiring. I would have like to see a variety of dishes, and more of them throughout the book.

There is a lot of variety in Hunn's book from Meatless Monday ideas like Italian Polenta to Workday Dinners including a Quick Shepherd's Pie. All around the globe, Hunn keeps costs in mind showing you how much you saved at the end of each recipe. I think Nicole Hunn's new book is a feather in her Gluten-Free on a Shoestring cap, and worth checking out.


In addition to cupcake pans, you can make this recipe actually look like a real Twinkie (or close). To make the "boats"see Todd Wilbur's instructional video on making them out of foil (not difficult once you get the hang of it; I was able to wash them on the top shelf of my dishwasher), or get a "canoe baking pan" as above for a consistent professional look.

Twinkie-Style Cupcakes
from Gluten Free on a Shoestring, Quick and Easy by Nicole Hunn, p.p. 154-5


Cake:
1 (16-ounce) box gluten-free yellow cake mix, or 1 recipe Make-Your-Own Vanilla Cake Mix
2 Tablespoons  vegetable shortening, melted and cooled
2 Tablespoons unsalted butter, melted and cooled
2/3 cup water, at room temperature
5 ounces egg whites (from about 4 extra-large eggs), at room temperature

Filling:
8 ounces marshmallow creme (1 small jar Fluff)
1/2 cup vegetable shortening, melted and cooled
1/3 cup confectioners' sugar 
1/2 tsp. pure vanilla extract

1. Pre-heat oven to 325F degrees. Grease or line a standard 12-cup muffin tin, and set it aside.

2. Place the cake mix in a large bowl and whisk a bit to break up any lumps. Add the shortening, butter, and water, and mix well. The batter will be thick.

3. In the bowl of your stand mixer fitted with the whisk attachment, beat the egg whites until stiff but not dry.

4. Scrape half the egg whites into the bowl of batter and fold in gently. Add the remaining egg whites and fold gently until on a few white streaks remain.

5. Fill the wells of the prepared muffin tin about three-quarters of the way full. Place the tin in the center of the preheated oven and bake for about 22 minutes, rotating the pan once during baking. The cupcakes are done when a toothpick inserted into the center of the middle muffin comes out nearly clean. Allow the cupcakes to cool in the pan.

6. While the cupcakes are cooling, make the filling. In the bowl of your stand mixer fitted with the paddle attachment, place the marshmallow creme and shortening. Beat on medium speed to mix well. Add the confectioners' sugar and vanilla, and beat on high speed until fluffy. Transfer the filling mixture to a pastry bag fitted with a small "Bismarck tube" pastry tip.

7. Once the cupcakes have cooled, invert them onto a piece of parchment paper. With a wooden skewer or large toothpick, make four holes in the underside of each cupcake, and wiggle the top around a bit to create space for filling. Insert the pastry tip into each of the holes, and pipe in some filling (as much or as little as you like). Repeat with remaining cupcakes. 

Yield: 1 dozen cupcakes

Egg Fried Rice
from Gluten Free on a Shoestring, Quick and Easy by Nicole Hunn, p.p. 103

4 Tablespoons canola oil
3 extra-large eggs, lightly beaten
2 scallions, white and green parts chipped finely
4 cups cold, previously cooked rice, with the grains separated as much as possible (not clumpy and sticky)
1 teaspoon toasted sesame oil
2 Tablespoons gluten-free tamari, plus more to taste
1 teaspoon rice wine vinegar

1. Heat a wok or large skillet over high heat and add 2 tablespoons of the canola oil. When the oil is hot, add the add the eggs. Stir to scramble the eggs, and cook only until slightly runny. Remove the eggs from the pan and set them aside. Wipe out the pan.

2. Add the remaining 2 Tablespoons of canola oil to the hot pan. Add the scallions and the rice, and stir, spreading the rice in a shallow layer int he pan. Allow to cook for about 2 minutes without stirring. Using a wooden spoon, break the rice apart, then stir int he sesame oil, tamari, and rice vinegar.

3. Return the cooked egg to the pan, and mix well. Serve immediately.

Yield: 4 servings

Wednesday, December 19, 2012

Nearing Normal

BS"D


Last week was Chanukah, the festival of lights, 8 days on the Jewish calendar reserved for celebration and festivity.  I have been busy making and baking, latkes, donuts, more donuts, and yet more donuts. Donuts, traditionally fried, are a popular treat to commemorate the oil which G-d miraculously made last for 8 days for the Jews in the desecrated Temple in Jerusalem.

This year I was thrilled to pieces to discover a new book called Learning to Bake Allergen-Free by Colette Martin, of the blog learningtoeatallergyfree.com. I thought I had already "learned" to bake allergen-free when Rosie was diagnosed with multiple food allergies years ago. Out went the eggs, out went the dairy, as for nuts, uh-nope! But I learned a few new things in Ms. Martin's well written tome.

The first few chapters give a detailed explanation of the ins and outs of allergen-free baking. Flours, milk and egg substitutes are explained along with oils and off the shelf gluten free flour blends. She goes into detail of not only the hows, but the whys of egg substitutes. I found it particularly helpful to learn how certain egg substitutes work better for a cake than a cookie, let's say.  I have tried and rejected flax seed gel as an egg substitute due to it's strong flavor, but I gave it another go round thanks to this book. There is also a homemade powdered egg substitute recipe, which is way more economical than the store bought variety.

The book goes on to provide very easy and clear from scratch recipes. It ends with recipes made from gluten free mixes. This is extremely helpful for me, and I think, especially economical. If  you use the mixes you do not have to buy 5 different types of gluten free flours and xanthan gum, only to use a small amount in a particular recipe. She varies the brands enough that one can find their favorite amongst the recipes. 

My only criticism is that she seems to favor hemp milk and coconut oil in her recipes. Although she does devote a whole page to the sing the praises of hemp milk, I've found it still a bit hard to find, and when I have it's been the costliest non-dairy milk alternative. Ditto for coconut oil, whose expense can be prohibitive for many. In addition,  personally don't care to have to melt it before using (as it is a solid at room temperature) when I'm doing a quick recipe. It's not until the very last pages that a chart is provided for substitutes. It is not made clear in the recipes themselves what can be subbed for these items. I used rice milk and canola oil, and all turned out well.  Other than that, I find the ingredients readily available in most chain supermarkets.

Last year I had success making baked cake donuts in addition to fried Jelly donuts, so I decided to try some of her cake recipes as donuts.  I utilized both the from scratch recipes and one from the mix for this purpose.

They could not have come out more beautiful or delicious. I have become very familiar with the egg free cake I refer to as "vinegar chocolate cake", also know as wacky cake, lazy day cake, or 3-hole chocolate cake, and disliked the taste. But, I was willing to give it one more try. Martin's technique is a bit different than others I've tried, first combining wet ingredients and adding the dry second.  Whatever it was it worked and I have an easy new favorite gluten-free and vegan chocolate cake.

Learning to Bake Allergen-Free is a fantastic gift for the allergic and gluten free family or friend. The thanks will keep on coming, along with the baked goods!


Basic Chocolate Cupcakes
from Learning to Bake Allergen-Free by Colette Martin, p. 195

1 1/2 cups gluten-free flour blend
1/2 tsp. xanthan gum (leave out if your flour blend contains xanthan gum)
3/4 cups sugar (I felt it needed about 1 cup)
1/4 cup unsweetened natural cocoa powder
1 1/2  teaspoons baking soda
1/2 teaspoon salt
6 Tbsp. coconut oil, melted (or canola oil)
2 Tbsp. apple cider vinegar
1 cup water
1 tsp. vanilla extract

1.  Pre-heat the oven to 350F degrees. Line a muffin tin with baking cups.

2. Mix the flour, xanthan gum, sugar, cocoa powder, baking soda, and salt together in a medium bowl, making sure the cocoa is fully incorporated. Set aside.

3. Combine the coconut oil, vinegar, water and vanilla together in a large bowl, with a mixer on medium -low speed, about 30 seconds.

4. Gradually add the flour mixture to the wet ingredients. Blend completely

5. Spoon the batter into the baking cups, filling each cup about 3/4 full.

6. Bake at 350F for 20-24 minutes until a toothpick comes out clean.  Cool on a wire rack

Yield: 12 cupcakes


Party Cupcakes from Bob's Red Mill*
from Learning to Bake Allergen-Free by Colette Martin, p.240

1 pkg.  Bob's Red Mill Gluten Free Vanilla Cake Mix
3/4 cup flax seed gel (3 Tbsp. Flax seed meal mixed with 1/2 cup plus 1 Tbsp. warm water; allow to rest 10 minutes before using)
1/2 cup sunflower oil
1/2 cup vanilla hemp milk (I used rice milk)
 1/2 cup allergen-free candy sprinkles.

1. Follow the package preparation instructions with the above substitutions.

2. Stir in the candy sprinkles last, by hand.

3. Bake according to package instructions.

Yield: 12 cupcakes.


*I used Betty Crocker Gluten Free Yellow Cake Mix with good results. I adjusted the liquid in the recipe to match the liquid requirements on the Betty Crocker box.

Monday, December 3, 2012

What to give? What to give?

BS"D

 This time of year, people sit down with a pad and pencil and then tap their pencil on the side of their head racking their brains for what to buy loved ones for holiday gifts. Scanning the myriad glossy ads for Black Friday I noticed the same old things ("mittens again, how nice" yawn), coupled with novelty items that seem cool but really end up taking up space, and are an unneeded expense (how often will you use a home cotton candy maker? Really?!). New books are fresh and interesting. New cookbooks are useful. In addition, they are often glossy and appealing. I find people on specialty diets, like gluten and allergy-free are always looking for new and exciting recipes. In the coming weeks, I hope to review some great new cookbooks that make wonderful holiday gifts. If you want to push your gift over the top, prepare one of the dishes in the book and present it on a nice new platter or baking pan for the recipient to keep. I guarantee you it will be appreciated.

I revisit the Twinkie controversy to review my first book, Real Snacks by Lara Ferroni. As Americans sit biting their nails over whether they will be able to buy classic snack cakes ever again, you can prepare them at home, and make them gluten free and vegan! Once again the ever considerate Lara Ferroni, author of another favorite of mine, Doughnuts, has included gluten-free and vegan (no eggs, no dairy) substitutions for her recipes. How great is that! Ferroni's book covers popular American snacks savory to sweet that are normally purchased. The subheading on her book states, "make your childhood treats without all the junk", sounds good to me. From the goldfish crackers to the Hostess style cupcakes on the cover, she does quite a comprehensive job of covering all the biggies. Being a food photographer, Ferroni's photos in Real Snacks, are top notch, style wise, and mouth watering, stomach wise. You can purchase a Twinkie mold baking pan , or you can create your own molds out of aluminum foil and a spice jar as in Todd Wilbur's video.


 Vanilla Snack Cakes
from Real Snacks by Lara Ferroni, p.p. 5-6, 140
Ingredients:


    3/4 cup (90 grams) gluten-free all-purpose baking mix.
    1/4 cup (30 grams) ground millet
    1 teaspoon baking powder
    1/2 teaspoon salt
    4 egg whites
    1/3 cup (66 grams) cane sugar
    2 tablespoons honey
    1/4 cup (2 ounces) water
    2 tablespoons safflower oil
    4 egg yolks
    1 teaspoon vanilla extract
    1 batch (about 1 cup) Snack Cake Crème
Preparation:

Preheat the oven to 350°F and lightly grease a canoe-style snack cake pan. If you don't have a snack cake pan, you can use 4-ounce loaf pans. Alternatively, create your own molds out of foil by shaping double thicknesses of aluminum foil around a spice bottle and setting the individual foil pieces next to each other in a cake pan.

Sift the all purpose baking mix, ground millet flour, baking powder, and salt together and set aside.

In a dry mixer bowl with dry beaters, beat the egg whites until stiff, about 2 minutes. Transfer the beaten egg whites to a clean bowl and set aside.

In the same mixer bowl, add the sugar, honey, water, oil, egg yolks, and vanilla and beat for 1 minute. Add the flour mixture and beat until smooth, about 2 minutes. Fold in half of the beaten egg whites; once the first half is fully incorporated, fold in the second half.

Pour the batter into the prepared molds, filling them 2/3 of the way full. Bake until golden, 15 to 20 minutes, rotating the pans halfway through baking. Cool the cakes in the pan for at least 20 minutes, then remove to a wire rack and cool completely before filling with the Snack Cake Crème.

To fill the cakes, use a skewer or chopstick to poke 2 holes partially through the snack cake from the bottom, and wiggle around to hollow out some space. Use a piping bag fitted with a Bismarck (#230) tip or a very small star-shaped tip to fill the cake with the Snack Cake Crème.

To make raspberry snack cakes, make the snack cakes as directed. Coat each filled snack cake with raspberry jam and dust with shredded coconut. They will be sticky and delicious.

Or for Chocolate-Coated Snack Cakes, try dipping your snack cakes in melted chocolate (Chocodiles anyone?!).

Filling:

2 tablespoons ground millet flour
1/2 cup milk
1/2 cup (100 grams) cane sugar
1/2 teaspoon vanilla extract
4 tablespoons (1/2 stick) unsalted butter, cut into pieces
4 tablespoons coconut oil
Dash of salt (optional)

Combine the flour and milk in a saucepan over medium heat to form a thin, pale paste, about 4 to 5 minutes, stirring constantly. Be careful not to brown the roux. Stir in the sugar and continue to cook until smooth, about 2 to 3 minutes. Remove from the heat and stir in the vanilla. Cover and refrigerate to cool completely.

In the bowl of a stand mixer fitted with the whisk attachment, whisk the butter and coconut oil until light, about 1 minute. Add the cooled flour paste and beat until creamy, about 5 minutes. Store in an airtight container at room temperature for up to 2 days.

For vegan Snack Cake Crème, replace the milk with an equal amount of rice milk and the butter with an equal amount of coconut oil.

Yield: 8 large


I have made the appropriate substitutions for gluten free. Ingredients 3/4 cup (90 grams) white spelt or all-purpose flour 1/4 cup (30 grams) ground millet or cake flour 1 teaspoon baking powder 1/2 teaspoon salt 4 egg whites 1/3 cup (66 grams) cane sugar 2 tablespoons honey 1/4 cup (2 ounces) water 2 tablespoons safflower oil 4 egg yolks 1 teaspoon vanilla extract 1 batch (about 1 cup) Snack Cake Crème print a shopping list for this recipe Preparation Preheat the oven to 350°F and lightly grease a canoe-style snack cake pan. If you don't have a snack cake pan, you can use 4-ounce loaf pans. Alternatively, create your own molds out of foil by shaping double thicknesses of aluminum foil around a spice bottle and setting the individual foil pieces next to each other in a cake pan. Sift the spelt flour, ground millet flour, baking powder, and salt together and set aside. In a dry mixer bowl with dry beaters, beat the egg whites until stiff, about 2 minutes. Transfer the beaten egg whites to a clean bowl and set aside. In the same mixer bowl, add the sugar, honey, water, oil, egg yolks, and vanilla and beat for 1 minute. Add the flour mixture and beat until smooth, about 2 minutes. Fold in half of the beaten egg whites; once the first half is fully incorporated, fold in the second half. Pour the batter into the prepared molds, filling them 2/3 of the way full. Bake until golden, 15 to 20 minutes, rotating the pans halfway through baking. Cool the cakes in the pan for at least 20 minutes, then remove to a wire rack and cool completely before filling with the Snack Cake Crème. To fill the cakes, use a skewer or chopstick to poke 2 holes partially through the snack cake from the bottom, and wiggle around to hollow out some space. Use a piping bag fitted with a Bismarck (#230) tip or a very small star-shaped tip to fill the cake with the Snack Cake Crème. To make raspberry snack cakes, make the snack cakes as directed. Coat each filled snack cake with raspberry jam and dust with shredded coconut. They will be sticky and delicious. Or for Chocolate-Coated Snack Cakes, try dipping your snack cakes in melted chocolate. For gluten-free Vanilla Snack Cakes, replace the white spelt flour with an equal amount of gluten-free all-purpose baking mix. Filling: 2 tablespoons white spelt or ground millet flour 1/2 cup milk 1/2 cup (100 grams) cane sugar 1/2 teaspoon vanilla extract 4 tablespoons (1/2 stick) unsalted butter, cut into pieces 4 tablespoons coconut oil Dash of salt (optional) Combine the flour and milk in a saucepan over medium heat to form a thin, pale paste, about 4 to 5 minutes, stirring constantly. Be careful not to brown the roux. Stir in the sugar and continue to cook until smooth, about 2 to 3 minutes. Remove from the heat and stir in the vanilla. Cover and refrigerate to cool completely. In the bowl of a stand mixer fitted with the whisk attachment, whisk the butter and coconut oil until light, about 1 minute. Add the cooled flour paste and beat until creamy, about 5 minutes. Store in an airtight container at room temperature for up to 2 days. For gluten-free Snack Cake Crème, use the ground millet flour instead of the white spelt. For vegan Snack Cake Crème, replace the milk with an equal amount of rice milk and the butter with an equal amount of coconut oil. Yield: 8 large

Monday, November 19, 2012

R.I.P. Twinkie

BS"D

Big News!!! Hostess to cease producing Twinkies (and other beloved snack cakes). For those who eat gluten free, we said goodbye to Mr. (or is it Ms.?) Twinkie long ago.  But this week at the Kosherfest trade show in Secaucus, NJ, I received the good news that Shabtai Gourmet, a gluten and peanut free company,  is going to begin producing gluten free Twinkie-like snack cakes. Adding to their amazing repertoire of Ring Ding and Yodel-like cakes.  You can soon enjoy this iconic American treat even if you are gluten free (and they are also kosher for Passover).

Other great products tasted at the show include a truly outstanding gluten free (and kosher for Passover) baguette by Eytan gourmet. A number of years ago I became smitten with their outstanding gluten free brownies, and hope to buy their breads soon.

Another interesting baked good company at the show was My Dad's Cookies, which offered a selection of bakery style gluten free cookies, including black and whites, linzer tarts, and a Milano-style cookie. They really looked like the "real" thing.

Manischewitz has expanded their gluten free offerings and has come out with red velvet macaroons to add to their myriad of flavors. They have a macaroon mix wherein you can make your own macaroons at home. I saw the potential in this product to be used for a crust for pies or cheesecakes.  Experiment, I'm sure you will find many new uses for this new product.


My all time favorite of the show this year were Naturale-Boon, high end chocolates from Australia, available online in the U.S. They are available in pareve (non-dairy) and dairy varieties, and are as beautiful as they are delicious. Their homemade caramels are buttery and out of this world! In addition, Boon puts out a soy chocolate milk that reminded me of Yoohoo in glass bottles.
BOON Chocolates
For a quick fix on the go, there are The Simply Bars. Low calorie, vegan, gluten free and kosher. Need I say more.

I love the brown rice that's precooked and in individual bowls by Minsley. I buy them at Costco. Now I discovered they also make quinoa in the same sort of packaging. What a great idea for lunches at school or the office. You can have it with a salad, or bring a leftover piece of chicken, fish and veggies to mix in with the ready to serve quinoa.
This year for Thanksgiving, I decided to make a stuffing themed quinoa salad. It can be served warm in lieu of stuffing, but I prefer quinoa cold. If you want a great bread stuffing, I suggest using cubed gluten free hot dog buns, as they have the most crust surface area and hold up better in a stuffing than sliced gluten free bread.

Festival Fall Quinoa Salad or "Squiffing"

2 cups prepared quinoa (1 cup raw), cooled
1/2-3/4 cup dried cranberries
1/2 cup chopped dried apricots or apples
1/2 cup chopped pecans, toasted*
2 stalks scallions, finely chopped

Dressing:
1/3 cup olive oil
3 Tbsp. apple cider vinegar
1 teaspoon dijon mustard, optional
2 Tbsp. honey
salt and pepper to taste

In a large bowl, gently mix together salad ingredients.

In a small bowl, whisk together dressing ingredients. Pour over salad. Toss well to coat. 

Cover and chill until ready to use. May be prepared up to 2 days in advance.

Serves: 6-8


*To toast nuts: Spread out in  a single layer on a baking sheet. Bake at 350F degrees for 6-8 minutes, turning several times. Allow to cool.

Wednesday, September 12, 2012

Sugar, sugar....honey, honey

BS"D

Sometimes experiences in life are sweet like honey, and sometimes they are salty.  At Rosh Hashana, we eat honey and other sweet dishes as "good luck" for a sweet new year. Apples in honey, honey cake, honey cookies and tzimmes with a drizzle of the sweet stuff are common.

I came across a recipe for honey candy which mimics a European honey (miele) candy I tasted years ago-- hard on the outside, a gooey burst of honey inside. Pure flavor, not artificial. I thought it would be a neat project with the kids before rosh hashanah. They MUST be kept away from the boilng honey/sugar-- that is non-negotiable. I wouldn't want this sweet situation to turn into a salty one! But, they can stretch and roll the cooled candy, and little hands are good for wrapping the candy to give to friends and family for a sweet and happy new year.

May you all enjoy a shana tovah u'metukah, a sweet and happy new year!


Honey Candy
from Make the Bread, Buy the Butter, p. 160-161

Butter or margarine, for the pan and your hands
1 cup honey
1 cup sugar

1. Generously butter a 9x13-inch metal baking pan.

2. Pour the sugar and honey into a heavy-bottomed saucepan. Over high heat, bring to a boil. No need to stir. Let the mixture boil until it registers 300 degrees F on a candy thermometer, at which time it will appear to be nothing but a mass of frothy golden bubbles. Immediately pour the hot mixture into the greased pan.

3. Let it cool just enough that you can handle--about 10 minutes. It should be quite warm and malleable. Butter your hands well, and keep a little butter ready to re-grease as necessary.  Scoop the mass of warm honey into your hands and begin to stretch and fold it. Stretch and fold the candy and and watch as it turns pale and begin to glisten.  It should be a light golden color. Keep stretching and pulling until the candy is cool and starts to stiffen.

4. You must work quickly on this step. Working on a non-stick cutting board, silipat or clean counter, roll the honey mixture into skinny rope, 4 to 5 feet long (or divide into 5 pieces and create 1 foot long ropes). With a scissors or a sharp knife, snip rope into 3/4-inch long pieces.  Let cool completely.

5. Store in a cookie tin or plastic storage container--make sure unwrapped pieces don't touch each other (unless you want a really BIG piece of candy). Or wrap in small squares of waked paper.  The candy gets sticky after a few days.

Yield: About 80 pieces of candy


Tuesday, August 7, 2012

If you can't take the heat, get out of the kitchen!

BS"D


In the good ol' summertime I find people don't want to spend a lot of time in the kitchen. But for those of us who have to get food on the table for a family and "convenience" foods aren't so convenient due to food allergies/sensitivities, we need ideas for fuss free meals. I find grilling a great option.  So we've been grilling a few times a week this summer. But how do you beat the boredom of burgers and hot dogs all the time without a big fuss? For me it was learning the proper technique for making barbecued chicken. I grew up knowing that barbecued chicken meant a piece of meat charred black on the outside and near raw in the middle. But thanks to Cook's Country magazine I have learned the technique of cooking grilled chicken in indirect heat. What that means is having one burner on higher heat, usually the middle burner, and the side burners on low, then cooking the chicken on low. I've done it with whole chickens, "beer can" style, chicken pieces, and now a butterflied chicken. I've also learned that barbecued chicken doesn't have to mean a drippy, sweet sauce. After discovering the flavorful, crispy skinned wonders of the dry rub I was hooked.


Last night I made an herb rubbed chicken (with oil, so technically not a dry rub), that I prepped in the morning and let sit all day to marinate. When I ran in with the kids close to dinnertime,  I just fired up the grill and popped on the chicken, no muss, no fuss. With this technique there's not much to tending the chicken either, just pop, on close lid and turn after an hour. The result was the moistest barbecue chicken with the crispiest skin I ever had. My husband told me that it was on par with the chicken served at our favorite steakhouse. I was swooning!


I "eyeball" the amounts for the rub on this recipe, so you can add a bit more or less of the spices you like. Try other flavor combinations like Cajun, Indian, hot n' spicy or herbs d'provence. Fresh herbs may be used instead of dry.

Grilled Olive Oil and Herb Chicken


1 whole chicken, medium size 
1/4 cup olive oil
Juice of 1 lemon
2 Tablespoons honey
2 garlic cloves, pressed
2 Tablespoon dried rosemary
1 1/2 teaspoons dried thyme
1/2 teaspoon dried basil 
1/2 teaspoon onion powdersalt and black pepper to taste
 
Rinse and pat dry chicken. With kitchen shears or a sharp knife, cut chicken along back bone. Lay chicken flat and press down on breast bones to flatten more.

Mix together remaining ingredients in a small bowl. Rub spice mixture all over chicken, inside and out. Place chicken in a 1-gallon zip top plastic bag. Refrigerate for 4-8 hours.
Heat all burners on gas grill on high for 15 minutes. For one chicken, turn 1 burner on the end to low, the one next to it to medium and all other burners off. If you are grilling two chickens on a 3 burner grill, leave middle burner on medium, and side burners on low. You must maintain a grill heat of 350-375F degrees with lid closed, so you may have to reduce medium burner as well.
Place chicken skin side down over the low burner side of grill with legs closer to the medium burner. Close lid. Grill for about 1 hour, or until the thigh meat is 160F degrees. Flip chicken over and put over medium burner for 10-15 minutes. When done, thigh meat should register 175F degrees, and breast meat should be 160F degrees. Transfer to a tray and tent with aluminum foil. Allow to rest 15 minutes. Cut into pieces and serve warm.

Yield: 4-6 servings


For an easy and elegant "no bake" dessert, try this chocolate pie which comes together in about 15 minutes. You can use ready made whipped topping, or serve with a scoop of vanilla ice cream to cut the richness of the pie.

Vegan Mocha Truffle Pie

For crust:
2 dozen (approximately) gluten free cookies such as shortbread, grahams or sandwich cookies (I used 1 box of Jo-Sef brand Sandwich O's)
1/4 cup non-hydrogenated margarine (such as Earth Balance)

For filling:
1-14 ounce can coconut milk (not low fat)
10-12 ounce bag semi-sweet or bittersweet chocolate chips
1 1/2 Tablespoons granulated instant coffee powder
2 Tablespoons non-hydrogenated margarine (such as Earth Balance)
2-8 ounce containers non-dairy whipped topping (such as Rich's Whip or Mimic Creme)
1/2 teaspoon pure vanilla extract
Spray a 9-10-inch pie plate with non-stick cooking spray. Set aside.

In a food processor fitted with a knife blade, process cookies until fine crumbs form. In a medium sized microwave safe bowl, heat 1/4 cup margarine on high for 1-2 minutes, until melted. Pour cookie crumbs over margarine; stir together until crumbs are totally coated with margarine (you may use your impeccably clean hands for this). Place in refrigerator while preparing filling.

In a medium sized microwave safe bowl, combine coconut milk, chocolate, coffee powder and 2 Tablespoon margarine. Heat on high for 2-3 minutes. Stir until chocolate is completely melted. If chocolate retains its shape, return to microwave for 15 second intervals, stirring in between until melted. Stir until mixture appears silky and is completely combined with no streaks of white on surface of mixture. Allow to cool for 20 minutes.

Pour cooled chocolate mixture into pie crust. Cover with plastic wrap and refrigerate for 2 hours, or until firm. This may be done up to 3 days in advance.

In an electric mixture, beat together whipped topping and vanilla. With a rubber spatula, spread whipped topping over chilled pie, forming a mound in the middle. You may use half the amount of whipped topping for a flatter looking pie. Cover and keep refrigerated until ready to serve.

Optional garnish: Berries, chocolate curls or shavings, chocolate espresso beans,or dusting of cocoa powder.

Yield: 10 servings